Knit A Swirl Hat

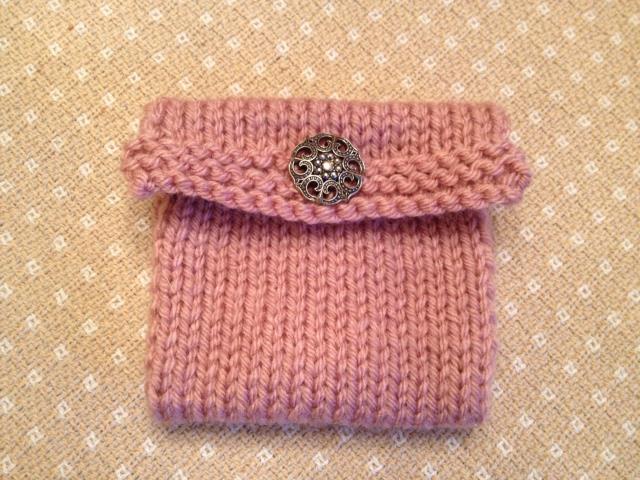
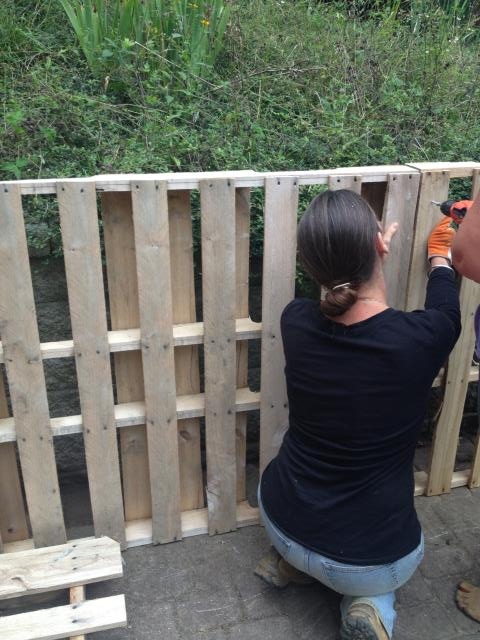
I finally did it!  I have started my Christmas present making in September – yeah!  I always say I am going to start earlier and then the next thing I know it is the end of October and then I am a crazy woman (ok – more so than I already am!)!

We have a very large extended family and each year the Christmas list goes out within a month or two after Christmas. My grandmother used to do the list and now one of my cousins has taken over – so appreciative that she did.  The way it works-  for each one of your family members in the hat is how many names you are given – so we have 2 names.  I reached out to both of our names and was given some suggestions and off I went.

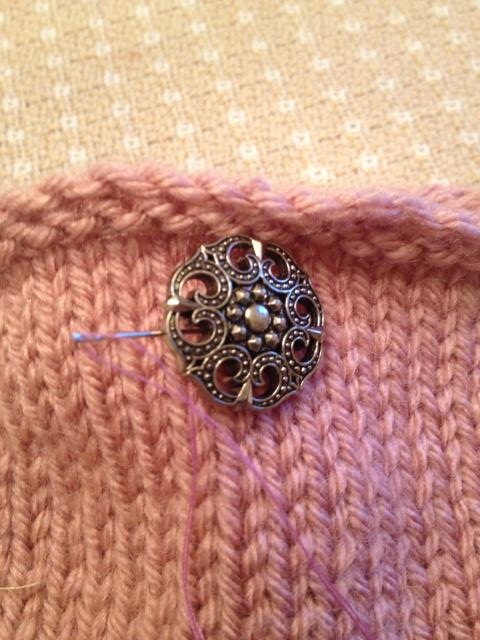
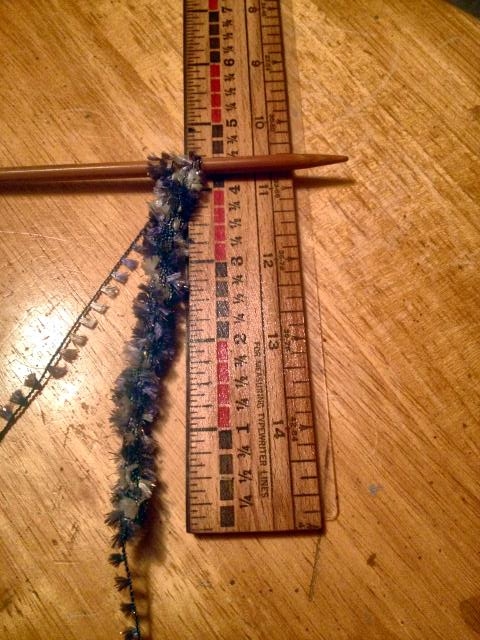
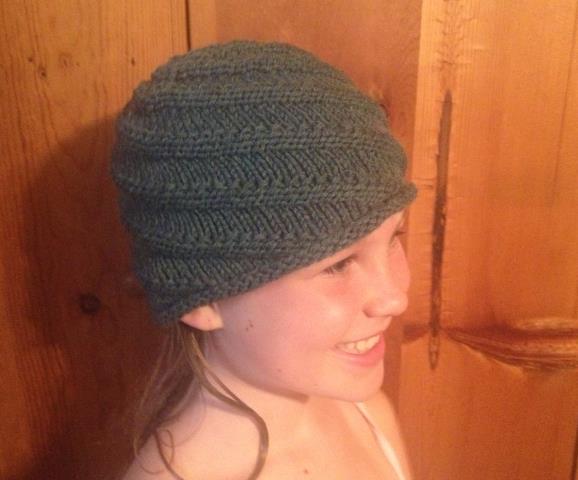
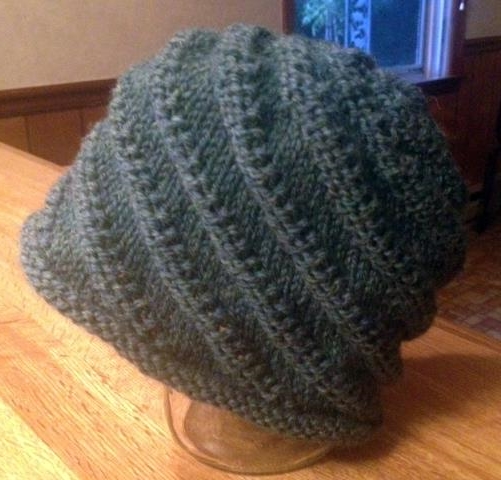
I wanted a little different of a hat pattern and one that was unisex.  When I saw this hat in one of my knitting books (101 Designer One-Skein Wonders) – I knew it was the one.  With Stella’s help in deciding which color to use, we settled on a beautiful blue-green wool yarn.
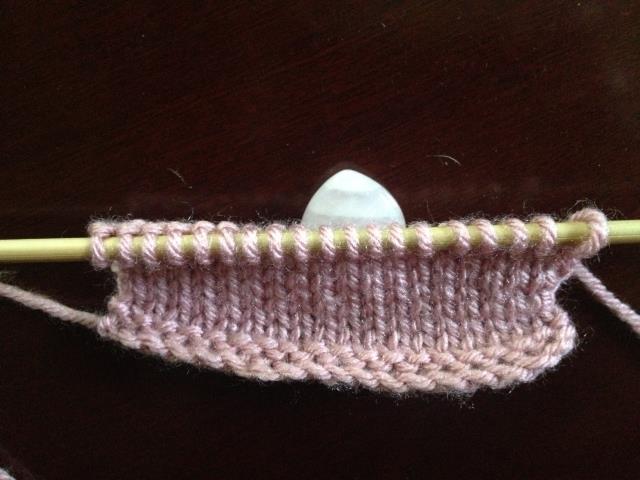
Swirl Hat

Swirl hat done

Items Needed

1 skein of yarn
1 pair US8 circular needles
1 set of US8 double pointed needles
Stitch marker
Tapestry needle

Gauge: 16 stitches = 4″ in stockinette stitch

To Start:

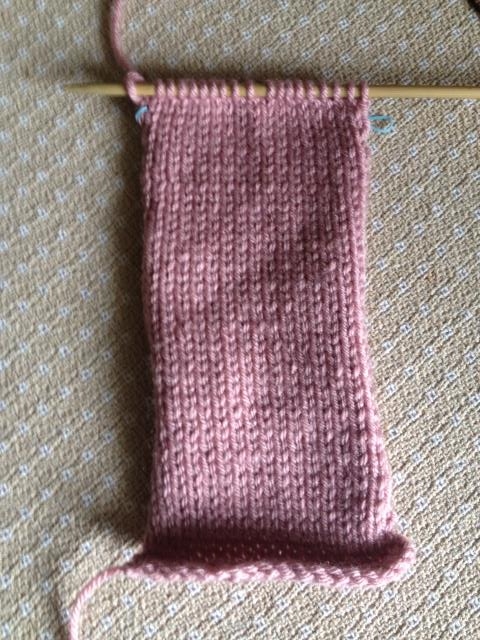
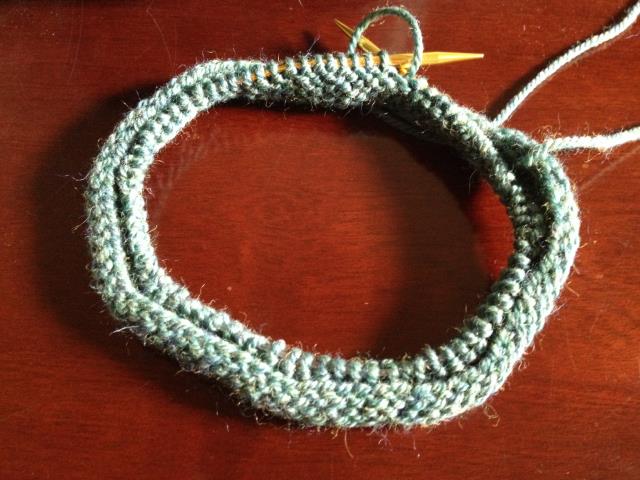
  • Using circular needles cast on 79 stitches and join into a round, being careful not to twist the stitches.
  • Knit 7 rows, this will make the rolled brim
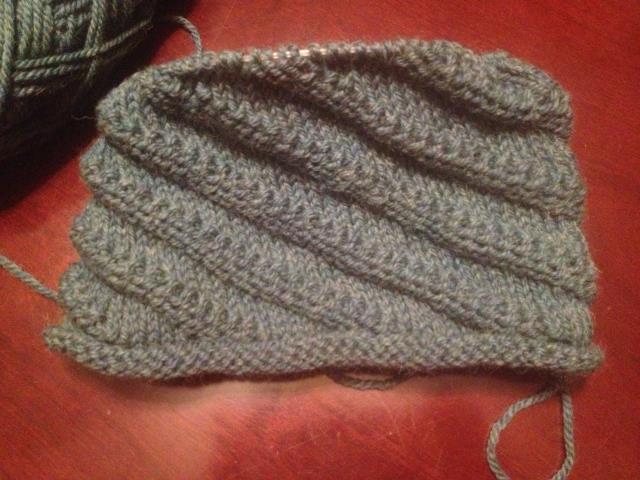
Swirl hat start

The Pattern:

Swirl hat pattern

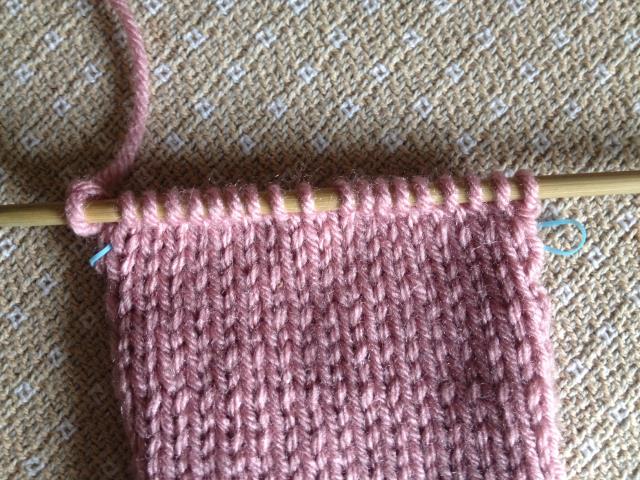
  • *Knit 6, purl 4; repeat from *.  This will make the swirl pattern because you have 79 stitches and the pattern is a 10 stitch repeat.
  • Continue until the piece measures 5 inches from the rolled brim.
  • End with a Purl 4 and place a marker to mark the beginning of subsequent rounds.

Swirl hat body doneSwirl hat marker

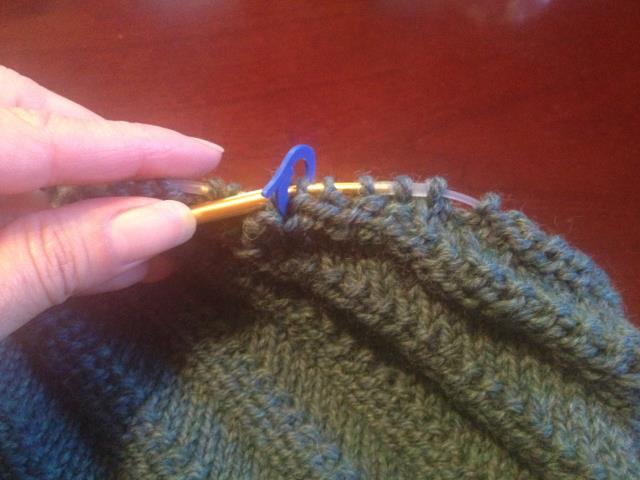
The Decrease (change to your double pointed needles when needed)

Round 1: *K2tog (knit 2 together), K4, P4; repeat from *.
Round 2: *K5, P4; repeat from *.
Round 3: Continue in pattern ending with a P4, move marker here.
Round 4: *K5, P2tog (purl 2 together), P2; repeat from *.
Round 5: *K5, P3; repeat from *, ending with a P3, move marker here.Swirl hat double pointed
Round 6: *K2tog, K3, P3; repeat from *.
Round 7: *K4, P3; repeat from *, ending with a P3, move marker here.
Round 8: *K2tog, K2, P3; repeat from *.
Round 9: *K3, P3; repeat from *, ending with a P3, move marker here.
Round 10: *K3, P2tog, P1; repeat from *.
Round 11: *K3, P2; repeat from *, ending with a P2, move marker here.
Round 12: *K2tog, K1, P2; repeat from *.
Round 13: Purl
Round 14: *P2tog, P2; repeat from *.
Round 15: Purl
Round 16: *P2tog, P1; repeat from *.
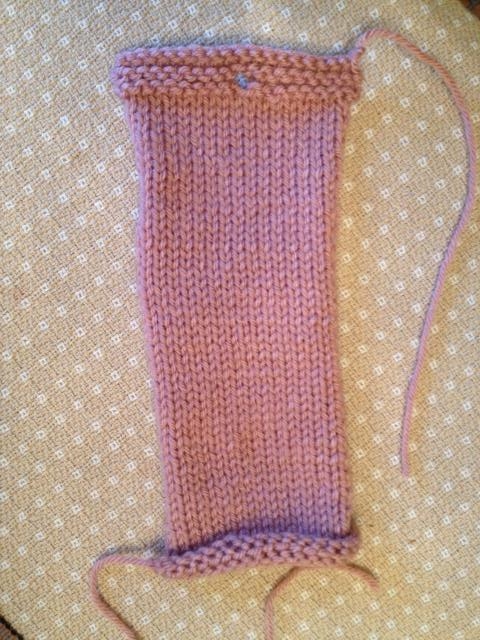
Finishing

  • Cut yarn, leaving a 10″ tail.
  • Thread the tail onto your tapestry needle and draw through remaining stitches twice.
  • Pull up snug and fasten off on the inside.
  • Weave in ends.

Swirl hat taking offSwirl hat done 2


Digiprove sealCopyright secured by Digiprove © 2013
Posted in Crafts, Knitting | Tagged , , , | 4 Comments

Country Loaf Bread

This recipe is one of my favorite bread recipes and I have been making it for about 20 years!  It is my “go-to”, quick bread recipe – by that I do not mean a quick bread.  It is quick because I do not soak the flour overnight.  Originally I made this bread with a combination of wheat and white flour, have made it with sprouted flour – but this time I was out of sprouted flour, none at the local health food store – so I used a combination of spelt, white and wheat.  Stella requested that I do one loaf with raisins in it, which I had never done before!

This is an easy yeast bread recipe that is great for sandwiches, with soup, toasted or just plain!

Country Loaf Bread

C Bread raisinC Bread plain

Ingredients

1 Tbl yeast (1 package)
2 1/2 cups warm water
2 Tbl sugar, honey or maple syrup (I used honey)
1 Tbl Sea Salt
6 – 7 cups flour (combination of spelt, wheat and white)
1/2 cup flax meal (optional)
1/2 cup raisins
1 – 2 Tbl cinnamon
Sesame, Poppy or Hemp seeds ( I used hemp)
Butter
Cornmeal
1 egg

1. Mix the yeast, water, honey and salt in a large glass or stainless steel bowl.  I use the bowl for my Kitchen Aide.

C Bread yeastC Bread yeast mixed

2. Add 2 cups of flour and beat for two minutes.

C bread 2 cups flour

3. Continue adding 1 cup of flour at a time, mixing after each addition add the flax meal if using.

C bread flax

4. Turn out onto a floured board, keep adding flour until a smooth ball is formed.

C Bread dough

5. Place in a greased bowl, cover and let rise until double in bulk – about 1 hour.

C Bread in bowl

6. Grease 2 loaf pans with butter and sprinkle with cornmeal. You can also grease a cooking sheet and sprinkle with cornmeal.

7. Punch the dough down and divide into two balls.

C Bread first rise

8. Place one ball into a loaf pan, spread out .

9. With the other ball knead in the raisins and cinnamon. I put the raisins in hot water to plump. Place in the other loaf pan and spread.

C Bread plump raisinsC Bread raisins

10. With a sharp knife, make cross slash marks on the top of each loaf.

C Bread knife

11. Brush with a egg wash – 1 egg with 1 Tbl of water.

C Bread egg

12. If you want you can sprinkle sesame seeds, poppy seeds, hemp seeds, etc on top.

C Bread in pans

13.  Allow the dough to rise again, about 45 minutes.

C Bread 2nd rise

14. Bake at 350 degrees for about 40 – 45 minutes.

C Bread out of oven

Take out of the loaf pans and cool on a wire rack.   Delicious warm with a good slathering of butter!  The raisin addition to the bread was a HUGE hit!!!

Digiprove sealCopyright secured by Digiprove © 2013
Posted in Bread, Recipes | Tagged , | 3 Comments

What To Do With All These Beets

Not having a garden this year we have been very fortunate to have so many farms and gardeners around us.  I recently ordered a 20 pound box of beets and planned on storing at least half of it for the winter and then with the other half making several pots of borscht for canning and freezing and then pickling some.  I did get to the pickling but before I got to the soup I went down to get a few for dinner and realized that they were sprouting!  I then did some research and realized that I would not be able to keep them for the winter and the reason being –  that all the greens were cut off.  Because all the greens were cut off the beets were not sealed by their skin.

I figured over the weekend I would be making beef stock and a lot of borscht.  I was talking to my aunt as to where would be a good place to get beef bones and explained to her about my beets.  She suggested that I steam them and then freeze them and that would take the pressure off getting so much done over the weekend.  I had one of those DUH! moments.  I was so focused on how I was going to make bone broth and the borscht that I did not even think about an alternative way to preserve the beets for the fall and winter.  I went home that night and started peeling and steaming and over the next couple of days I had the box done and put up!  So glad that I had that conversation with my aunt!

Another Way To Preserve Beets

F Beets box


Items Needed

Beets
Sharp knife
Steamer
Freezer bags
Straw


1. Wash and peel the beets.  Cut them up into quarters.  You could also wash the beets and then boil them, putting them into ice water after they are cooked and then peeling the skin off.  For some reason I just do not like boiling my beets.

F Beets cut

2. Place the cut up beets into your steamer and steam for 30 – 45 minutes.I have a double steamer, which is great for heating up foods or steaming a large batch of beets!

F Beets ready to steam

3. Once they are steamed (put them to the fork test, if a fork goes in easily they are done) either run them under cold water or put them in a bowl of ice water.  This will stop the cooking process and make them cool enough to handle.

4.  I let them drain after rinsing for about 15 – 30 minutes.

5. Label your freezer bag with contents and date and fill with your beets.

F Beets packed

6. Seal the bag almost all the way closed and stick a straw in at the corner.  Push out air as you are sealing and then suck the rest of the air out with the straw and seal closed.  Place in the freezer.  You can also use a vacuum sealer.

F Beets strawF Beets ready for the freezer

Now don’t forget they are in the freezer waiting to be used during the colder months.  A good borscht or beet, vegetable soup always hits the spot on a wintery day!

Digiprove sealCopyright secured by Digiprove © 2013
Posted in Freezing, Preserving | Tagged , , | 3 Comments

How To Clean Your Washing Machine

I know it seems silly to say that you need to wash your washing machine, but it is probably a good idea.  You clean your clothes in it – so it would be a logical conclusion to think that you would also be cleaning your washing machine, but that is not really the case.  The grime builds up along with the detergents along the sides, the corners and in the inner workings of your machine and then if you live in a humid area – mold and mildew could be growing!  The house we moved into was a second home and was used very sparingly and the appliances are very dirty inside on the parts that I can see.  And for the most part the house was used during hunting season with many guys staying there – so that will give you an idea of the condition of the appliances!

I knew my washing machine was dirty by looking at it, but I did not know how dirty until I took the photos!  The photos are not great – one of my camera’s stopped focusing and I have not been able to make it to the repair store and no matter where I stood there were many shadows – sorry.

Cleaning Your Washing Machine (top loading non HE machine)

W Machine outside clean

Items Needed

4 cups Vinegar
1 cup Baking Soda
150-20 drops Eucalyptus Essential Oil (optional)
Rags
Sponge
Toothpicks

Note: You can use another essential oil that is antiseptic and anti-bacterial – like Tea Tree, Oregano, Lavender, Geranium or Lemon.  I usually use Tea Tree, but figured I had some Eucalyptus, so why not mix it up – I also like the smell better than Tea Tree.

1. Set your washing machine for a large load, highest water level, hot, extra rinse and heavily soiled – allow it to start filling.

2. Pour in the vinegar and let the machine agitate a little to get the vinegar mixed with the water.

W Machine vinegar

3. Add the baking soda and allow the machine to agitate and mix it in.

W Machine baking soda

4. Add the essential oil allow it to mix and then turn the machine off or lift the lid.  Allow the water to sit for 30 minutes to an hour, depending out how dirty it is.

W Machine oil

5. Using a cloth or a sponge, dip it into the water and clean your machine, the lid (inside and out), the rim, the knobs – clean it all!

Before

W Machine bleach dirtW Machine corner grimeW Machine other corner dirt


After

W Machine bleach cleanW Machine corner cleanW Machine other corner clean


I have to admit that I had to use a toothpick to get all the dirt and lint from under the lid – wow there was A LOT!

6. Shut the lid and allow the machine to complete the wash.  Hopefully you will only need to do this once – but if really dirty do another cleaning load.

Before

Before

After

After

This made my laundry area smell very clean.  I have read a couple different suggestions on how often to clean your washing machine, from once a month to twice a year – I think it all depends on how much laundry you do, if you have hard water and what kinds of detergents you use.

A couple of tips:

Leave the lid open on your machine to let it air out

Use non-perfumed laundry products or make your own (that post is coming!)

Instead of fabric softener use vinegar – it will get your clothes really clean, soft and help in keeping your washing machine innards clean!

My dishwasher so needs it next!

Posted in Cleaning | Tagged , | 5 Comments

Dilly Beans!

It is so much fun canning with other people!   A friend came over with a whole lot of beans from her garden -so we decided to pickle them or another name for them is Dilly Beans.  I have Dilly Beans at other friend’s houses, but I have never made them – I usually blanch my beans and then freeze them – so this was a new one for me.  It is so great to see my cabinets filling up with such great canned veggies.  Just placed an order for several cases of tomatoes – so will be making sauce, stewed , and ketchup – keep an eye out for those post in the next week or two.

The only thing that I find when I am canning with someone else is that I am not so great in remembering to take the photos.  I get caught up in visiting, sharing stories, sharing recipes, etc – you get the picture.  I will try and make a better effort in the next canning session!

Dilly Beans (Pickled Beans)

D beans canned

Ingredients

2 pounds green or other color beans, trimmed to fit your jars
1 teaspoon cayenne pepper (you can use more if you like them spicy!)
4 teaspoons dill seed (not dill weed)
4 cloves garlic
2 1/2 cups white vinegar (5%)
2 1/2 cups water
1/4 cup pickling salt (use a bit more if you’ve only got kosher)

Items Needed

Canning pot
Canning tray
Jar grabber
Large sauce pan
Pint jars and lids
Plastic knife

1. Fill your canning pot with enough water to cover the jars.  You will want to insert a rack to keep your jars off the bottom of the pot – when it is time to place the jars.

2. You can either sterilize your jars in the canning pot or use your dishwasher.
prepare the rest of your ingredients.
3. Wash and trim your beans so that they fit in your jar.

D beans beansD beans cut
4. Combine vinegar, water and salt in a medium saucepan and bring to a boil. While it’s heating up.

5. Place your lids into a small sauce pan and cover them with water – heat the water to almost boiling.  This will sterilize the lids and make the rubber sticky.

6. Pack your beans into the jars, leaving 1/2 inch headspace (distance between the tops of the beans and the rim of the jar).

7. To each jar, add 1/4 to 1/2 teaspoon cayenne pepper, 1 clove of garlic and 1
teaspoon dill seeds.

8. Pour the boiling brine over the beans, making sure to leave that 1/2 inch headspace. Use a plastic knife to remove air bubbles from jar by running it around the interior of the jar.

9. Wipe the rims of the jars and put a lid and ring on.

10. Process for 5 minutes in a boiling water bath (remember that you don’t start timing until the pot has come to a roiling boil).

The processing time listed is for altitudes of 1,000 feet or less. For altitudes up to 3,000 feet, add 5 minutes; 6,000 feet, add 10 minutes; 8,000 feet, add 15 minutes; 10,000 feet, add 20 minutes.

11. Take the jars out of the water bath and place on counter (I place a dishcloth down) and then wait to hear the pop of the lid – this means that the jar sealed.  If a jar does not seal, turn upside down and let stand for 15 – 20 minutes and then turn over – the jar should have sealed.  If a jar does not seal this will be the jar that you indulge in first!

Note: These beans want to hang out for a least two weeks before eating, to thoroughly develop their flavor.  Then ENJOY!

Digiprove sealCopyright secured by Digiprove © 2013
Posted in Canning, Preserving | Tagged , , | 3 Comments

The Fall Garden Planted, Almost

This weekend was gorgeous and since the garden is now fenced – I really wanted to get a fall garden in.  This year, I think was the first one in 11 years where I have not had a garden.  I have missed not having a garden, but at the same time there has been so many other projects – I wonder if I would have been able to keep up with a garden.  I have to admit that I cheated and bought my vegetable plants from the local nursery!  I have started putting my wish list of garden seeds together for next year and have started saving seeds and gathering seeds to get a head start on next year.

I am fortunate that there are some posts already on the property that I was able to use for a raised bed- not sure if I will do the whole garden this way, but it was a start.  I think it will take a couple of seasons to get the whole garden going.

My uncle came over a few weekends ago and tilled a good part of the garden – how thankful I am for that.

F garden begin

Materials

Materials

I am a little anal, well – really with some things a lot anal.  The morning was spent doing laundry and hanging it to dry and them mowing 2 parts of the front field.  It was a little sad to mow the orchard area and to see that in the last 2 days half the orchard had been destroyed by one or several bucks.  They took out many trees with the rubbing of their antlers – two of those trees were my almond trees – I am hoping to salvage 1, but I am not sure.  Then it was off to the garden.  Here is where I am somewhat anal.  I turned the soil and then laid the posts. When I was laying the post I used my level to make sure that they were as close to level as possible. Some of the garden is on a downward slope – so I want the beds to be level and drain properly.

F garden turned

F garden compostAfter laying the posts I added some compost to the bed.  I then turned the soil again before planting.  It was quite the upper body workout – which is good, because pretty much the only exercise I get now is homesteading!  Hoping to get back to my running in September.

F garden turned again

Then came planting the plants. I planted beets, kale, two types of broccoli, cabbage and chard.  I still have the spinach, lettuce and cauliflower to plant which I will do tonight – I wanted to see where the shade hit in the afternoon before planting – now I know.

F garden planted

I then raked up the grass clippings, forgot to put the bag on the mower, and put them in the wheel barrel.  I decided I would use the grass clippings as my mulch – figured it was free, held moisture well and would give back to the soil!

F garden mulchedF garden planted 2

After all that, I watered and then I finished securing the bottom part of the fence.  I decided not to bury the fencing, but to use u-clips to secure.  I also decided that I would plant around the outside of the fencing with pollinator friendly plants.  That is three times the good – helps deter animals from digging under the fencing, brings pollinators to the garden, which is so beneficial and lastly that it will look wonderful.  I have put the word out to anyone that has some plants to give away!  So far I have gotten some bee balm, butterfly bush and one other plant that of course I can’t think of the name.  I will also be digging up some lilac runners and replanting the day lillies that are in front of the house!

The day was made complete by some homemade pizza shared with Stella and a dear friend!!  Wishing you all happy gardening!!!

Digiprove sealCopyright secured by Digiprove © 2013
Posted in Garden, Homesteading | Tagged , | 4 Comments

Knitted Treasure Purse

It has rained a lot here and when I can’t be out on the land I need to keep myself busy.  I was looking for a quick project that was also easy and I found one on the Red Heart website – a simple knitted change purse.  I think if I added up the time, this probably took 2 – 3 evenings (if that) – I would pick it up when I was sitting and listening to music, watching a movie with Stella or just watching the rain fall.  As soon as I finished it and showed it to Stella she asked if I would make her one – I handed her this one and she was so happy!  She also asked me why I do not sell some of the things that I make, working on that one (fall/winter project) – but I do think I will make several more of these for some Christmas presents.

Knitted Treasure Purse

T purse done

Items Needed

Yarn (any that has the gauge of 19 stitches = 5″, 20 rows = 4″ in stockinette)
Size 8 straight needles
Stitch markers (or I used small rubber bands)
Darning Needle
Button

Stockinette Stitch
Row 1: (right side): Knit
Row 2: Purl

Purse

Cast on 19 stitches

Row 1 & 2: knit

T purse start

Following rows work in stockinette stitch until piece measure 8″.

T purse length to fold

End with a right side row, place marker at each end of the last row worked.

T purse markers

Flap

Work in stockinette stitch for another 1 1/2″, ending with a right side.

Next row: (wrong side) knit

Next (buttonhole) row: K7, K2Tog (knit 2 together), yarn over twice, K2Tog, K8 (19 stitches)

T purse button hole

Next row: Knit to yarn overs, knit first yarn over through the front loop and second yarn over through the back loop, knit to end

Next row: knit

Bind off knitwise

T purse full length

Finishing

1. Fold piece with right sides together and cast on edge even with the markers.

2. Sew side seams up to markers, leaving the flap free.  Remove the markers – I cut my rubber bands and pulled them out.

T purse sewing sides

3. Turn right side out.

4. Line up button to hole and sew the button on.

T purse sewing buttonT purse button on

5. Weave in any ends.

Now you can tuck your treasures inside!

Digiprove sealCopyright secured by Digiprove © 2013
Posted in Crafts, Knitting | Tagged , , | 2 Comments

Pickled Beets

As I have said many times in my beet posts – we LOVE beets in our house.  I have never been a big fan of pickled beets and I think is was more fear than dislike.  While at a lunch, pickled beets were served and I didn’t want to seem rude – so of course I ate them and I really LIKED them.  So with all the beets coming in – we will be storing some for fall and winter eating, but I wanted to have some in the deep of winter and early spring and figured this was a good way to make sure of that.

Pickled Beets

P Beets done

Items Needed

7 – 8 lbs of beets
1 – 2 onions (I omitted)
4 cups vinegar (5% acidity)
1 1/2 tsp canning salt
2 cups sugar
2 cups water ( I used some of the water from steaming the beets)
2 cinnamon sticks
1 tsp whole cloves
1 tsp allspice nuts
Cheese cloth
Canning pot
Soup pot
Small saucepan
Pint size canning jars with lids
Jar grabber

P beets beets

1. You can boil the beets and then peel, but I prefer to peel the beets and then steam.  I do this mainly so that I can use the steaming water.  Even though I wash the beets first – I always think that if I boil them and then use the water I will have some dirt residue.  But you can do either.

P beets steaming

2. Sterilize your jars either in the bath water or in the dishwasher.

3. Get your bath water going – you want it boiling by the time you are ready to put your jars in.

4. Place your spices into some cheese cloth and tie up.  You can put the cinnamon sticks in with the cloves and allspice or you can leave in separate.

P beets spicesP beets spices tied

5. In your soup pot combine the vinegar, sugar, water and spices – bring to a boil.

P beets start brine

6. Add the beets to the brine and let simmer 5 – 10 minutes.

7. In a small saucepan heat the lids in water to almost boiling.  This will sterilize the lids and make the rubber sticky.

8. Fill the jars with beets, packing and leaving  1/2″ head-space.

P beets in jar

9. Fill the jars with the hot liquid, again leaving 1/2″ head-space.

10. Wipe the jar lids clean, place the lid on and secure with the ring.

11.  Place the jars into the water bath using your jar grabber, bring back to a boil and process for 30 minutes.

The processing time listed is for altitudes of 1,000 feet or less. For altitudes up to 3,000 feet, add 5 minutes; 6,000 feet, add 10 minutes; 8,000 feet, add 15 minutes; 10,000 feet, add 20 minutes.

12. Take the jars out and place on the counter ( I lay a dishcloth down) and then listen for the pop – this is the jar sealing.  If the jar does not seal, turn the jar upside down for about 20 minutes and then turn over – it should now be sealed.  If a jar does not seal, that is the jar you need to enjoy now.

Digiprove sealCopyright secured by Digiprove © 2013
Posted in Canning, Preserving | Tagged , , | 3 Comments

Many Jobs, Many People – The Crop Mob At Work Again!

This past Saturday was our turn to host the crop mob.  I had been looking forward to this and making the list of jobs that I wanted to get accomplished with so many people’s help.  Stella was looking forward to it because she was going to have a group of friends over.  As the day came closer checking of the weather forecast happened several times a day, first there was no chance of rain, then that changed going from 20% to 60%, worry set in.  On Friday I checked and the forecast did not look good, but I was keeping the faith and went and picked up the last of the wood pallets.  Friday night a big pot of roasted vegetable soup was made, along with some zucchini bread.

I woke early on Saturday morning and first thing I did was check the forecast – it had changed, the rain was not suppose to hit until 4pm – yeah!  Saturday morning was spent in the kitchen.  First breakfast was made and from there, the dough for the pizzas were made, then the toppings – then 4 pizzas were put together, covered and set aside.  Next blueberry buckle was made for dessert.  After that the salad was made, pine nuts roasted and the plates, napkins and silverware were set out.  The fridge had cold drinks ready and the cooler was stocked.  It was now 1pm and the “mob” was showing up at 2pm!

Stella and I went and trimmed the bushes where the wood shelter was going to be made – we were taking the last wheel barrel full of cuttings to the woods when the first car pulled up – excitement!

We had 9 adults and 5 children – a lot of work was done.

CM postsThe garden fencing was put up:, measurement re-done, the gates laid out as to where they would eventually be hung,  post holes dug, posts put in, the metal stakes put in the ground, the fencingCM fencing secured.  To see the fencing for a 50×50 garden site being put up by so many and in such a short time was wonderful.  Since there were two gates on the property I had found, 2 gates were incorporated into the garden – strategically placed so that a truck could pull in – this idea was a brilliant one by one of the participants.  How great that will be when compost is delivered or supplies for raised beds!

CM garden

CM wood bldgA wood holder was built outside the basement door for the wood that will heat the house this winter.  The structure was built with free wood pallets I had picked up from one of the businesses in town.  All was done except the roof – since I am still trying to figure out whether or not to do a permanent roof or just use a tarp and see how that works for one season.

CM wood done

The clothes line post was taken out and a new one put in.

CM laundry

The old chicken coop had some work done – the entrance to the door was dug out so we can now open the door and all the rotted wood was taken off the nesting box.

CM coop beforeCM coopCM coop 1


The 3 shrubs that were along the driveway and that the deer had eaten away at were pulled out.  All of this done in the course off 2 1/2 hours!!!! And the rain held off until the very end!!!!!

CM shrubs

A cement turkey was left on the property and we had discussed painting the turkey – well that became a reality.  The kids painted the turkey and also named the turkey, Bob.  It was quite the production.

CM turkeyCM paintingCM Bob

Part of the front garden bed was weeded and rocks removed by the 2 boys.

CM weeding

I had really thought that we would not get all these jobs done and did not have anymore.  I am in need of having my grape arbor redone, but thought that would be a job for another time.  I should have gotten the supplies.  Next time I will have many more projects and be prepared.

Over our meal we discussed how hard it is to figure out what all can be accomplished my so many in a 3 hour time frame and plans on how to do that are already being figured out for the remaining homes this year and for next year.

I wish I had taken more pictures, especially of us all enjoying a meal around the dining room table or of the kids having a dance party in the living room or videoing the trees being torn out of the ground – but I was hosting and making sure that everyone had all that they needed to get the job done and to nourish their body!  It was an incredible day and I am so grateful to all the work done my so many and the benefit we all received from each other!

Digiprove sealCopyright secured by Digiprove © 2013
Posted in Homesteading | Tagged , | 4 Comments

Knitted Headband

I have been working on a wire knitted necklace for some time now and was hoping it would be today’s blog – but no such luck.  That project has become a bigger undertaking than I anticipated or had time for – the wire broke once and I had to start over, because I wanted a more fluid necklace I used a more pliable wire which kinks – so hoping to have it done in a week or so….

This summer Stella started wearing head bands and head kerchiefs and I love it.  I have also noticed that she has started taking more care in her hair appearance, brushing her hair a couple of times a day – this is new – before I would have to ask and ask for her to brush her hair and then I usually ended up doing it!

Knitted Headband

Hband side

Items Needed

Size 8 double pointed needles
Size 8 straight needles
Yarn, less than a skein and something that will give a little

1. Using double pointed needles, cast on 5 stitches

2. Make an I-Cord that measures 4″.

Hband icord

3. Once your work measures 4″ , switch over to your straight needles and start increasing your width by knitting in the front and back (KFB) of the first and last stitch of each row until you have your desired width.  Because of the yarn I chose I just knitted each row, but you could also do a pattern. If you choose to do a pattern, increase until you have the correct number of stitches on your needle to work the pattern.

Hband taper up

4. Knit each row or follow your pattern until the piece measures 12 1/2″ from end of I-Cord.

Hband length

5. Start decreasing your headband by K2Tog at the beginning and end of each row until you have 5 stitches on your needle.

Hband taper down

6. Switch to your double pointed needle and work an I-Cord that measures 4″.

7. Cut a tail and you can either weave in the ends or leave them – your choice.

Hband done

You know have a very unique and stylish headband! Stella loved it!

Hband front


Digiprove sealCopyright secured by Digiprove © 2013
Posted in Crafts, Knitting | Tagged , , | 2 Comments