The Strawberry Patch Is Planted!

I look almost daily on craigslist under free to see what I can get for the land.  This week was a great score – 15 strawberry plants, amaryllis, mullein, holly hock and oregano!  I was so excited when I heard back from the listing and was told that I could come and get them.  The best part of it all was that I met two wonderful sisters – one is a master gardener and the other is a master naturalist.  We exchanged tid bits, blogs and emails.

I had had part of the garden tilled, but with all the rain that we got this summer – much of the grass had grown back.  I covered a good section with cardboard, but the grass still was not dead underneath – so I had to truly make a garden bed.  This turned into an almost all day project with a nice break in the middle of the day.  I am allergic to strawberries, but Stella loves them – so I had her help make the bed with me.  I think she enjoyed it and learned a lot.

I will do some raised beds in the garden, but it is a 50×50 foot garden, so big and to do all raised beds would be expensive and really not necessary.  So first I went walking around the property – it is amazing what I am finding in the woods!  I found two cattle gates and that is what is being used for the gates of the garden and I have been finding posts everywhere.  I had used most of the posts already in the fencing of the garden, but I remembered seeing some at the beginning of the woods, off the orchard – so I went in search of those.  I found 3, but one of them I could not budge – will have to have someone help me the next time I have some strong backs around.  The two I did drag out had some nails in the ends – so they were hammered out.  These would be used for the sides and rocks would be used for the ends.

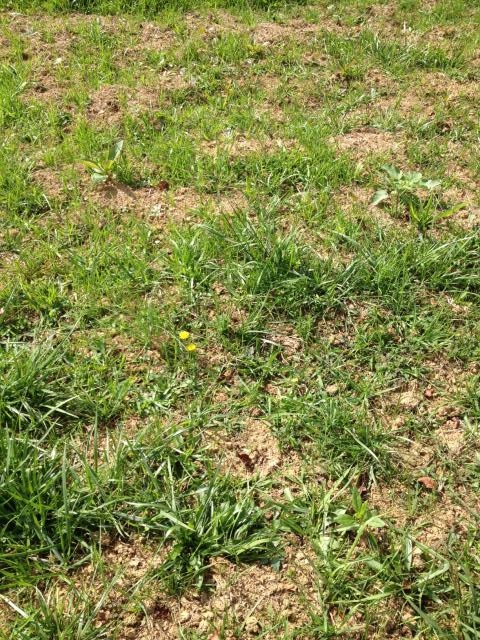
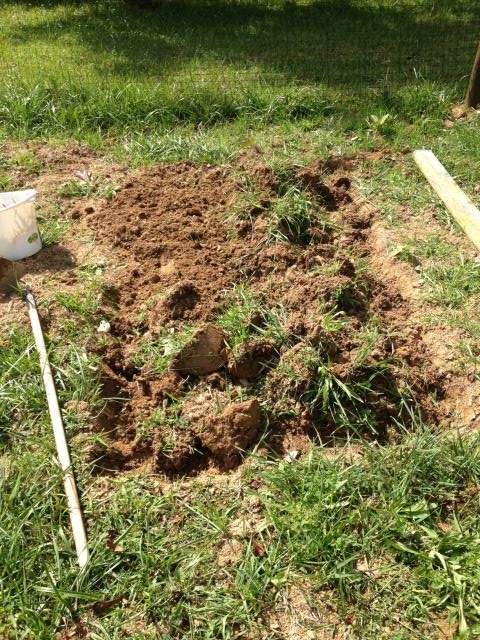
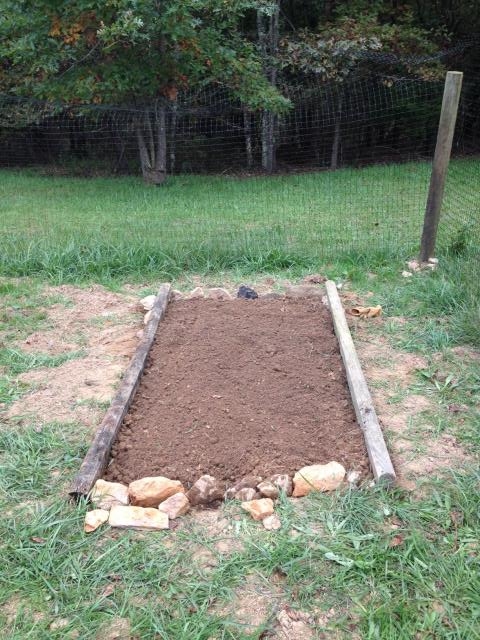
First picking the spot….

Strawberry patch

Next was digging up the area and turning the soil.  This was hard work – then with a hoe – I broke up the soil and the clumps of grass.  I then placed and leveled the fence posts and secured the rocks on the downward slope.

Strawberry digging

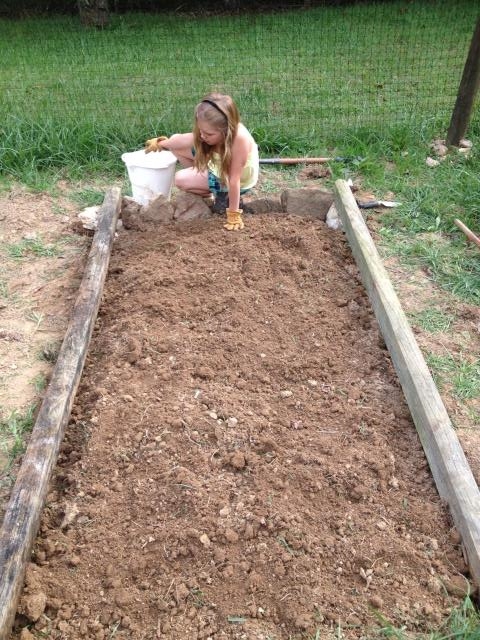
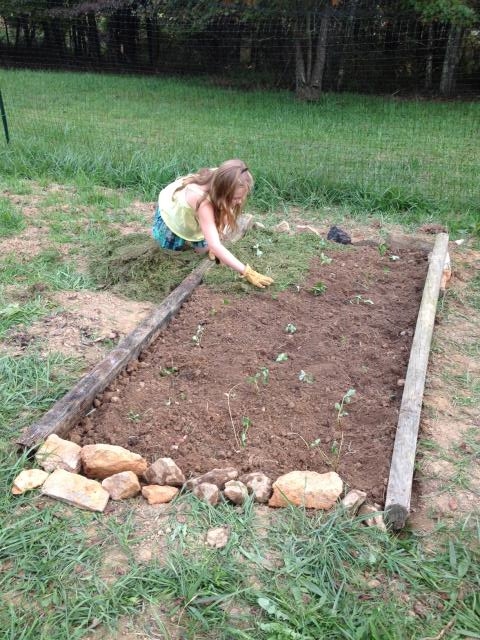
After all that was done – we pulled out all the grass with roots and the other plants – this is where Stella started helping.

Strawberry getting grass out

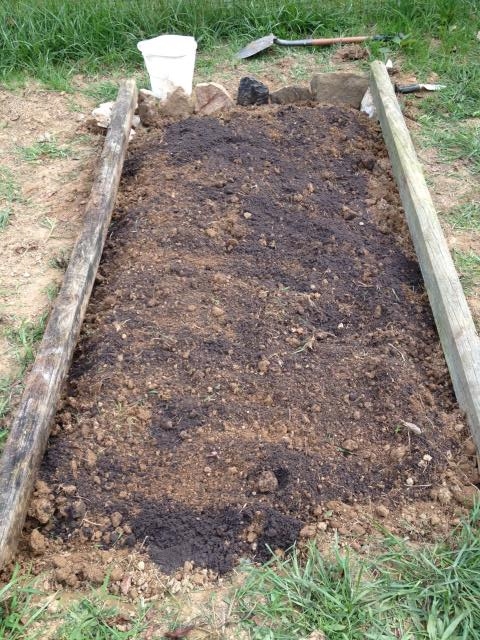
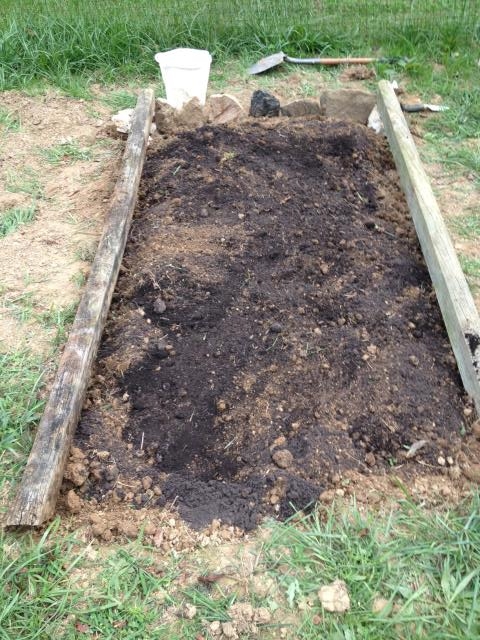
Since this is a permanent bed I added some top soil and compost and then tilled that all into the bed.  Stella is afraid of the hand tiller since she had a mis-hap with it and put it through her foot.  Understandably she stays far away from it!  While I was doing this, Stella was digging up rocks for the upside end.

Strawberry top soilStrawberry compostStrawberry ready for planting

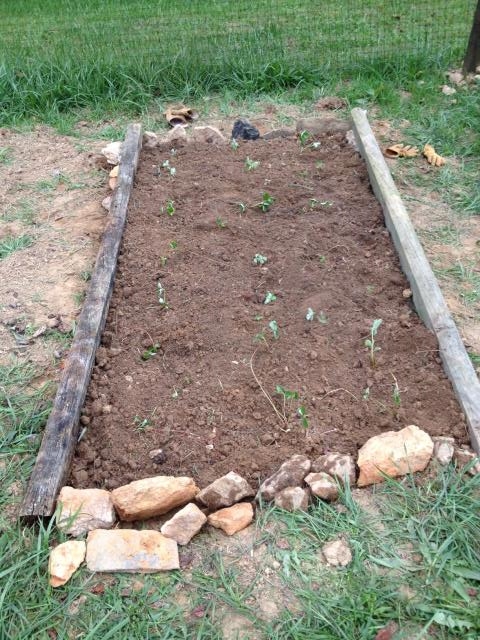
It was time to plant the strawberries – this was done by both of us.

Strawberry planted

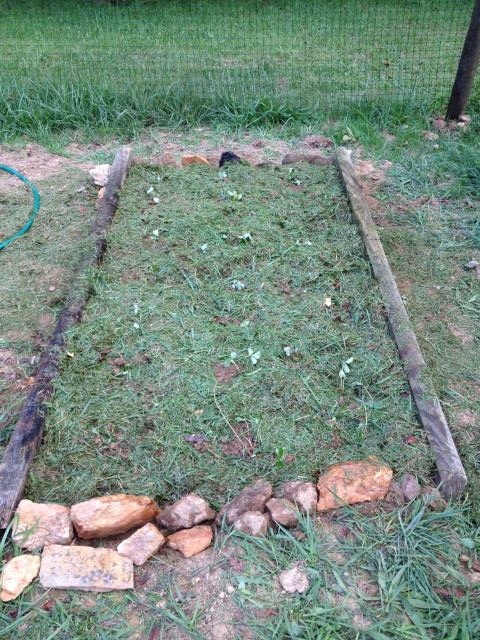
Next came the mulching.  I did some mowing and dumped the grass clippings next to the bed and Stella mulched.

Strawberry mulching

The bed was complete!  Now we just have to wait for next year to reap the rewards – or I should say Stella needs to wait.  If it is like our strawberry plants in NY – I will never harvests one strawberry – Stella will eat them right then and there when she see them – just like she does with the blueberry bushes!

Strawberry done

Digiprove sealCopyright secured by Digiprove © 2013
Posted in Garden, Homesteading | Tagged , | 5 Comments

Sourdough Bread – Our New Favorite!

I was so excited to make sourdough bread from the starter I made, that my mouth was watering when the aroma was filling the house! This is another recipe from Sally Fallon Morell’s cookbook Nourishing Traditions.  I mis-read the recipe and let it rise a little longer than I should have – I think that is why the top turned a little white, but it did not make a difference to us eating it or the taste – divine!

Sourdough Recipe (I cut the recipe to 1 1/2 the actual recipe)

Sourdough done

Ingredients

6 cups of starter (room temperature)
9 3/4 cups spelt, kamut or hard winter wheat flour (I used all spelt)
1 7/8 tbl course sea salt
1/2 cup water

1. Place starter, salt and water in a large bowl and mix with a wooden spoon until the salt crystals are dissolved.  I ground my salt in my pestle and mortar.

Sourdough saltSourdough start

2. Slowly mix in the flour.  Towards the end you will find it easier to mix with your hands.

Sourdough flour

3. If the dough seems too thick you can add another 1/4 cup of water.

4. Knead by pulling and folding the dough over – this can be done right in the bowl.  Knead for about 10 – 15 minutes.

Sourdough kneaded

5. Butter your loaf pans well.  The dough should fill 2 – 3 loaf pans.

Sourdough pans

6. Without pressing down the dough, divide, shape and place in loaf pans.

Sourdough in pan

7. Cut a few slits on the top of the dough, cover and let rise 4 – 12 hours.

Sourdough risen

8. Preheat the oven to 350 degrees and bake for about 1 hour.

9. Take the loaves out of the pans and allow to completely cool on a rack.

Slice and enjoy.  We tried with with a good slathering of raw butter and with some apple butter that I had just made.  It was delicious!  It was a true sourdough – I loved the flavor, I was not sure if Stella would.  I cut her a slice with butter and she loved it!!  Stella told me it was better than the bread I had been making.  We have had the bread toasted with our eggs over easy in the morning and Stella loves it as the bread for her grilled cheese!  Make some – I don’t think you will be disappointed!  Ut will keep for up to one week without refrigerating and this bread freezes well.

Digiprove sealCopyright secured by Digiprove © 2013
Posted in Bread, Recipes | Tagged , | 1 Comment

Make Your Own Softscrub Cleaner

For the most part I make all my cleaning products, but I have to admit that I use Bar Keeper for cleaning the bathroom, toilet, kitchen sink and wanted to try and get away from that and make a cleaner from scratch.

I came across a recipe, I think I saw it on Facebook, and I wrote the recipe down.  Can’t find where I found it to give the original creator credit – but I did tweek it a little bit.

Soft Scrub Cleaner

Bathroom cleaner jar

Ingredients

1/2 cup baking soda
1/2 cup washing soda
1 cup liquid castille soap
2 Tbl vinegar
20 – 25 drops tea tree essential oil
10 – 15 drops lemon essential oil
10 – 15 drops peppermint essential oil

Bathroom cleaner ingredients

1. In a glass bowl mix the baking soda and washing soda together, getting rid of all the lumps.

Bathroom cleaner dry

2. Add the castille soap and the essential oils – mixing well as you add.  It will harden quick, but keep mixing and if need be add a little more castille soap.

Bathroom cleaner wet

3. Add the vinegar – it will fizz a little, but it will stop.

4. I really get it blended by using my handheld mixer.  It will be the consistency of a soft paste.

Bathroom cleaner mixed

5. Store in a glass jar or mason jar.

When using, take a little out of container and place on a wet sponge. Scrub the surface that needs to be cleaned.  Rinse and dry – it will be sparkly and the bathroom will smell lovely.  It also works wonder on a the stainless kitchen sink.

Bathroom cleaner on sponge

Bathroom sink before

Bathroom sink before

Bathroom sink after

Bathroom sink after

Kitchen sink before

Kitchen sink before

Kitchen sink after

Kitchen sink after

It does not take a lot to clean a lot of surface space!

Digiprove sealCopyright secured by Digiprove © 2013
Posted in Cleaning | Tagged , | 5 Comments

Sourdough Starter

With getting back to basics I am again making our bread. Our bread of choice when I am purchasing is sourdough – we love the airiness of the bread and the flavor.  I asked many people if they had a sourdough starter I could get some of, but I was not successful.  I decided I would take my chances and make my own starter.  I opened up my “go to” cookbook: Nourishing Traditions and of course there was a recipe for sourdough bread and sourdough starter!

The original recipe calls for freshly ground rye flour, but since i do not have a grain grinder – I ended up buying organic rye flour from the local health food store.

Sourdough Starter (recipe can be found in Nourishing Traditions)

Items Needed

2 cups rye flour
2 cups cold, filtered water
Cheesecloth
6 cups rye flour
Cold filtered water
2 gallons sized bowls

Sourdough starter ingredients

1. In one large bowl combine 2 cups rye flour and 2 cups water – mix well.  This will make a soupy mixture.

Sourdough start day

2, Cover the bowl with a double layer of cheese cloth and secure with a large rubber band or twine/ribbon.  This allows yeasts and bacteria in but not the bugs.

Sourdough start covered

3. For the next, for a total time of 7 days – transfer the starter into a clean bowl, add 1 cup rye four and enough water to make a soupy mixture.  Cover and let stand.

Day 1

Day 1

Day 2

Day 2

You will notice along the days the starter will get frothy, bubbly and smell sour – this is all part of the process.

Day 3

Day 3

Day 4

Day 4

Day 5

Day 5

Day 6

Day 6

After 7 days the starter is ready to use.  Save at least 1 quart (4 cups) for your next batch.  If not using the remaining starter immediately, store in airtight jars in the fridge or freezer.

To start a new batch of starter, take a quart of the leftover starter in a clean bowl.  Add 1 cup of rye flour each day plus water until 3 quarts are obtained.

Digiprove sealCopyright secured by Digiprove © 2013
Posted in Bread, Homesteading, Recipes | Tagged , | 2 Comments

I Am Seeing Green Everywhere, That’s Green Beans!

Green beans have been in abundance lately.  The garden where I work has been turned into a CSA for the employees. Each week the Sanctuary Caretaker sends us out an email with what is available and make our selection.  Green beans have been on the list for many weeks and they are delivered in a garbage bag and all of us fill up our bags.  Most of us have canned them, eaten them and now are freezing them – we cannot see them go to waste they are so beautiful and so delicious!

You will need to blanch the beans before freezing them.  All fruit and veggies contain enzymes and bacteria that overtime with breakdown and destroy the nutrients.  Blanching stops the enzymes and kills the bacteria.

Freezing Green Beans

Beans freezer

Items Needed

Green beans
Soup pot
Ice
Freezer bags or vacuum sealer bags
Straw

1. Fill your soup pot with water and set to boil.

2. Wash, trim and snap the beans into smaller pieces.

BeansBeans cut

3. Fill your sink or a large pot/bowl with cold water. Do not add the ice until right before putting the first batch of beans in the water.

4. Once your soup pot is boiling fill with beans.  You will need to blanch for about 3 minutes – start timing from when the first beans are added to the water.

Beans hot

5. Pour your ice into your cold water.  Use a slotted spoon to remove the beans from the hot water and place into the cold water.

Beans ice

6. Take the cold beans out of the water and place on a dish towel.  You want the beans to be as dry as possible before bagging and freezing.

Beans drying

7. Once the beans are dry it is time to bag them.  I have a vacuum sealer and highly recommend them, but if you do not have one freezer bags and a straw will do the trick.  Fill your bags and seal them.  If using the freezer bags – fill the bags, zip them closed leaving enough space to insert a straw. Using the straw suck the air out and seal the bag.

Beans foodsaver

8. Date your bags and place in the freezer.

This is a great way to preserve your green bean harvest and be able to enjoy them in soups, casseroles and as a side dish come later fall or into the winter.

Digiprove sealCopyright secured by Digiprove © 2013
Posted in Freezing, Preserving | Tagged , , | 2 Comments

Even More Tomatoes To Make Tomato Sauce

After putting up 37 jars of diced tomatoes we were on to tomato sauce.  We figured that we would do a small batch of sauce as an immediate go to – after all these tomatoes we figured we weren’t going to want to making sauce in the near future!

This tomato sauce was a huge hit at our house.  Stella tried it on her tortellinis and told me it was the best sauce she had ever had and that I really needed to write a cook book!  I will take that as a “2 thumbs” up review!

Tomato Sauce

Tomato sauce done

Items Needed

Roma tomatoes, or other variety
Basil
Onion
Garlic
Bacon fat, olive oil, lard or other oil to saute in
Bayl leaves
Lemon juice
Ice
Quart canning jars and lids
Canning pot
2 large soup pots
Cast iron pan
Colander
Immersion blender or regular blender
Funnel
Jar Grabber
Paring knife
Chopping knife
Cutting board

Many of the first steps are the same as the steps for canning diced tomatoes.  You can also start this with your canned diced tomatoes and skip the steps of skinning the tomatoes and adding the basil and lemon juice.

1. Fill your canning pot and start that heating up – it takes a long time to come to a boil.

2. Fill another soup pot with water and bring to a boil.

3. Fill your sink with cold water and ice.

4. Clean and sterilize your jars, either in a dishwasher or in a water bath – cleaning your jars first in the sink.

Tomato dishwasher5. Once your soup pot water comes to a boil, add your tomatoes.

Tomato in hot water6. After about 60 – 90 seconds take your tomatoes out of the boiling water and place in the sink with cold water and ice.  This will cool the tomatoes and stop the cooking process.

Tomato ice7. With your paring knife remove the “belly button” (where the stem was) and remove the skin.  The skin should come off easily, if not place back in the boiling water for a few second.  Place the tomatoes in a colander.

Tomato skinned8. Repeat steps 5 – 7 until all the tomatoes are done.

9. Chop the tomatoes up and place in a large soup pot.

Tomato cut in pot10. Chop up your basil and add to the tomatoes, mixing well.

Tomato basil11. Heat your cast iron pan and add whatever oil you are going to cook with, we used bacon fat.

12. As your pan is heating, chopped up several onion and add to the pan – slowly cooking until translucent.

Tomato onion13. Chop several cloves of garlic and add that to the onions.

Tomato garlic14.  Add the onions and garlic to the chopped tomatoes, along with 3 – 4 Tbl of lemon juice.

15. Place the pot of tomatoes on a burner and heat – you don’t want to bring to a boil, you want to slow simmer to thicken it and cook the tomatoes.  Add several bay leaves.  Stir occasionally so that the bottom does not burn.

Tomato sauce cooking

16.  Once the tomatoes have cooked down some, take out the bay leaves and using your immersion blender puree the sauce to a consistency of your liking.  If  you do not have an immersion blender you can puree in batches in your blender, but allow the tomatoes to cool slightly.

Tomato sauce puree

17. Place your tops into a saucepan and heat the water, but do not boil.  Let the tops sit in the water for at least 10 minutes – this will sterilize them and make the rubber sticky.

Tomato lids

18. Place a funnel over the mouth of the jar and fill to within 1/4″ from top of jar.  Wipe the mouth of the jar clean then place the lid and ring on.

19. Place the jars into your water bath,using a jar grabber and bring back to a boil and process for 40 minutes (3,000 ft altitude).  Remember to make adjustment for your altitude.

20. Take the jars out of the canning pot and place on a dish cloth lined counter.  You should hear the popping of the jars – this is the jar sealing.  If the jar does not seal, turn it over for 20 – 30 minutes and it should seal – if not those are the jars you use first.

It will be hard to go back to store bought sauce after you make your own. So worth it!!


Digiprove sealCopyright secured by Digiprove © 2013
Posted in Canning, Preserving, Sauces | Tagged , | 1 Comment

Tomatoes, Tomatoes Everywhere – Canning Diced Tomatoes

My cousin and I decided to can tomatoes together this year – thought it would be better than doing my our lonesome.  We decided on 3 flats – the kids could play and we could can and it would not take all day.  I ordered 3 flats and she said 3 cases and I said 3 flats – when I picked them up it was 3 cases!  I picked them up on Friday and we canned on Monday, believe me I could not wait – the smell of tomatoes in my house, not a good thing!

Tomato box

We got the kids fed breakfast and then started the process of skinning the tomatoes, dicing, cleaning and sterilizing jars – the hours went by and before we knew it it was dinner time!  Wow – we canned 37 jars of diced tomatoes and then made some tomato sauce (next post).  We only lost 2 jars – it was not easy to keep the jar warm as we were packing it with cold tomatoes – after the second jar lost we figured that out.

Canned Diced Tomatoes

Tomatoes diced

Items Needed

Roma tomatoes, or other variety
Basil
Lemon juice
Ice
Quart canning jars and lids
Canning pot
2 large soup pots
1 large bowl
Funnel
Jar Grabber
Paring knife
Chopping knife
Cutting board

1. Fill your canning pot and start that heating up – it takes a long time to come to a boil.

2. Fill another soup pot with water and bring to a boil.

3. Fill your sink with cold water and ice.

4. Clean and sterilize your jars, either in a dishwasher or in a water bath – cleaning your jars first in the sink.

Tomato dishwasher

5. Once your soup pot water comes to a boil, add your tomatoes.

Tomato in hot water

6. After about 60 – 90 seconds take your tomatoes out of the boiling water and place in the sink with cold water and ice.  This will cool the tomatoes and stop the cooking process.

Tomato ice

7. With your paring knife remove the “belly button” (where the stem was) and remove the skin.  The skin should come off easily, if not place back in the boiling water for a few second.  Place the tomatoes in a colander.

Tomato skinned

8. Repeat steps 5 – 7 until all the tomatoes are done.

9. Chop up your basil and add to the tomatoes, mixing well.

Tomato basil

10. Chop the tomatoes up and place in a large soup pot.

Tomato cut in pot

11. Place your tops into a saucepan and heat the water, but do not boil.  Let the tops sit in the water for at least 10 minutes – this will sterilize them and make the rubber sticky.

Tomato lids

12. Fill a large bowl with hot water.

13. Fill a jar with 2 TBl lemon juice and the diced tomatoes.  Take a knife and place down the sides of the jar, releasing any air bubbles.  Fill the jar to 1/2″ from the top.  Wipe the jar clean and put lid and ring on.

Tomato diced funnelTomato diced ready for bath

14. Place the jar into the large bowl of hot water.

15. Pack another jar following step 13. When this jar is sealed take the jar out of bowl of warm water and place that jar into the canning pot with a jar grabber.

16. Repeat steps 13 – 16 until your canning pot is full.

17.  Once the water in the canning pot is back to a boil, process the jars for 50 minutes.

18. Take the jars out of the canning pot and place on a dish cloth lined counter.  You should hear the popping of the jars – this is the jar sealing.  If the jar does not seal, turn it over for 20 – 30 minutes and it should seal – if not those are the jars you use first.

Aren’t the jars so beautiful?!  They will come in handy when you want to make a pot of sauce or add some tomatoes to a stew or other yummy meal!  I love watching my cabinets fill up  with the summer and fall harvest, knowing that I will be able to enjoy it during the snow covered months!

Digiprove sealCopyright secured by Digiprove © 2013
Posted in Canning, Preserving | Tagged , , | 2 Comments

Kids Craft Corner – Recycled Pencil Holder

It was so nice to get back to crafting with Stella and doing a kids craft corner evening.  If your kids are like Stella then their room, desk, craft area is overflowing with pencils, pens, markers, crayons…  We are always looking for holders for all of them – so when I saw this in a magazine or on the web somewhere – I knew that we had to make a couple. I saved up our cans – putting them to the side waiting for a time where we had an hour or two to focus on making these.

Recycled Pencil Holder

P Holder done

Items Needed

Cans – washed and labels removed
Yarn
Mardi Gras beads
Embellishments (buttons, flowers, jewels, felt pieces)
Glue gun and sticks

1. Wash and remove the labels from your cans.  Be careful not to cut yourself on the can, which I did!  You can either file down the rough edge or I took needle nose pliers and crimped the little piece that is left raised after you take the top off.

P Holder cans labelsP Holder cans

2. Get all your crafting supplies together and place in easy reach of your crafting area.

P Holder embellishments

3. With you glue gun – put some glue at the bottom of the can.  Place the start of your yarn on the glue and secure.  Be careful with the glue – it is HOT.

P Holder glue startP Holder start yarn

4. Wrap the yarn around the can, pushing the yarn down to cover the can.

P Holder wrapping

5. When you get to the top, cut the yarn and then glue the end.

P Holder wrapped

6. You are now ready to decorate your holder.

P Holder addingP Holder addin 2

7. If using beads – you will have to cut each strand so that it fits around the can one time.  You will also have to glue several spots of each wrap of beads.

P Holder 3

Get your pens, pencils, markers, crayons, scissors, etc and fill your holders!  This makes great teacher, mother’s day, father’s day, grandparent, friend gifts.  The best part is that the kids can pretty much do this all on their own and you are using items that you already have and recycling/repurposing your cans – how wonderful!

Digiprove sealCopyright secured by Digiprove © 2013
Posted in Crafts, Kids Crafts, Recycled, Repurposed | Tagged , , | 3 Comments

A New Knitted Washcloth Pattern

I love knitting my other washcloth pattern, but when I saw this I decided I needed some washcloth variety!  I love this pattern and the illusion it gives of the different squares.  This is a fast and easy pattern and you can knit a washcloth in an evening.  I will definitely be making more of these and soon!!

Knitted Washcloth

Washcloth done

Items Needed

Size US 7 straight needles
Cotton yarn
Darning needle

Gauge: 20 stitches = 4″ in stockinette stitch

Directions

Cast on 36 stitches

Washcloth start

Row 1: Slip 1, K35

Row 2: Slip 1, P35

Row 3: Slip 1, P32, K3

Row 4: Slip 1, P2, K15, P15, K3

Repeat Row 4 eighteen more times

Washcloth first section

Next Row: Slip 1, K2, P15, K15,P3

Repeat this row 18 more times.

Slip 1, K35

Slip 1, P35

Bind off loosely and weave in ends.

Washcloth soap

You will get squeaky clean with one of these!

Digiprove sealCopyright secured by Digiprove © 2013
Posted in Crafts, Knitting | Tagged , , | 2 Comments

Girls, Giggles, A Sleepover and Pancakes!

Stella had her first “official” sleepover this past weekend.  She has had her best friend from NY and her cousins, but this was a sleepover with new friends made in her new home.  In NY our house seemed to always have kids over on the weekends and I loved listening to the laughter, the conversations and the fun being had – it was wonderful to have all of that this past Friday night.  The one thing that I could do without is the “time to go to sleep”, “time to be quiet” that seems to go on whether here or in NY.  Sleepovers are nights when all involved get very little sleep!  But the lack of sleep is so worth it when you hear the giggles, excitement and fun going on!!

Morning came early, before 6:30 – yikes!!!  The three girls all have different breakfast food items – so to decide on one item was not easy for them, for me it was since we have no cereal in the house or a waffle maker, we decided on pancakes.  I usually have pancakes in the freezer, but we had finished up the last batch last week and I had not gotten around to making more (we tend not to eat pancakes as often in the warmer months) – so I had to make a new batch.  As I was making the batter, part of me was saying these aren’t that healthy, the flour hasn’t been soaked – I am not feeling good about these, but a solution came – I can put some hemp seed and flax into the batter and make it a little more nutrient rich!  I also had some raw milk that was starting to sour – buttermilk pancakes these would be.

Blueberry Pancakes

Pancakes enjoying

Ingredients

1 1/4 cup flour
2 Tbl sugar
1 tsp baking powder
1/2 tsp baking soda
1 1/3 cup buttermilk or sour milk (DO NOT uses soured store bought milk)
1 beaten egg
1 Tbl olive or coconut oil
1 cup blueberries (optional – can use apples or other berries)
3 Tbl hemp seeds (optional)
3 Tbl flax meal

1.  In a medium sized bowl combine the flour, sugar, baking powder and baking soda.

2. In a separate bowl combine the milk, egg and oil – mix well.

Pancakes dry and wet

3.  Add the wet ingredients to the dry and mix until blended but still slightly lumpy.

Pancakes mix

4. Add the blueberries and combine.

Pancakes blue

5. This is when I had my “aha” moment and added the hemp seeds and flax meal, but you could add them to the dry ingredients in the beginning.

Pancakes hempPancakes batter all

6. Melt butter on your pan/griddle and allow to get evenly hot.

Pancakes butter

7.  Pour your batter onto the pan , when you see the bubbles turn the pancakes and cook on the other side.

Pancakes cookingPancakes cooking 2

Serve with maple syrup, honey or we used a jar of grape jelly that did not set – it was delicious!  The girls loved the pancakes and more giggle were had at the table!

Pancakes served

Digiprove sealCopyright secured by Digiprove © 2013
Posted in Breakfast, Recipes | Tagged , | 1 Comment