Oh So Good Fruit Bars

Looking for a not to sweet bar for Stella to take in her lunch or I could grab during the day when needed.  I tried this recipe out of a cookbook I have had for 25+ years, but it was too sweet and I wanted more protein – so I got to work on  changing it up to fit what I was looking for.

Have you ever gone to use your brown sugar and it was hard?  Well that is what happened to me when I went to make these bars.  A quick fix – measure out the amount that you need to use and place in a glass, oven proof bowl, sprinkle with water, mix and stick into a 300 degree oven.  Check regularly – this will soften the brown sugar for your use.  Do not put this back into your brown sugar stash.

Fruit Bars

Fruit bar done

Crust Ingredients

3/4  cup spelt flour (you could use white or wheat)
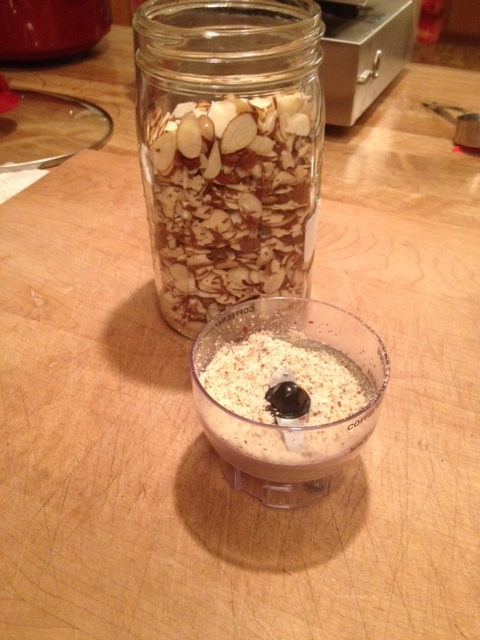
1/2 cup almond meal
1/4 cup brown sugar
1/2 cup butter, softened

Topping Ingredients

2 eggs
3/4 cup brown sugar
1/4 cup spelt flour
1/2 tsp baking powder
1/4 tsp sea salt
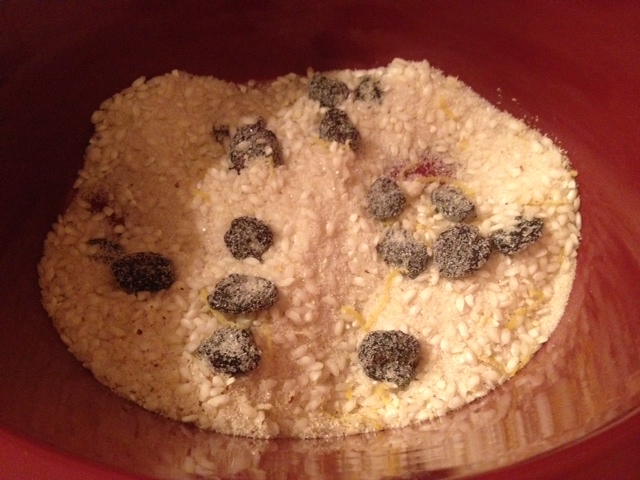
1 cup seedless raisins, chopped
1/2 cup dried cherries, chopped
1/2 cup unsweetened coconut
1/2 cup crispy pecans, chopped

1. Preheat oven to 350 degrees.

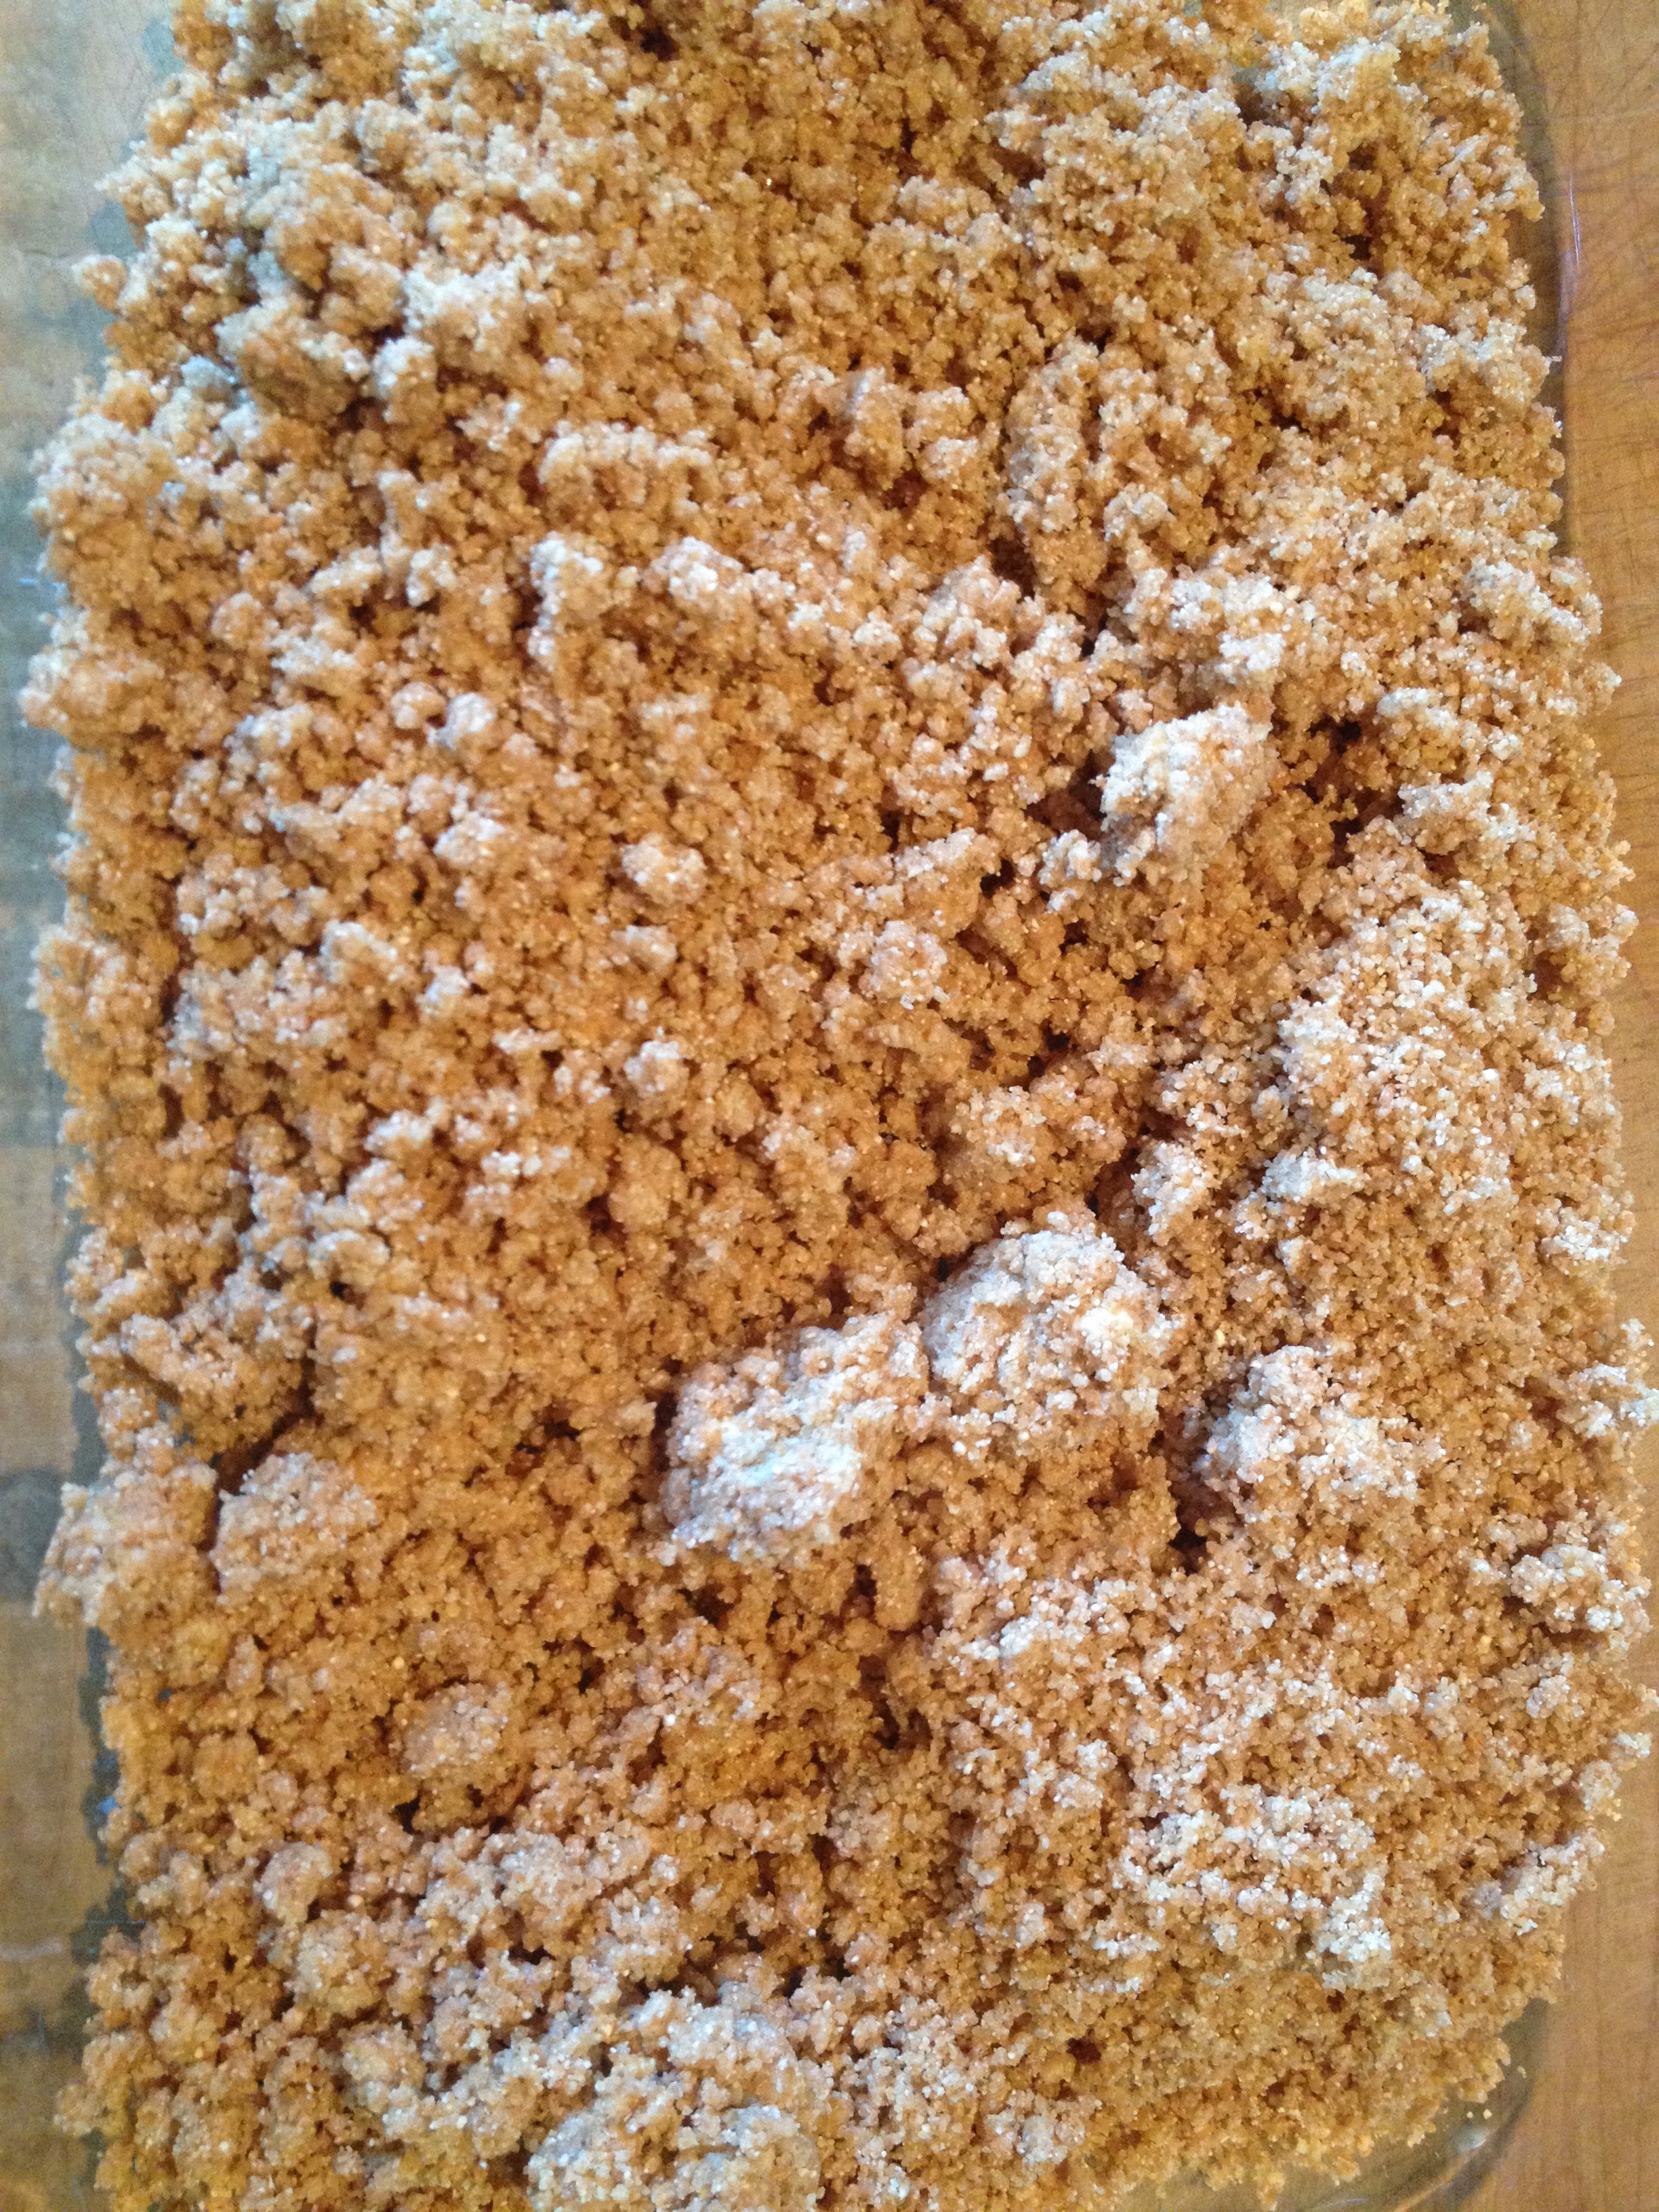
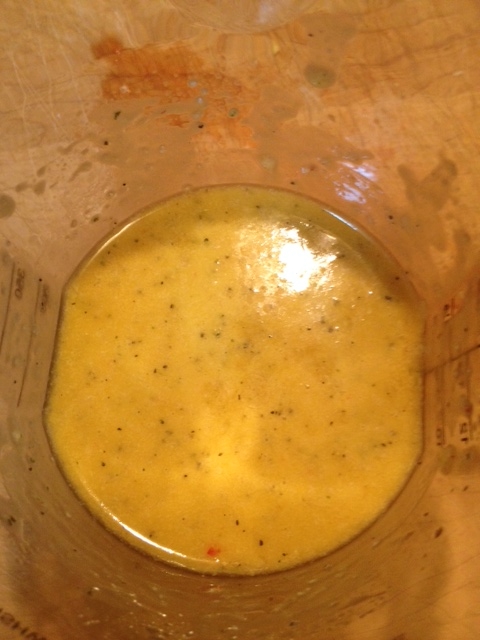
2. Blend together all crust ingredients.

Fruit bar crust ingredients

3. Press the crust mixture into the bottom of an 8×8 or small Pyrex casserole pan.

Fruit bar crust

Fruit bar crust firm

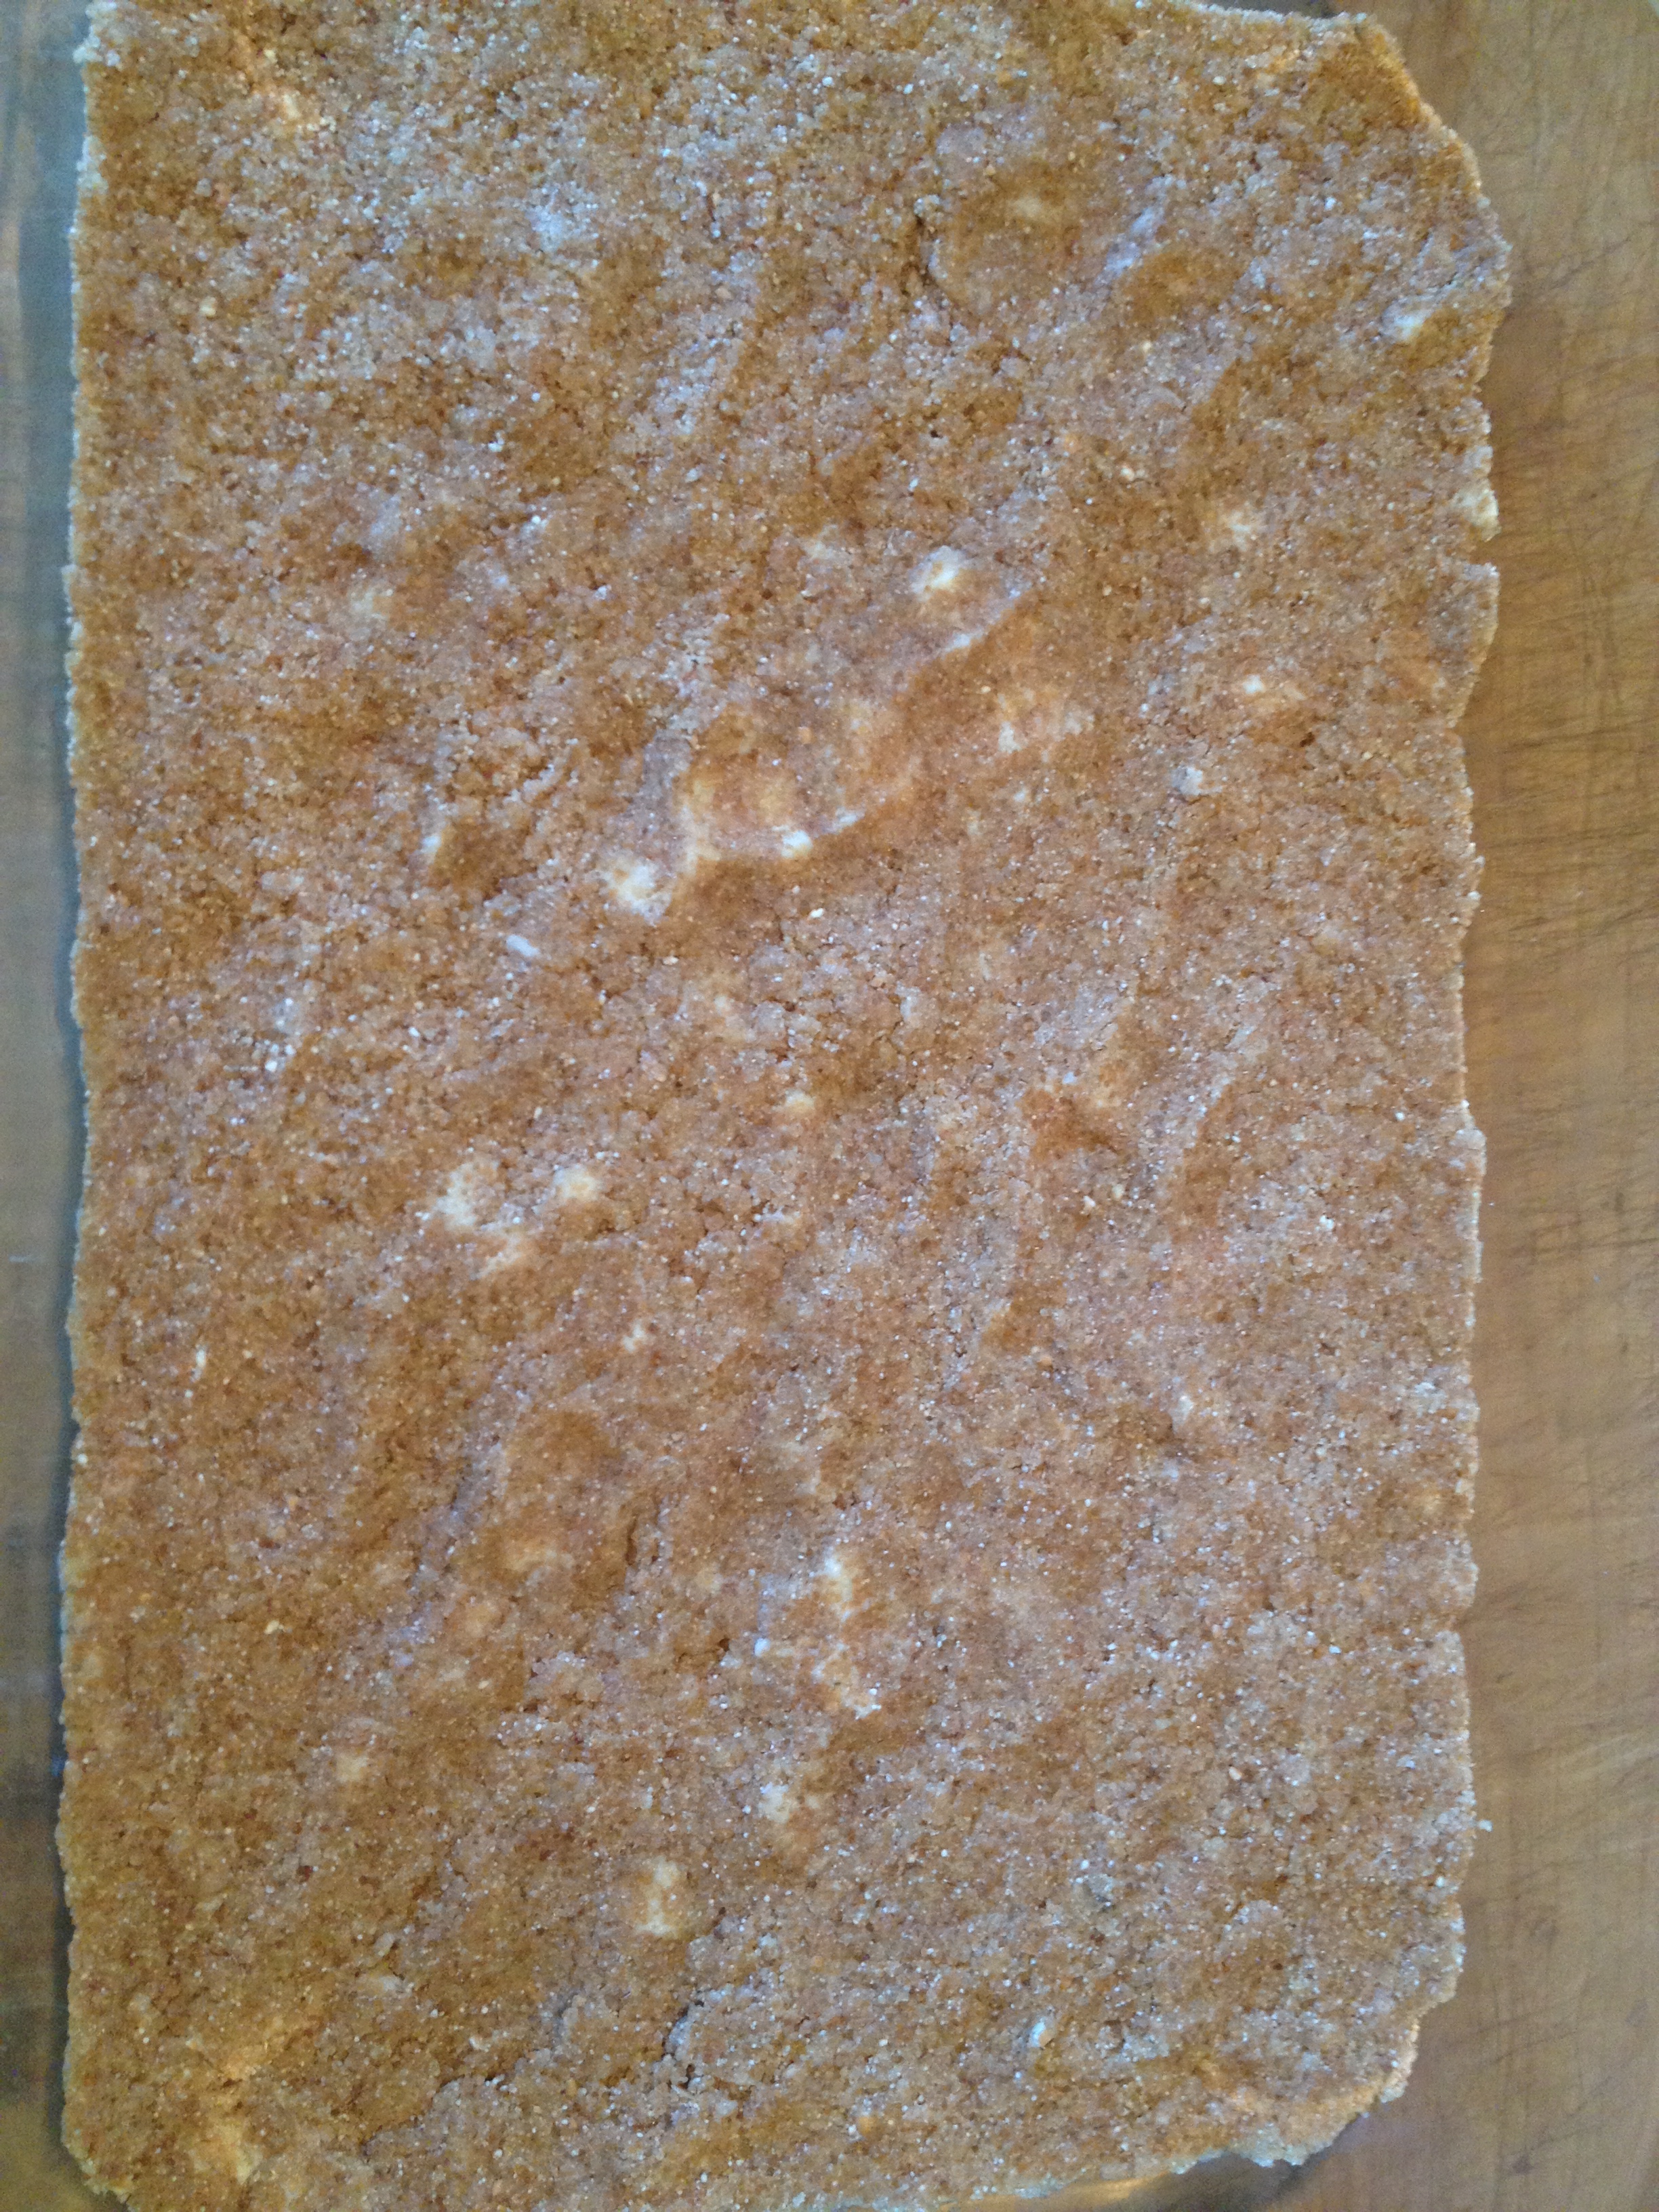
4. Bake for 10 minutes.

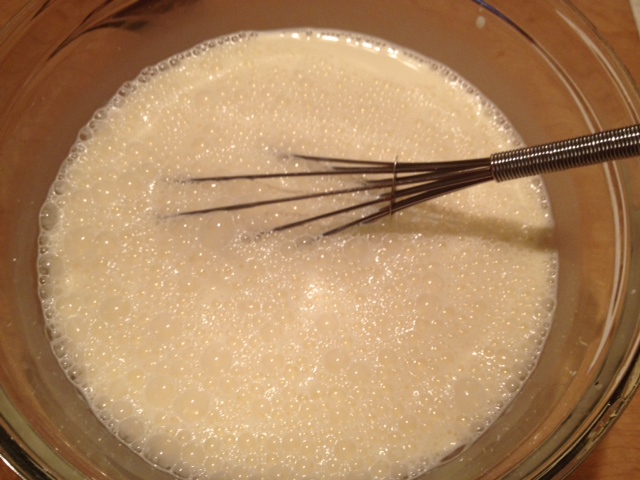
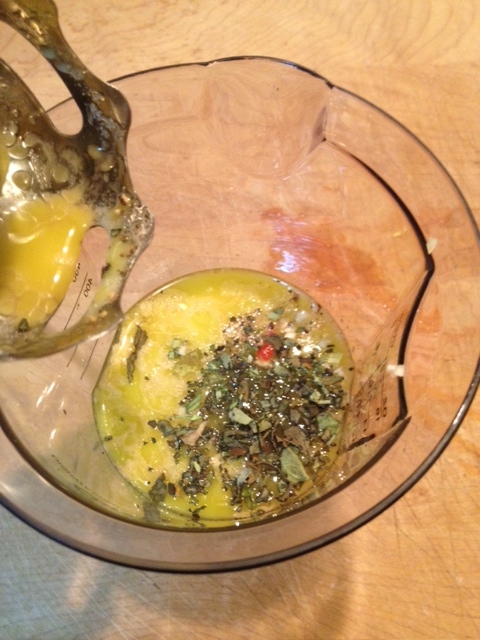
5. While the bottom is baking, make the topping.  Beat the eggs well.

6. Gradually add the brown sugar and then the flour, salt and baking powder.

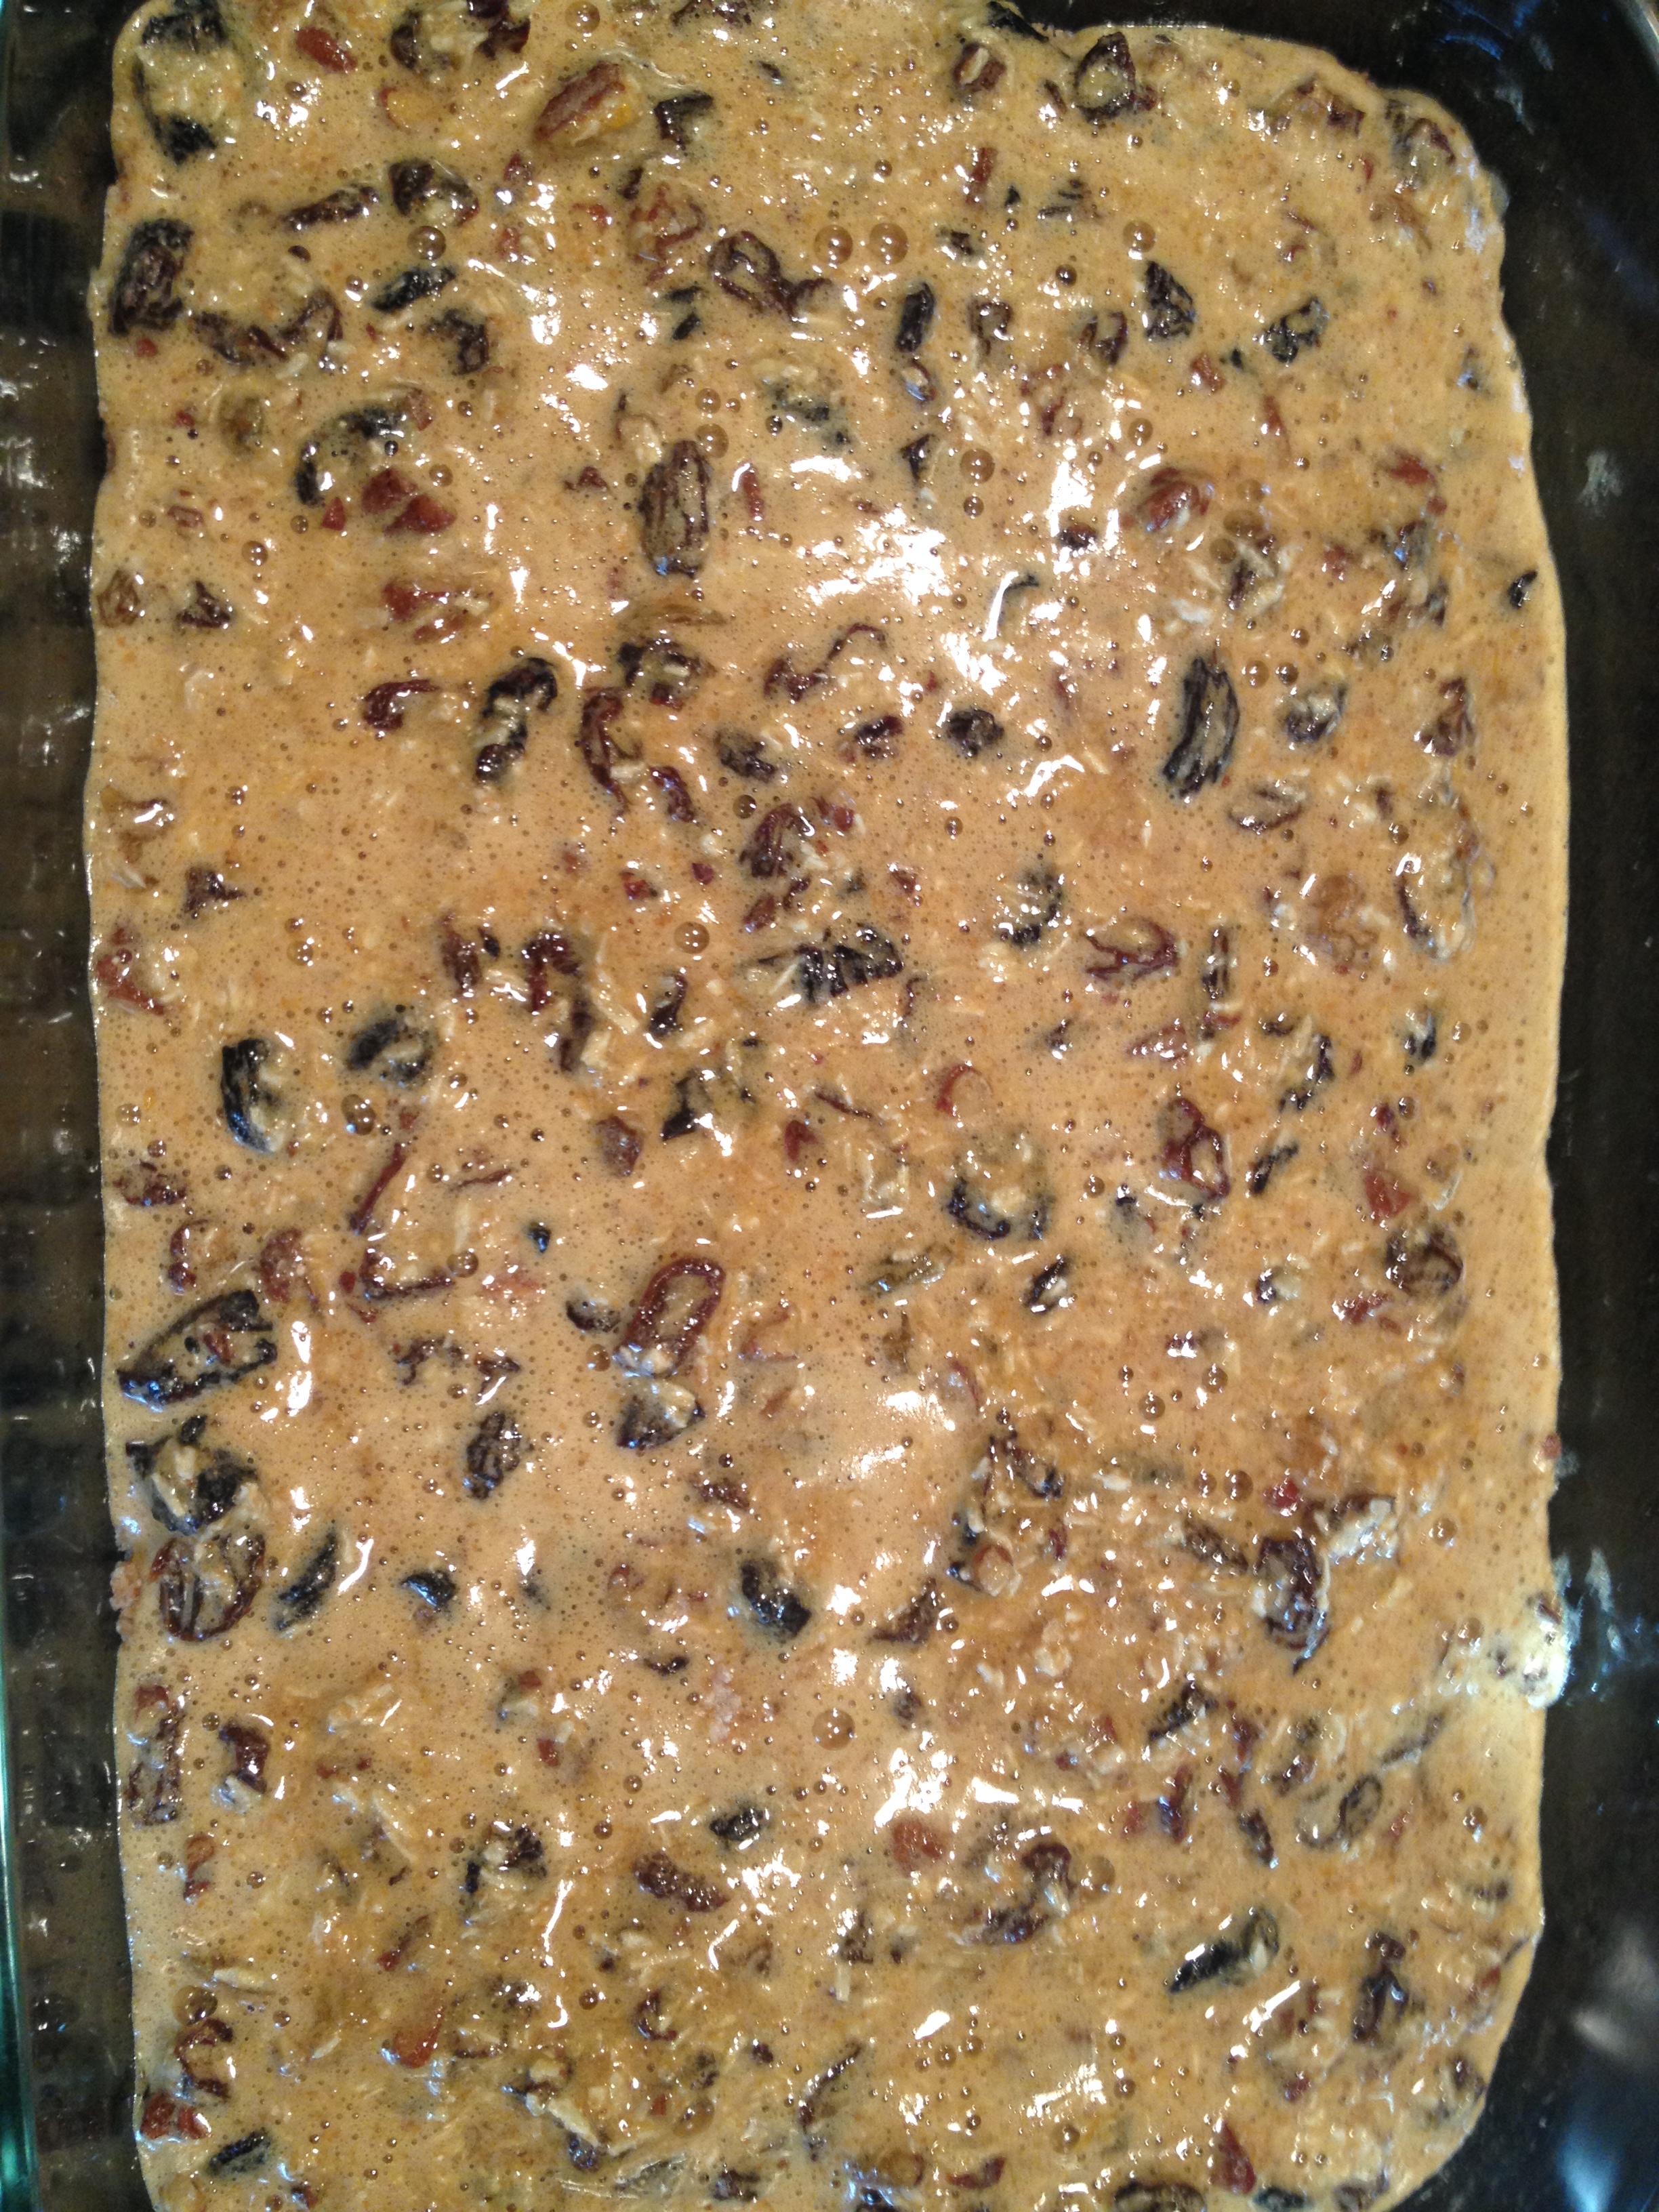
7. Add the raisins, cherries, coconut and pecans mixing by hand and incorporate into batter.

8. Spoon the batter over the baked crust.

Fruit bar topping

9. Bake for another 25 minutes.

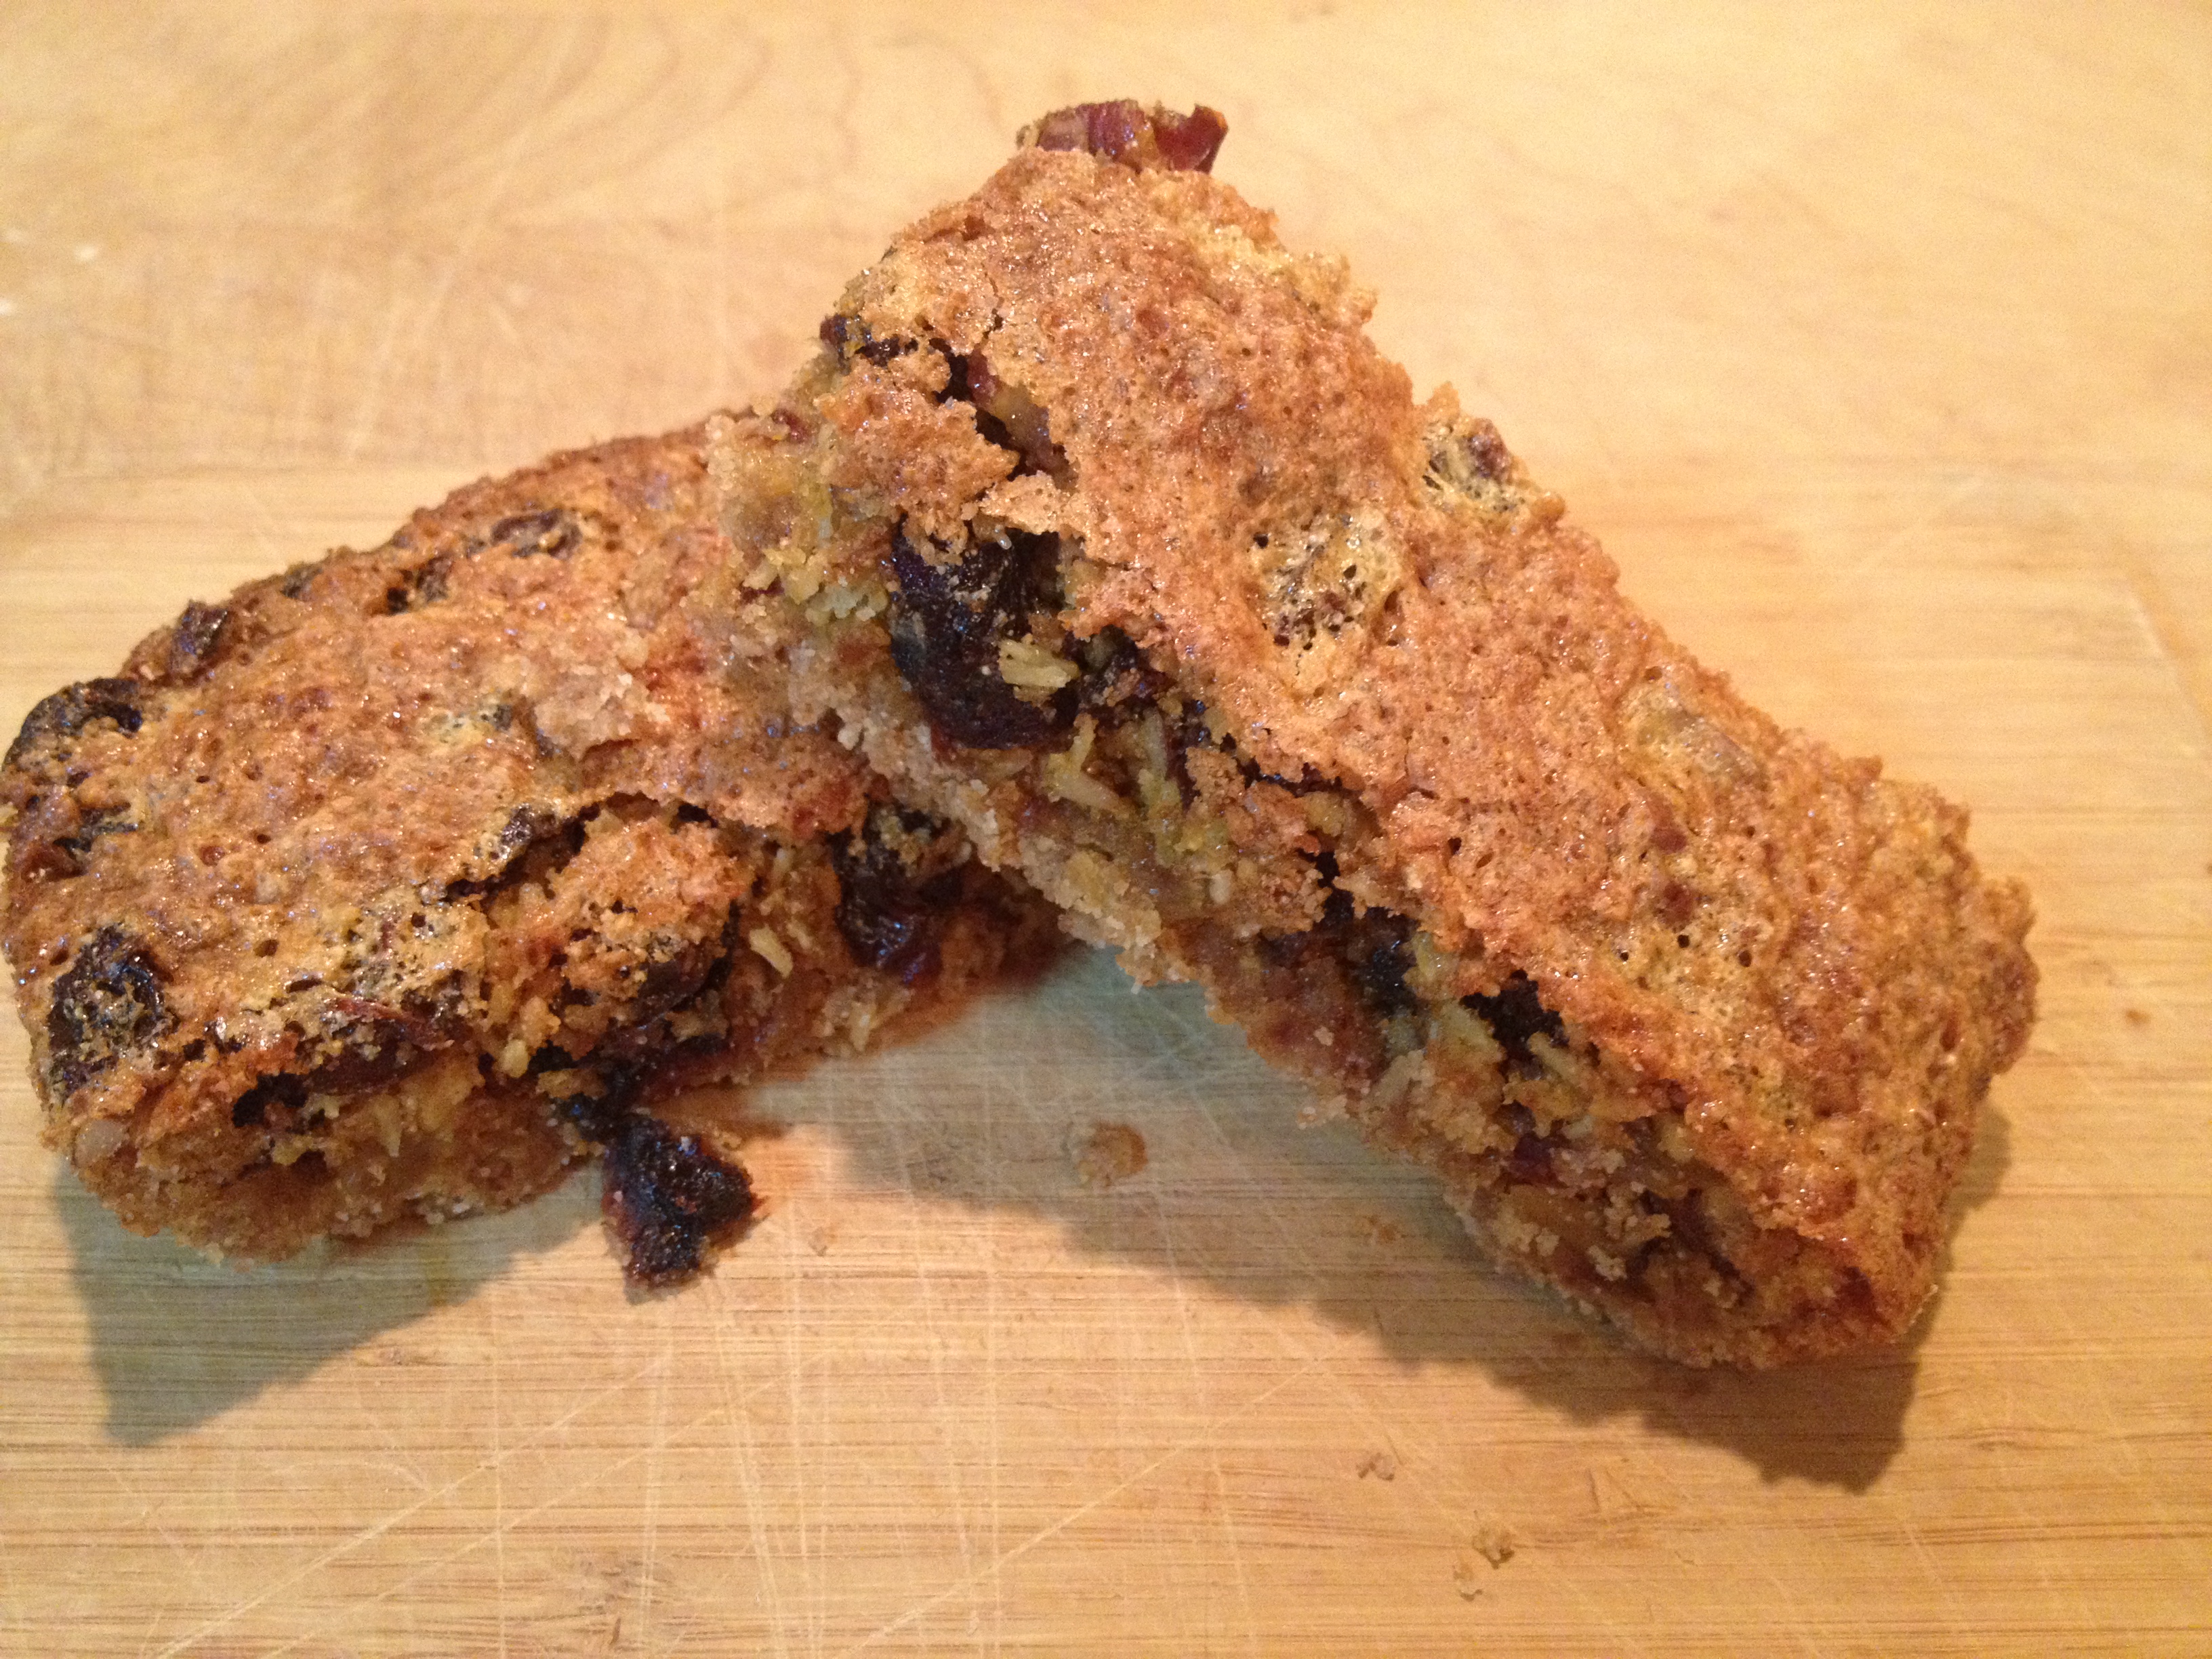
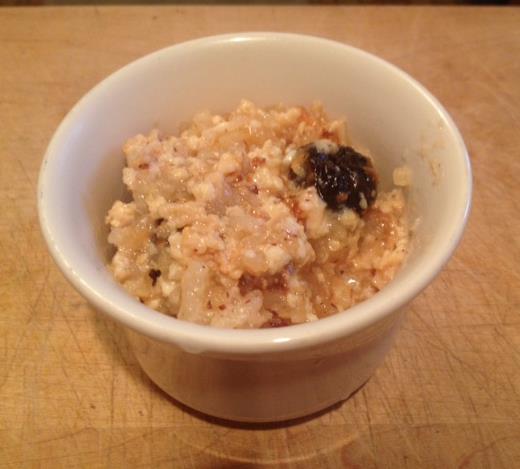
10. Cool and cut bars with a sharp knife, have to cut through the dried fruit.

Makes about 2 dozen bars, depending of the size you cut them!

These bars stay together, are chewy and not overly sweet.   They were a huge hit in our house and I think they will be in yours!  They freeze well.

Digiprove sealCopyright secured by Digiprove © 2015
Posted in Lunch, Recipes, Snacks | Tagged , , , | 2 Comments

How To Tissue Paper Paint A Room

It has been almost a year since I had a bathroom put in downstairs and until this past weekend it was just the sheet rock!  I knew what I wanted to do, had the paint and the tissue paper, but for some reason I thought it would be a much bigger project than it turned out to be.  I also thought that I would not be able to do it and had a friend, who is a painter, and say she would come over and help – BUT … our schedules were hard to coordinate.  So this past weekend I took the plunge, had my friend give me some pointers, and then off to painting.

I prepped everything, got my painting clothes on, turned on some upbeat music and off I went.  Stella thanked me afterwards for painting the bathroom (and yes she did help some).  Why did she thank me you ask?  She has been wanting to move to the downstairs bedroom and one of the parameters that was put on the move was that the bathroom had to be done before she made it hers.

I really liked the way it turned out and I think it adds a lot to such a small bathroom instead of just smooth walls.

Tissue Paper Painting

Tissue done

Items Needed

Paint
Brushes
White tissue paper (quantity depends on the size of your room)
Painters tape
Disposable gloves (optional)

Before

Before

I used a little less than 30 sheets of 20″x20″ tissue paper.

1. Prep your tissue paper:
* Tear the edges of each sheet
* Crumple the paper up and then flatten
* Tear the tissue paper into some large and some small pieces

Tissue paper

Tissue tear

Tissue crumpled

2. Tape any edges you need to, take items off the walls, put a paint cloth down.

Tissue tape

3. I used a paint brush for the whole bathroom. I had thought about using a roller, but found that the paint brush work really well.  Paint 1 small section of your wall.

4. Press the tissue paper on to the wet paint.

Tissue on wall

5. Paint over the tissue paper, being careful not to tear the paper.  You want to get all the air bubbles out.

Tissue paint

6. Repeat steps 3 – 5, until you have completed your room.

Tissue close

It is that simple and you get a really nice texture on the walls.  Many of the tutorials say to overlap the tissue paper so you have no flat spots on your wall – I want some flat parts on my wall, but it is your preference.

Digiprove sealCopyright secured by Digiprove © 2015
Posted in Crafts, Homesteading | Tagged , | 3 Comments

Nutritious, Delicious, and Hearty Kale Soup

This recipe came from mercola.com.  This is a great site, full on wonderful information and you can sign up to receive their e-newsletters.  When I saw this recipe in the e-newsletter I wanted to make then and there, but alas I did not have any kale in the house.  The next day the chicken broth came out of the freezer to start defrosting and off to the store I went!

One line from this recipe, got me to thinking and wondering… “Chop garlic and onions and let sit for 5 minutes to bring out their health benefits.”  I had never heard this before and wondered why is this so.  Whenever I do use onions and garlic – I  cut them and let them sit before adding them to the recipe so I guess I was doing it “right” without even knowing it, but again why is this so?  Off to do some research and find the answer.

This is what I found out:  The substances in both garlic and onions that make them smell so strongly are also what makes them strong disease fighters.  The strong smell is sue to phytochemical called allicin and organosulfur compounds and these are the compounds that scientist thing show disease fighting actions.  When you chop, crush, mince garlic and onion the cells are ruptured and releases the alliin and alliinases allowing them to mingle and enhance the healing properties of both the onion and garlic.  That is why you need to let them sit at room temperature for 10 – 15 minutes before cooking.  The more you cop, cut, etc the more health benefits and the stronger the smell the better!

Enough science, let’s get cooking!

We both LOVED this soup.  With some homemade bread, this made for the perfect dinner or lunch!  Another soup to add to Stella’s list – yeah!!!!

Super Energy Kale Soup

The steam kept fogging the lens!

The steam kept fogging the lens!

Ingredients

1 medium onion, chopped
4 cloves garlic, chopped
5+ cups chicken, bone or veggie broth (I used chicken broth)
1 cup carrots, diced into 1/4″ inch cubes
1 cup diced celery
2 medium sized red potatoes, diced into 1/2″ cubes
3 cups kale, rinsed, stems removed and chopped very fine
2 tsp dried thyme
2 tsp dried sage
Sea salt and pepper to taste

1. Chop garlic and onions and let sit for 10 – 15 minutes to bring out their health benefits.

Kale ingredients

2. Heat 1 Tbl broth in a medium soup pot.

3. Sauté onion in broth over medium heat for about 5 minutes stirring frequently.

4. Add garlic and continue to sauté for another minute.

Kale onion

5. Add broth, carrots and celery and bring to a boil on high heat.

Kale veggies

6. Once it comes to a boil reduce heat to a simmer and continue to cook for another 5 minutes. Add potatoes and cook until tender, about 15 – 20 minutes more.

Kale potato

7. Add kale, thyme, sage and salt & pepper to taste, cook another 5 minutes. If you want to simmer for a longer time for extra flavor and richness, you may need to add a little more broth.

Serves 4

Nutritious, Delicious, and Hearty Kale Soup

Prep Time: 20 minutes

Cook Time: 30 minutes

Total Time: 50 minutes

Yield: 4

Ingredients

  • 1 medium onion, chopped
  • 4 cloves garlic, chopped
  • 5+ cups chicken, bone or veggie broth (I used chicken broth)
  • 1 cup carrots, diced into 1/4" inch cubes
  • 1 cup diced celery
  • 2 medium sized red potatoes, diced into 1/2" cubes
  • 3 cups kale, rinsed, stems removed and chopped very fine
  • 2 tsp dried thyme
  • 2 tsp dried sage
  • Sea salt and pepper to taste

Instructions

  1. Chop garlic and onions and let sit for 10 - 15 minutes to bring out their health benefits.
  2. Heat 1 Tbl broth in a medium soup pot.
  3. Sauté onion in broth over medium heat for about 5 minutes stirring frequently.
  4. Add garlic and continue to sauté for another minute.
  5. Add broth, carrots and celery and bring to a boil on high heat.
  6. Once it comes to a boil reduce heat to a simmer and continue to cook for another 5 minutes. Add potatoes and cook until tender, about 15 – 20 minutes more.
  7. Add kale, thyme, sage and salt & pepper to taste, cook another 5 minutes. If you want to simmer for a longer time for extra flavor and richness, you may need to add a little more broth.
Schema/Recipe SEO Data Markup by Zip Recipes Plugin
http://simplyrurban.com/?p=8647

Digiprove sealCopyright secured by Digiprove © 2015
Posted in Recipes, Soup | Tagged , , , , | 3 Comments

Bulky Yarn Ribbed Knitted Hat

I really became attached to a particular hat this winter and pretty much wear it all. the. time!  I even, for the most part wear it in the house!  I decided with winter dragging on that a new, bright colored hat might be a great project.  I found some beautiful yarn, bright and sparkly.  I have a hat pattern for about 10 years now that I wanted to knit, but never seem to get around to it – well the time was now!  With all my hair it is not the easiest thing to find hat that fit me just right – this hat knits a little big and does not fit my head snugly, which I prefer.  I do really like the pattern and it will make for a good spring transition hat.

Knitted Hat

Wanted to make it fun while Stella was taking photos!

Wanted to make it fun while Stella was taking photos!

Items needed

1 skein bulky yarn
Size 11  (16″) circular needles
Size 11 double pointed needles
Marker
Darning needle

Abbreviations:

SSK (slip, slip, knit) – slip 2 sts, one at a time, as if to knit. Slide the left needle through the front loops of these two stitches, from left to right and knit them together from this position.

K2Tog: Knit 2 stitches together as one.

Brim of Hat

1. Cast on 64 stitches.

2. Place your marker on the needle and join the stitches, making sure not to twist.

Rounds 1 & 3: Purl
Rounds 2 & 4: Knit

Hat brim

Rib Pattern

Round 5: K1 *P2, K2*, repeat to last 3 stitches, end P2, K1.
Repeat round until hat measures 5 1/2″, this will just cover ears, if you want it to cover all of your ears, adjust to desired length.

Hat ribbing

Top Shaping – when necessary changed to double pointed needles.

Round 1: *SSK, P1, (K2, P2) 2x, K2, P1, K2tog*, repeat around

Round 2: *K1, P1, (K2, P2)2x, K2, P1, K1*, repeat around

Round 3: *SSK, (K2, P2) 2x, K2, K2tog*, repeat around

Round 4: *K1, (K2, P2) 2x, K3*, repeat around

Round 5: *SSK, K1, P2, K2, K1, K2tog*, repeat around

Round 6: *(K2, P2)2x, K2*, repeat around

Round 7: *SSK, P2, K2, P2, K2tog*, repeat around (32 stitches)

Round 8: *K1, P2, K2, P2, K1*, repeat around

Round 9: *SSK, P1, K2, P1, K2tog*, repeat around

Round 10: *K1, P1, K2, P1, K1*, repeat around

Round 11: *SSK, K2, K2tog*, repeat around (16 stitches)

Round 12: *SSK, K2tog*, repeat around (8 stitches)

Finishing

1. Cut yarn.

2. Using a darning needle, thread yarn end through the remaining 8 stitches.  Pull together tightly and fasten off.

Hat taking off

3. Work in all yarn ends.

Hat1

If you need to block your hat: soak in lukewarm water until thoroughly wet.  Roll in towel to remove excess water, then shape and air dry.

Digiprove sealCopyright secured by Digiprove © 2015
Posted in Crafts, Knitting | Tagged , , , | 2 Comments

Kids Craft Corner: Make Silly Putty

Stella had a project that was due in school – so off to the internet she went to figure out what it would be.  The project was how to do something and then they have to present the steps in class.  Last year she made minions and they were so cute, this year she decided to make silly putty.  I love that she is so creative, but not that she is not that great with cleaning up after herself!  Something to work on and I take lots of time outs!

Can’t wait to hear how she did not her presentation.  She did a run through with me as I photographed and asked questions – she did really well and only ran a few seconds over time!

Make Your Own Silly Putty

Silly putty done

Items Needed

Plastic bowl
Spoon
Small glue bottle
1 Tbl borax
1 1/2 cup warm water
Food coloring (optional)

Note:  Stella had gloves on her list of items needed.  But as we found out – the silly putty stuck to the gloves and that batch was a dud.  So even though you see a photo with gloves on, don’t use them.  If you use food coloring, just wash your hands right away to get as much off as possible.

1. Pour the glue into your bowl.

Silly putty glue

2.  Pour the water into the glue bottle, put the top back on and shake.  You want to get all the glue out of the bottle.  Pour out into the bowl and mix the water with the glue.

Silly putty water

3. Add the borax and stir.  A glob will start to form.

Silly putty borax

silly putty blob

4. If using food coloring add that now.  You want to make sure you drop some coloring into the water and onto the “blob”.  Mix well with your hands.

Silly putty coloring added

Silly putty stir coloring

Silly putty mixing with hands

5. Take the silly putty out of the water and there you go!

To store you silly putty, use a zip lock sandwich bag.

Her posters:

Silly putty what you need

Silly putty how to

Silly putty summary

Digiprove sealCopyright secured by Digiprove © 2015
Posted in Kids Crafts | Tagged , | 2 Comments

Crock Pot Rice Pudding

Rice pudding is one of my favorites and with this recipe I need to be careful!  This recipe is so easy I could see myself putting this together in the morning for rice pudding every night!  I don’t think my waste-line would appreciate that or would my blood sugar level!  But for a once in awhile treat – this is perfect.

Because you use arborio rice, it is almost like a dessert risotto, so creamy.  I really think the lemon zest makes this perfect finish to it.  Stella and I ate it hot, warm and cold and to tell you the truth I loved it each and every way!

Crock Pot Rice Pudding (recipe from Organic Authority)

Rice pudding served

Ingredients

3/4 cup granulated sugar
1/2 cup Arborio rice
1/4 cup dried cherries
2 Tbsp. ground crispy almonds
1 tsp. grated lemon zest
Pinch salt
4 cups organic milk
Heavy cream (optional)
2 organic eggs
1 tsp. vanilla extract

1. Grind your almonds – I use a coffee grinder- and grate your lemon.

Rice pudding almonds

Rice pudding lemon

2. Add sugar, rice, cherries, almonds, lemon zest, and salt to your crock pot. Combine well with a wooden spoon.

Rice pudding dry

3.In a large bowl, whisk together milk, eggs, and vanilla extract. Add to your crock pot and combine. If you want a thicker or richer rice pudding, you could use heavy cream instead or a combination of milk and heavy cream (which I did).

Rice pudding wet

4. Cover and cook on high for 4 hours. The rice will be tender and set into a pudding.

Rice pudding ready to cook

Rice pudding done

Serves 6.  If you use organic ingredients, it breaks down to about $1 per serving – tasty and economical!

Digiprove sealCopyright secured by Digiprove © 2015
Posted in Dessert, Recipes | Tagged , , , | 3 Comments

Kids Craft Corner – Make A St. Patrick’s Day Wreath

It seems with all the snow that we would have A LOT of extra time for crafting, baking, creating… but the time has flown by!  Our days have been filled, not sure with what exactly, but the next thing I know another week has passed.  With St. Patrick’s day approaching I figured it was a good time to re-post this!

Originally posted on March 14, 2012

Yes, we made another wreath, but this time it was for St. Patrick’s day.  I love making crafts with Stella – never know exactly how it will turn out until we are done.  We made this one a little smaller, using one of the straw wreaths I picked up at Goodwill for $0.99 – Stella asked why we were not using a bigger wreath like our Valentine wreath – go figure, the things she remembers.  This took a couple of days to complete – only because Stella had such a busy schedule!

St. Patrick’s Day Wreath

st patrick day wreath

Items Needed

Straw wreath – any size
Green ribbon (2 – 3 spools, depending on size of wreath)
Beads
Glue
Glue gun
Felt
Green wool roving
Felting pad
Felting needle
Thread and needle
Shamrock cookie cutter

1. Unwrap the straw wreath and wrap with green ribbon.  I used a glue gun to secure the ribbon.


2. If you are going to do a felted shamrock to hang in the middle – get your supplies set up (wool roving, felting needle, felting pad and shamrock cookie cutter).


3. Stuff the cookie cutter with the wool roving and then using the felting needle felt the wool.  Once the wool is felted take the shamrock out of the cookie cutter and shape the shamrock with the felting needle – this also felts the wool more and makes it firmer.


4. Double thread a needles, preferably with green thread and thread through the top of the shamrock.  String as many beads as you will need to hang the shamrock on the inside of the wreath.  Secure the shamrock to the top of the wreath (on the inside).


5. Trace shamrocks on green felt.  We used the firm felt and I was able to find felt that was made from post consumer plastic.  Cut your shamrocks out.

7. Decide where you want them on the wreath and then secure with glue.  Allow to dry.  We also found a “jeweled” shamrock from an old hair tie of Stella’s so that was also used on the wreath.

8.  Using either green ribbon and a string on beads attach a hanger to the wreath.

9. Hang on your door or some place in your home.  Hopefully all those shamrocks will bring luck to your home!

Digiprove sealCopyright secured by Digiprove © 2012-2015
Posted in Kids Crafts | Tagged | 3 Comments

Mexican Caviar

This is such an easy dip to make and not as bad for you as some. As mentioned in the Italian Dressing post – I really had a craving for this and just had to make it!  All the different flavors really go well together and for the most part kids like this one (good way to get some veggies in them!).  If you have any leftovers, which does happen on occasion – it makes for a great snack during the day!

The final outcomes looks like you spent more time putting this together than you actually did!  Great for potlucks, parties and really any get-together!

Mexican Caviar

Mex Cav done

Ingredients

2 Roma tomatoes (or any nice ripe tomato)
1 Bell pepper (green or red)
1 small onion
1 bunch cilantro
1 can shoepeg corn (or you can use fresh or frozen corn)
1 can black beans or black eye peas
Homemade Italian dressing
Mexican seasoning (cumin, cayenne)

NOTE: I used corn that I had preserved from the summer.  I just let it defrost and get to room temperature, which allowed any water to drain.

1. Drain and rinse the corn and the beans, add to the bowl.

2. Chop fine: tomatoes, pepper, onion and cilantro and place into a bowl.

Mex Cav veggies

3. Make the Italian Dressing or if you are pressed you can use store bought Italian Dressing, add the extra Mexican spices to the dressing.

Mex Cav ready to mix

4. Add the dressing to the bowl and mix all together.

SO EASY!

This is best if it sits for several hours or better yet overnight in the refrigerator.  Before serving mix well.  Goes best with your favorite tortilla chips!

Digiprove sealCopyright secured by Digiprove © 2015
Posted in Recipes, Sides, Snacks | Tagged , , , , , | 2 Comments

Make Your Own Italian Dressing

Ok- so we are sort of on a homemade dressing kick, but in our house that is a good thing!  I love when I have a recipe that calls for something store bought, but I can make it from scratch in my kitchen and the best part – it tastes so much better!!

We were away visiting family and someone brought a bean, corn, spice dip and it made me remember that I had a recipe for Mexican Caviar and that is when the craving started and wouldn’t let go.  When we came back from our trip we had our monthly game night scheduled and this one was to be appetizers – I knew exactly what I was making, but first I had to make some homemade Italian dressing.  Don’t worry the Mexican Caviar recipe is my next post!

Italian Dressing

Italian done

Ingredients

3/4 cup olive oil
1/4 cup red wine vinegar
2 – 3 cloves garlic, minced
Sea salt and pepper to taste
1 1/2 tsp dried basil
1 tsp minced red pepper
1 Tbl Parmesan cheese

1. Process the oil and vinegar together in a blender or in a jar with a stick blender or shake vigorously in a jar.

Italian oil and vinegar

Italian blending first

2. Add the salt and pepper, spices and cheese.

Italian ingredients

Italian spices added

3. Process just long enough to mix together.

4. Let sit for 30 minutes for flavors to meld.

5. Before serving whisk lightly or shake bottle.  You will absolutely fall in love with this Italian dressing.  It just bursts with flavor and just so rich with goodness!

Digiprove sealCopyright secured by Digiprove © 2015
Posted in Condiment, Recipes | Tagged , , , | 1 Comment

Knitted Pull Through Wrap

A couple of years ago I received several skeins of hand dyed wool yarn.  Really beautiful yarn and I wanted to find the perfect thing to knit for myself.  I came across this pattern on Favecrafts.com and this past summer I started knitting.  This was not a knitting project that I could do mindlessly while watching a movie – so it took time, ok a lot of time!  But to be fair to myself I knitted many other things between the summer and now, picking this project up in-between other projects.  I finished knitting it about a month ago and it has sat on the back of my couch waiting to be blocked – why did I wait so long?!  I don’t know, because blocking takes pretty much no effort.  But having time with the snow outside – I decided it was time!  I love it.

Knitted Pull Through Wrap (original pattern)

Shawl done

Items Needed

Size 8 round needles
Size 9 round needles
3 – 4 skeins
Cable needle
Darning needle

Approximate size:Wrap measures 17½” x 70” (mine was about 65 inches long)

Gauge: 16 sts = 4”; 29 rows = 4” in Seed st with larger needles. CHECK YOUR GAUGE.

Abbreviations:

C4B = Slip next 2 sts to cable needle and hold in back, K2, K2 from cable needle.
C4F = Slip next 2 sts to cable needle and hold in front, K2,K2 from cable needle.

How To:

With smaller needles, cast on 75 sts. Work in Seed st as follows:

Row 1: (Right Side): K1, * P1, K1; repeat from * across.
Rows 2-6: Repeat Row 1.
Change to larger needles

Pattern
Row 1: (Right Side): (K1, P1) 6 times, (P2, K5, P3, K5, P2) 3 times, (P1, K1) 6 times.
Row 2: (K1, P1) 6 times, (K2, P4, K5, P4, K2) 3 times, (P1,K1) 6 times.
Row 3: (K1, P1) 6 times, (P2, K13, P2) 3 times, (P1, K1) 6 times.
Row 4: (K1, P1) 6 times, (K2, P4, K1, P3, K1, P4, K2) 3 times, (P1, K1) 6 times.
Row 5: (K1, P1) 6 times, (P2, C4B, K1, P3, K1, C4F, P2) 3 times, (P1, K1) 6 times.
Row 6: Repeat Row 2.
Row 7: Repeat Row 3.
Row 8: Repeat Row 4.
Repeat Rows 1-8 for Seed st and Cable patterns until 10” from beginning, end wrong side row.

Shawl pattern

Divide For Slits
1. Keeping continuity of patterns, work across first 29 sts; drop yarn and attach 2nd skein of yarn, work across next 17 sts with 2nd skein of yarn; drop yarn and attach 3rd
skein of yarn, work across last 29 sts with 3rd skein of yarn.

2. Working each section separately and staying in pattern, work slits for 6½”, end with a wrong side row.

Shawl openings

3. Now work across all sts with one skein of yarn until 69” from beginning.

4. Change to smaller needles and work 6 rows of Seed st across all sts. Bind off in pattern

Finishing

1.Weave in all ends.

2. Wet rap thoroughly, squeeze out excess water.  Lay on a towel and pin to block.

Shawl pinned 1

Shawl pinned 2

3. Allow to dry completely.

Digiprove sealCopyright secured by Digiprove © 2015
Posted in Crafts, Knitting | Tagged , , , | 2 Comments