Honey-Spiced Peaches

honey peaches peaches

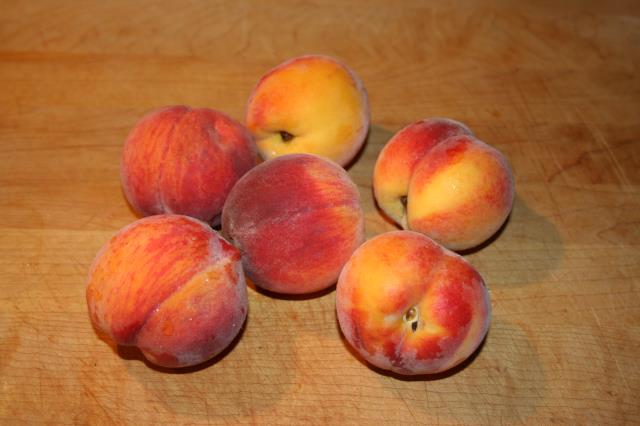
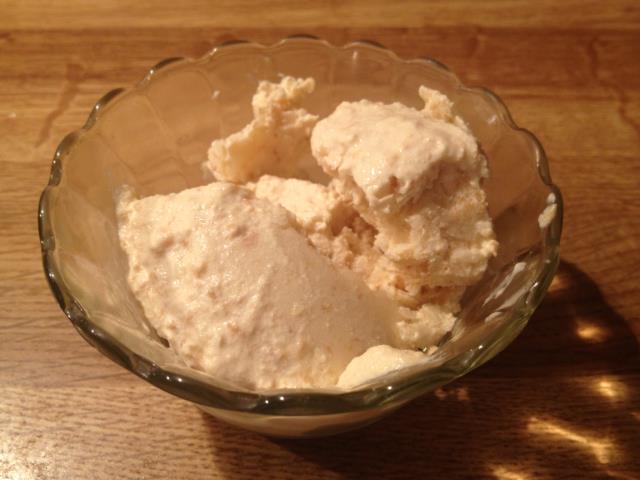
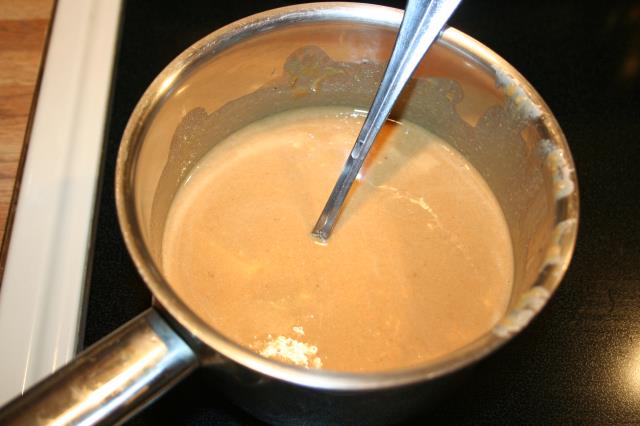
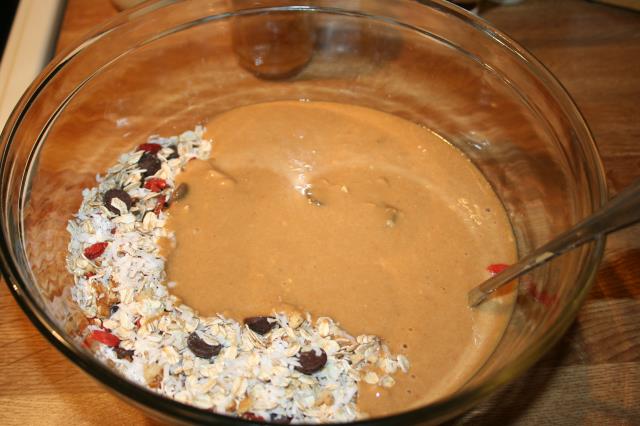
Peaches, peaches everywhere.  I am peached out!  I sliced and froze them, baked with them and we ate them whole and in ice-cream – but there were still some left – what to do?  I didn’t want to make jam – it has been too hot lately to do any lengthy canning – so I took out my Ball Blue Book Guide to Canning and looked up peaches.  I found a recipe for Honey Spiced Peaches and then remembered one of my aunt’s had mentioned she had made this recipe.  Decided why not give it a try.

Honey-Spiced Peaches

honey peaches canned

Ingredients

8 pounds small peaches
1 cup sugar (I used somewhere between ½ up and ¾ cup)
4 cups water
2 cups honey
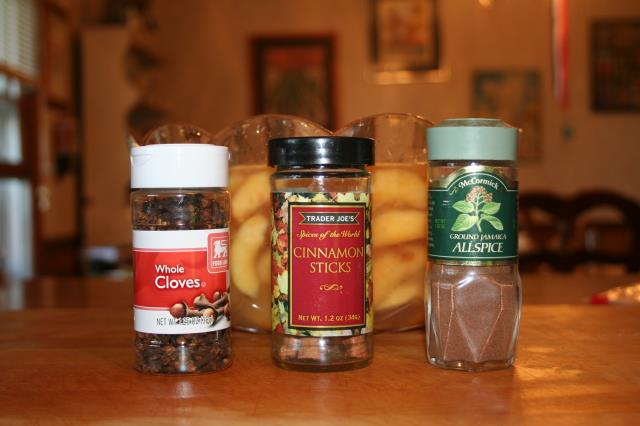
Cinnamon sticks (1 for each jar)
Whole allspice (which I could not find so used ground)
Whole cloves
Lemon juice

Items Needed

Canning jars (either 3 quart jars or 6 pint jars – which I used)
Lids
large sauce pan for syrup
Canning pot and tools

1. Prepare your jars, either by sterilizing in your canning pot or in the dishwasher.

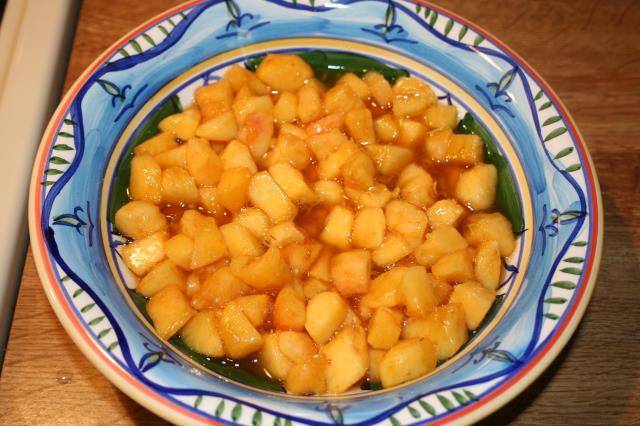
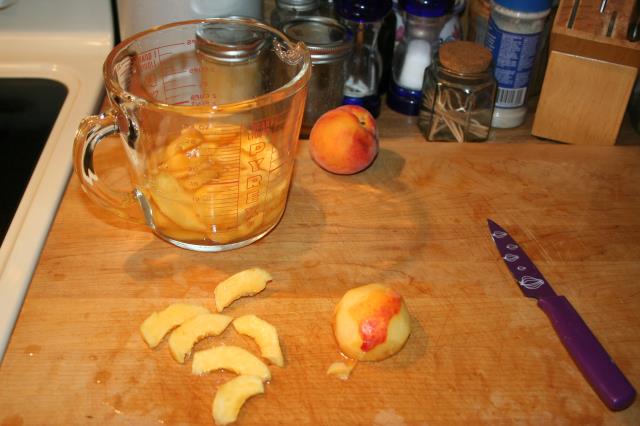
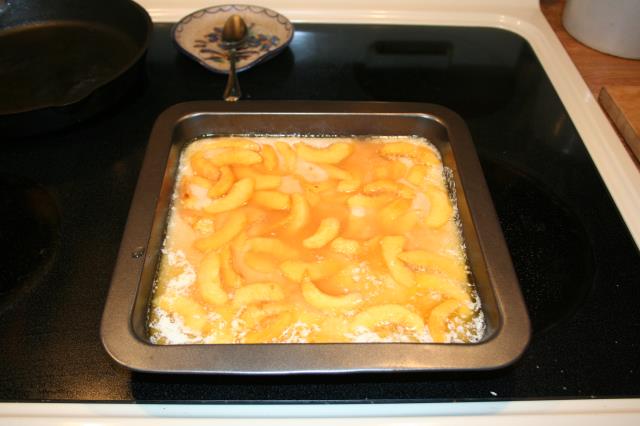
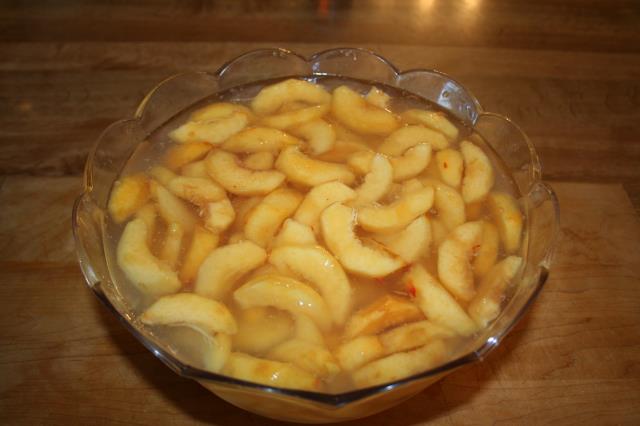
2. Wash your peaches and peel your peaches, placing whole is a bowl of water and lemon juice to keep from browning.  I was so used to slicing my peaches that I automatically did so before I remembered that I did not have to for this recipe – I figured I had already started so I ended up slicing them all.

honey peaches lemon

3. Heat your bath water – you want it boiling by the time you are ready to place your jars in.

4. In a small saucepan heat water with your lids – just heat, but do not boil.  Once they have heated turn the burner off and leave them in the water until ready to use.

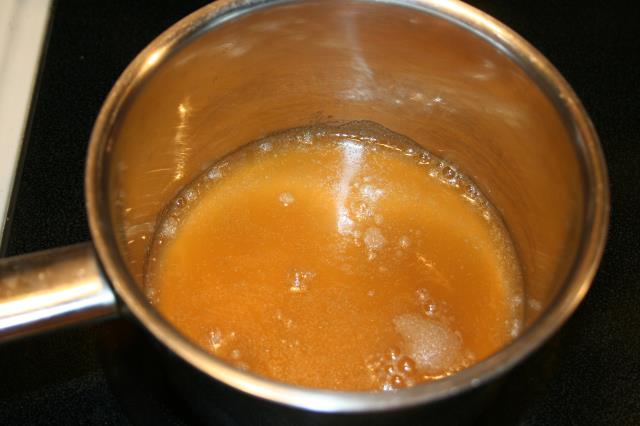
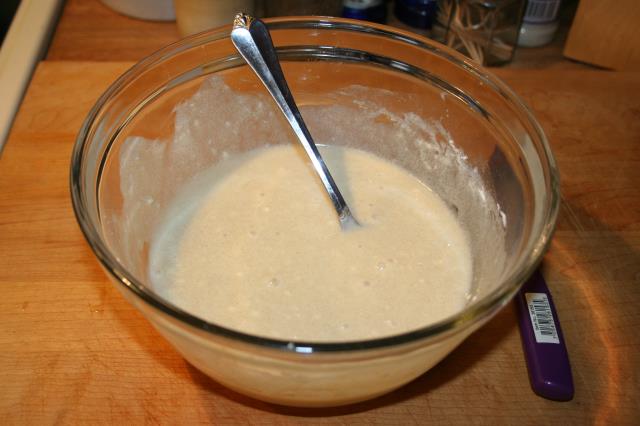
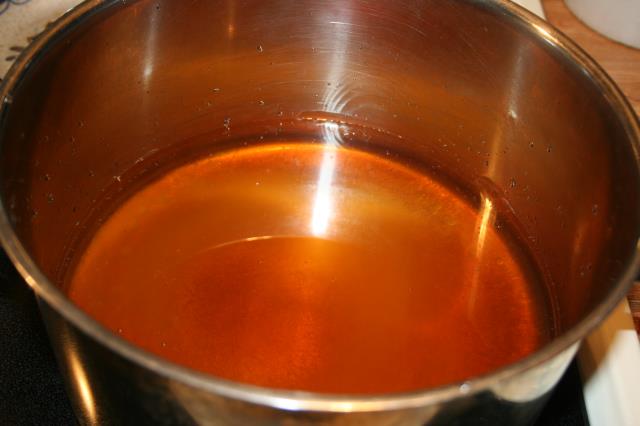
5. Combine the honey, sugar and water in a saucepan – cook until sugar dissolves.

honey peaches syruphoney peaches syrup cooked

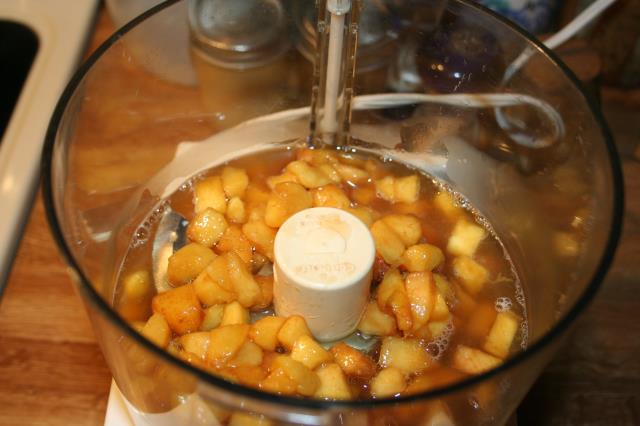
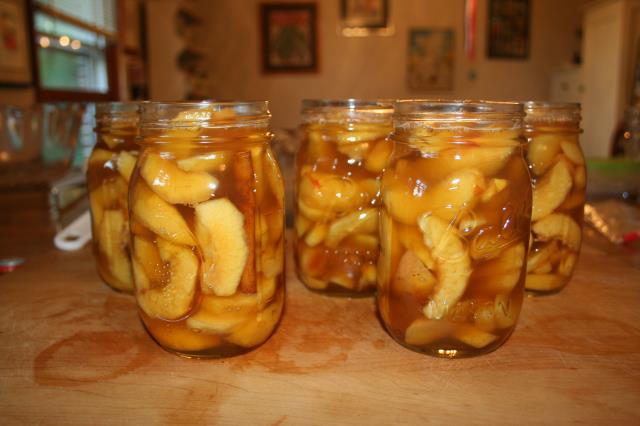
6. Drain peaches and place into jars – pack well.  I stuffed them in, tapped the jar and stuffed more in and still when they were done in the bath water – it looked like I only filled the jars half way.  Really stuff them in there!

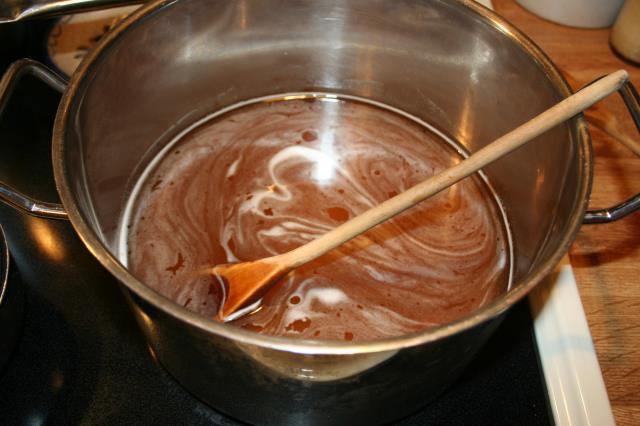
7. Place 1 cinnamon stick, ½ tsp allspice and ¼ tsp cloves into each quart sized jar.  If using pints place 1 cinnamon stick, ¼ tsp allspice and 1/8 tsp cloves in each jar.

honey peaches spices

8. Ladle the hot syrup into each jar, covering peaches and leave ½” head-space.

honey peaches in jar

9. Wipe lids of jars clean, place lid on and seal with ring.

10. Place jars into boiling bath water and process for 25 minutes.

11. Take out and place on dishcloth lined counter top.  Listen for the pop – telling you the cans sealed.  If a jar does not seal, turn it over and leave it for 15 – 30 minutes –turn over and it should be sealed, if not then that is the one you will eat first!

Store in a cool cabinet.  Enjoy – Stella can’t wait for us to open a can and eat them!!

Digiprove sealCopyright secured by Digiprove © 2013
Posted in Canning, Preserving | Tagged , , | 2 Comments

Kids Craft Corner – Cardboard Wallet

I walked into the kitchen to see Stella very focused  – she was writing on a piece of paper.  I took a closer look and she was designing and diagramming the steps to make a wallet out of cardboard and duct tape.  I left her to her work.  A little while later she came down to the basement telling me that she needed a piece of cardboard – I told her that I would have to look for one.  I ended up cutting a top flap from a box and gave it to her.  Stella then went a found a ruler and drew her plan out on the cardboard piece.

Cardboard Wallet

Cardboard done

Items Needed

Cardboard
Box cutter
Ruler
Pencil
Different color duct tape
Scissors

Cardboard drawing

1. Draw your pieces on a piece of cardboard.  Stella’s wallet has 3 sections, so she drew out 6 rectangles or 3 sizes.

Cardboard ruler

2. Cut your pieces out.  Depending on the thickness of the cardboard will determine whether you can use scissors or will need an exacto knife or box cutter.  If you using a box cutter – either have an adult cut it or have an adult supervise cutting.

Cardboard cutting

3. Tape each section together – for a total of 3 sections.

Cardboard materialsCardboard tapingCardboard taping 1

4. Tape your 3 sections together to make your wallet.

Cardboard done 1

I was really impressed with her creativity and the fact that she drew it all out.  I only helped with the cutting of the pieces with a box cutter.  Stella did all the rest of it – figuring out how to tape it together so that it would still open and be able to hold items inside.  She did a great job!  I see many other projects coming from her!

Digiprove sealCopyright secured by Digiprove © 2013
Posted in Kids Crafts | Tagged , , , | 2 Comments

Crop Mob?

Crop mob sunflowerLiving in a rural area – I have found that I have become more isolated.  This is not necessarily by choice, but because of distance to others and the amount of work it takes to keep up a house and property, which does not leave much time for other things.  Back in the day community was found in barn raising, town socials and church gatherings and when your family was in need – the community stepped up to help out in all sorts of ways.

In our community I have family, friends and co-workers – and all are willing to lend a helping hand, give advice/suggestions, barter for goods and services and to be there when needed – but there are still times when a community coming to help is so appreciated and so helpful.  I was lucky to have this type of help with my move – many hands made the work so much easier and more enjoyable.

Recently a co-worker got way behind on her property upkeep – so 5 of us showed up at her house one morning and worked for 3 hours!  It was amazing how much was accomplished and the time just flew by.  Out of this came the Crop Mob.

Crob Mob weedingOur crop mob is made up of 5 families since there were 5 months Crop mob paintingof good weather left to the year. Each family gets one 3 hour segment of time and then gives the same to the other families.  The host family put together a list of tasks that needs to get done and then provides a meal for all who worked. If this is successful, we will add more families next year and do more months!

Crop mob wood

Our first gathering was this past Sunday.  There were 11 of us, 9 adults and 3 children.  We weeded, painted a room, painted doors, gathered wood from several locations and stacked them for future use and put up siding.

Crop mob siding

After we had finished the jobs – we all gathered to share a meal.  We had soup, corn bread and polenta casserole – followed by ice cream.  We sat and talked and enjoyed each others company almost as long as we worked.  The kids played and helped build a fire so we could roast marshmallows. It was a magical day – much shared and much given in love and respect of each other and what we are all trying to accomplish with our lives.

Crop mob kids

Next month it is at our house – Stella has already started asking what we are going to make for the meal and what projects are we going to tackle.  One of the children at the crop mob, is Stella’s age and will be going to the same school as her this coming school year – so nice for her to meet someone prior to starting a new school!  I wanted to share this concept – well, because I think it is a great idea! Coming together to get jobs done, giving and receiving, helping others and nourishing one another with work, friendship, community, accomplishment and good food!

Digiprove sealCopyright secured by Digiprove © 2013
Posted in Homesteading, Life | Tagged , | 5 Comments

Is It Hot Outside? Cool Off With Peach Ice Cream

At the end of last summer I purchased and ice cream maker, but we never used it!  I have always wanted one and after taking a class with Sally Fallon Morell – I really wanted to make ice cream from scratch and to stay away from the store bought and the chemicals in them.

For some reason at the end of last summer and fall, even with the best intentions, we just never got around to making ice cream.  This summer with all the fruit in the house of late – I decided it was time to take the maker out of its box.  Peach ice cream was on the horizon.  I did look at the recipes from the recipe book that came with the maker, but went back to my original thought and used the Nourishing Traditions recipe.

There is not “sugar” in this recipe, but really there is since you use maple syrup and you have the sugar in the fruit.  I really liked this ice cream, Stella and her friend did not – now I have a lot of ice cream to eat!  Oh, the hardship!!

I cream served

Peach Ice Cream (from Nourishing Traditions cookbook)

Ingredients (makes 1 quart)

2 cups fresh fruit (I used peaches)
2 Tbl lemon juice
4 Tbl maple syrup
1 tsp gelatin
2 egg yolks, lightly beaten
2 cups heavy cream, preferably raw, not ultra-pasteurized

NOTE: Prior to making the ice cream recipe below – read your directions for your ice cream maker – for mine I have to put the bowl in the freezer at least 12 hours before using.

1. Mix the maple syrup with the lemon juice and toss with fruit.  Cover and let stand for 2 hours.

I cream peaches soaking

2. Drain the fruit and combine 3/4 cup of the drained juice (I did not have quite enough – so I added water) with the gelatin.  Heat gently until the gelatin is dissolved.

I cream gelatinI cream dissolved

3. Place the fruit in a food processor with the gelatin mixture and process until desired texture.

I cream peachesI cream peaches processed

4. Pour the fruit mixture into a bowl and stir in the remaining ingredients.

Love the color of these yolks!

Love the color of these yolks!

I cream in bowlI cream mixed

5. Pour the mixture into an ice cream maker and process according to the directions.

I cream maker

Store the ice cream in an airtight container in the freezer.  Take out of the freezer and let stand about 10 minutes, to soften, serve and enjoy!  Perfect on a hot day!

Digiprove sealCopyright secured by Digiprove © 2013
Posted in Dessert, Recipes | Tagged , | 3 Comments

Make Your Own Hair Gel Using Flax Seeds

A couple of weeks ago, my co-worker and me were having a discussion on home product conditioners.  The conversation was around how to keep knots out of hair – I suggested using mayonnaise, olive oil or coconut oil.  My co-worker decided to try mayonnaise, but it was hard to get it all out of her hair.  She did some research on other options and came across flax seed hair gel. She came into work and told me about it – I was intrigued.  She has finer hair and thought it would be too heavy for her.  I went to the internet and did some research – reading fantastic review after fantastic review and decided to give it a try.  Many recipes suggest adding aloe vera gel, honey or essential oils, but I decided to keep it basic at first and see how it worked.

According to many website, flax is very beneficial for your hair and your pocket book- these include:
~leaves hair soft, shiny and moisturized
~promotes hair growth
~gives curls definition
~fast drying
~all natural
~gives hold with no crunchy residue
~cost less than store bought hair gel
~can reuse the flax seeds

Flax Seed Hair Gel

IMG_8320

Items Needed

2 cups water
1/4 to 1/2 cup flax seeds (the more flax seeds the thicker the gel)
Small saucepan
Wooden spoon
Panty hose, cheese cloth or strainer
Airtight container

1. Mix the water and flax seed together in a pot.

IMG_8301

IMG_8304

2. Cook over medium low heat, mixing with a wooden spoon, pretty consistently – but not constant.

IMG_8310

3. You want to bring it to a boil and when a white froth forms on top (looks like egg whites) turn the heat off and allow to simmer, keep stirring.

IMG_8312

4. Pour the the mixture through a strainer, stocking, etc. into your container or I found that a glass measuring cup worked really well.

IMG_8315

5. Wash your pot immediately – if not the gel will harden to your pot and it will almost be impossible to get it off.

6. Let it cool down and add the aloe vera gel and/or essential oils if using.

Keep in the refrigerator between uses. Will keep for up to 3 weeks.

To use: Take a small amount in your hand and distribute through wet hair.  Scrunch your curls or twist you hair for curl.  You will love this!

Digiprove sealCopyright secured by Digiprove © 2013
Posted in Beauty | Tagged , | 2 Comments

Blueberries Overflowing, Blueberry Buckle Time

Along with putting up peaches – I have about 34 pounds of blueberries to put up. I will mostly freeze the blueberries for use over the fall, winter and spring until next blueberry season.  We LOVE blueberries in our house and as they sit out on the counter waiting their turn into the freezer, both Stella and I grab a handful as we pass by.

BB bushesThe local nursery had their blueberry bushes on sale – so I purchased some and planted them in the front of the house.  The BB up closelocation was picked because the soil is more acidic there, thanks to the pine trees growing, the proximity to the house and the dog likes to hang out around that area – good for keeping the deer and other animals away.  There are quite a few that are ripe on the bushes and Stella keeps stepping outside to grab a few fresh off the bush!

This past week my neighbor was wonderful and cut two sections of the front field – my mower has needed some work and I was not able to cut it myself.  I offered to pay him or make a meal, but he said he was happy to do it and nothing was needed in exchange.  He is the best neighbor and after looking at all the blueberries I decided I would make him and his wife a blueberry buckle.  I went to the blog to get the recipe and realized that I had never blogged this recipe and it is a favorite of ours, many friends and made many, many times during blueberry season and other times of the year with blueberries from the freezer. The smell is permeating the house and I write this post and it is simply wonderful!

Blueberry Buckle

BB done

Ingredients

3/4 cup sugar
1/2 cup room temperature unsalted butter
1 egg
2 cups flour
2 1/2 tsp baking powder
1/4 tsp sea salt
1/2 cup milk (preferably whole)
2 cups blueberries

Topping

1/2 cup sugar
1/2 cup flour
1 tsp cinnamon
1/4 cup cold butter

1. Preheat the oven to 350 degrees.

2. Combine the 3/4 cup sugar and 1/2 butter in a bowl – make sure they are well mixed.

BB butter sugar

3. Add the egg to the mixture, beat well.

BB egg

4. Stir in 2 cups flour, baking powder and salt in a separate bowl.

5. Add the flour mixture and milk, alternately to mixture. Beat smooth after each addition.

BB flourBB milk

6. Spread the batter into a greased pan (8×8 or 9″ round).

BB in pan

7. Top with blueberries.

BB berries

8. Mix together the flour, sugar, and cinnamon for the topping.  Cut in the butter until crumbly.

BB toppingBB mixed

9. Sprinkle the topping over blueberries.

BB sprinkled

10. Bake for 45 to 50 minutes.

Digiprove sealCopyright secured by Digiprove © 2013
Posted in Dessert, Recipes | Tagged , | 2 Comments

The Easiest Peach Cobbler

I have been putting up peaches for the past couple of days and I am ready to stop being sticky!   I am down the last bunch and it feels good!   As I putting up some more peaches yesterday I thought I should make a new peach recipe and then I found this recipe for easy peach cobbler and had to try it.  It is one of the easiest recipes I have ever done and the house smelled divine as it was baking.

Easy Peach Cobbler ( http://www.squidoo.com/peach-cobbler-recipe-easy )

P cobbler done

Ingredients

4 Tbl butter
1 cup sugar ( I used a little less)
1 cup milk
1 cup flour
4 – 5 fresh peaches peeled and sliced
1/4 cup water

Note: you can use a can of peaches, if so you don’t need to use the 1/2 cup water.

1. Preheat the oven to 350 degrees.

2. Put the butter in an 8×8 pan and place in the preheating oven to melt.

P cobbler butter

3. In a separate bowl combine the milk, flour and sugar – mix well.

P Cobbler milk

4. In a large measuring cup – measure the half cup of water – place to the side.

5. Peel and slice 4 – 5 medium sized peaches.

P Cobbler peaches sliced

6. When the butter is melted – take the pan out of the oven and let cool slightly.

P Cobbler melted

7. Pour the milk batter over the butter.

P Cobbler milk added

8. Pour the peaches and water in the pan and spread out evenly.

P cobbler peaches added

9. Place the baking dish in the middle of the oven and bake for 45 minutes.

Allow to cool and enjoy!  It is very delicious and I think I would cut the sugar to 1/2 cup the next time that I make it!

Digiprove sealCopyright secured by Digiprove © 2013
Posted in Dessert, Recipes | Tagged | 2 Comments

How To Make A Cake From A Watermelon

I saw a picture of a cake made from a watermelon and had to try it.  How cool a cake that under the frosting is watermelon – FUN!  Of  course when I tried to remember where I saw the photo – I could not for the life of me remember – so I did it by memory and what I thought would work well.

Watermelon Cake

Watermelon done

Ingredients

Seedless watermelon
Fresh Blueberries
Fresh Strawberries
1 pint Heavy whipping cream (full fat)
1 1/2 tsp Vanilla
1 – 2 tsp Sugar or Stevia (I used stevia)
Crispy almonds (optional, but recommended)

1. In a cold glass bowl (place in fridge 30 minutes before, along with the beaters) pour in of whipping cream along with the sugar – mix on low until sugar or stevia is mixed in.

Watermelon whipped ingredientsWatermelon cream stevia

2. Add the vanilla and mix on medium until soft peaks form.  Place in refrigerator.  You can make the whipped cream ahead of time (no more than 1 day) – cover and store in the refrigerator – you will need to hand whipped it again before using.

Watermelon vanillaWatermelon whipped cream

3. Remove the top and bottom from the watermelon and then remove the rind from the middle section.  You want this to look like a tall round cake.

Watermelon wholeWatermelon ends offWatermelon rind off

6. Before icing the watermelon, dab dry with a paper towel – this will help the whipped cream adhere better.

7. Ice the watermelon cake with the whipped cream, sides and top.

Watermelon iced

8. If using the slivered almonds – coat the side of the cake or sprinkle on top.

Watermelon crispy nuts

9. Arrange the fruit on the top of the cake.

Watermelon decorated

Enjoy!! People were so surprised when I cut into it!  It was a hit!!


Digiprove sealCopyright secured by Digiprove © 2013
Posted in Dessert, Recipes | Tagged , | 4 Comments

Build Your Own Compost Bin Using Pallets

Our compost bin, or I should say lack of – since our compost bin is a pile of our kitchen and yard waste covered by cardboard and a couple of rocks.  The pile is in our front field, near where the garden will be next year.  After having the waste strewed across the rest of the field we decided to cover it with cardboard – and that helped – it now stays in one place! I wanted a real compost area, but I wanted to do it as inexpensively as possible.

A local warehouse here will give you their pallets, the ones that they are not going to reuse again – wonderful.  I had 2 pallets already left over from the delivery of shingles when they were putting my new roof on – so I needed 2 more for the first part of the compost bin.  Eventually it will be a 2 part compost bin and will have used 7 pallets.  I went to the warehouse during my lunch and asked what pallets could I take. The guy asked if I had someone else to help me – I said no and that I could do it.  I got another look and then he told me to follow him. I was dressed in a skirt, but I did have my work gloves with me.  When we went outside he asked me what car was mine – told him the Jeep Cherokee – another look.  I backed the car up to the pallets and we loaded the first one – at this point he told me we would not be able to load anymore.. what?!  I told him I thought we could fit 1 or 2 more – another look – but when we were done 3 were loaded.  He wanted to make sure that I had someone at home to help me unload them, which I told him I did – even though I did not.

I went to the local hardware store and bought the other items that I would need to build with: 2 hinges, a latch, heavy gauge wired and pliers to cut the wire.  Total cost of $12.59 and I would not use all of it!

Compost Bin From Pallets

Compost bin closed

Items Needed

Compost bin hardware
4 pallets
Heavy gauge wire
Latch
Hinges
Wire cutters


Note: Many warehouses will give away their pallets, it is either that or through them away.  You can also usually fine them on craigslist.org under free items or materials.

1. Pick your location.

2. Lay out the pallets as you want them. For the sides of the pallet that the door will attach on – place so that the 2×4 sides are facing out – this is where you will attached the hinges and latch.

3. Cut your wire, length will be determined by the thickness of your pallets – I cut mine about 2 feet long.

4. Connect the back and side pallets with wire and the top and bottom.

Compost bin back sideCompost bin wire

5. Connect the hings to the left side 2 x 4 – making sure that they will line up to a place that you can attach them to the door.

6. I placed a spacer under the door when I was lining it up for the hinges and latch.  I did not want it to drag when open.

Compost bin gate spacer

7. Attach the hinges to the door.

Compost bin hinges

8. Shut the door and line up where you want the latch and attach.

Compost bin latch

Your very own compost bin and a very reasonable cost!

Compost bin open

Digiprove sealCopyright secured by Digiprove © 2013
Posted in Building, Crafts | Tagged , , | 3 Comments

No Bake Chocolate Oatmeal Bars

I was invited to my first pot luck in our new home town.  I love get-togethers, but they also give me some anxiety.  When you are new to area and you are getting to know the community and new people and can be a little overwhelming. So as I was getting ready to leave a little tightness in my stomach happened – I would know the host, but would I know anyone else?  I knew one other person there, but a little uncomfortable in the beginning, but that did not last long.  It was nice getting to know people, share in their story, share mine (several times) and share in good food.  I was not sure what to bring, but I had wanted to try a new recipe and that is what I did.

 No Bake Chocolate Oatmeal Bars ( Original Recipe )

No Bake done

Ingredients

1 cup natural peanut butter
1/2 cup honey
1/2 cup coconut oil
2 cups oats
1 cup shredded unsweetened coconut flakes
3/4 cup crushed walnuts or nut of your choice
1/4 goji berries
1 1/4 cup dark chocolate chips

1. Grease a 9×13 pan with coconut oil or butter

2. In a large glass bowl combine the oats, walnuts, coconut flakes, goji berries and chocolate chips – mix.

No bake crushing nutsNo Bake oats

3. In a heavy bottomed sauce pan add the peanut butter, honey and coconut oil.  Stir often and do not let it boil.

No Bake peanut butterNo Bake Melted

4. Pour the heated peanut butter mix into the oats mixture and stir until well combined and the chocolate chips are melted.

No Bake combining

5. Pour the mixture into the grease pan and spread evenly.


No Bake spread6. Cover the pan, refrigerate and allow to harden.

7. Cut into bars.  You need to keep these cool or they will start to melt a little.  They will keep in the refrigerator up to one week, but I doubt they will last that long!

I didn’t hear any complaints – they were quit yummy if I do say so myself!

Digiprove sealCopyright secured by Digiprove © 2013
Posted in Dessert, Recipes | 3 Comments