Mural Painting

Stella is in New York visiting all her buddies and having a great time.  Even though the house is quiet without her – the time is flying by!  I have a list of projects that I wanted to complete in the house and with all the rain we have been receiving lately – I am glad that I have the list.

Stella had a loft bed in New York and not knowing what kind of house we would eventually end up in Virginia – we gave her bed away and I promised her that she could pick out new furniture.  Many furnishing were left in the house and among them was pretty much all the furniture in Stella’s bedroom – a double bed, bench, night stand and a little dressing table and chair.  She loved it all!

Mural designStella was against buying the house we are in and as a consolation to her grief (she is very happy that we bought it, now), I told her that she could paint her room whatever color she wanted and could even paint each wall a different color.  She thought about that and then came to me with a picture she drew of how she wanted her room painted – she wanted a mural!  We went to the paint store, where she spent quite a bit of time picking out samples.

My cousin is an artist and I went to her to help narrow down the color choices and to see if she would be interested in the job.  She helped pick out wonderful colors, that Stella agreed too and she said she would love to do it.
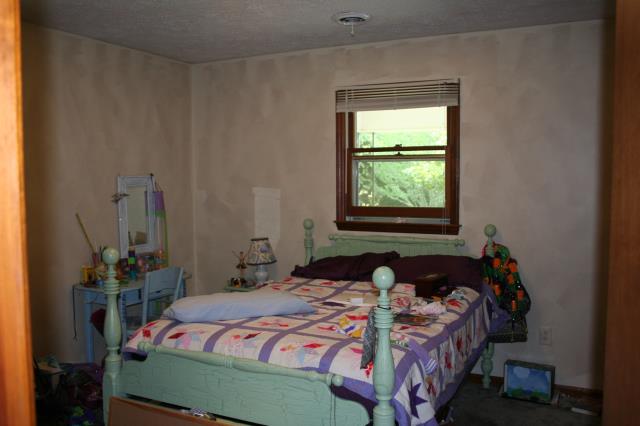
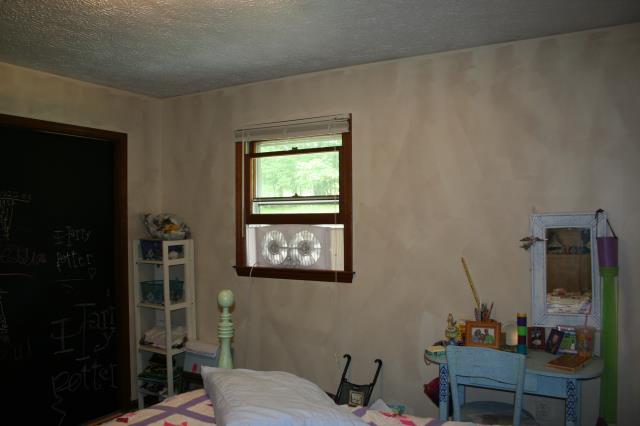
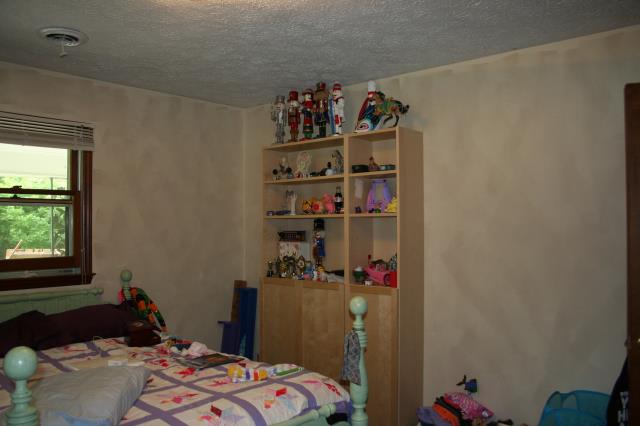
Room Before

Room Before

Mural before 1Mural before 2


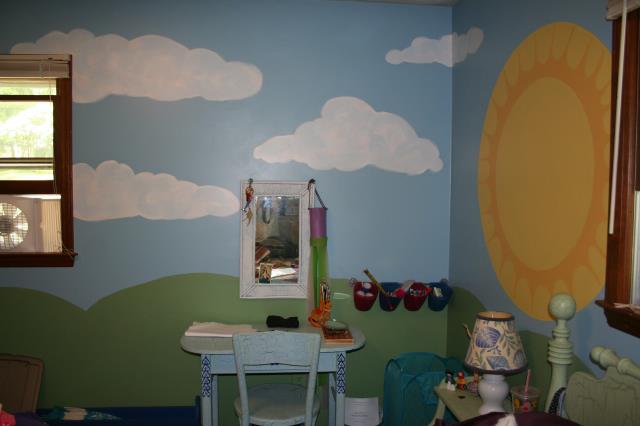
While the child is away, the fairies will paint! This past Sunday my cousin came over to Mural drawing
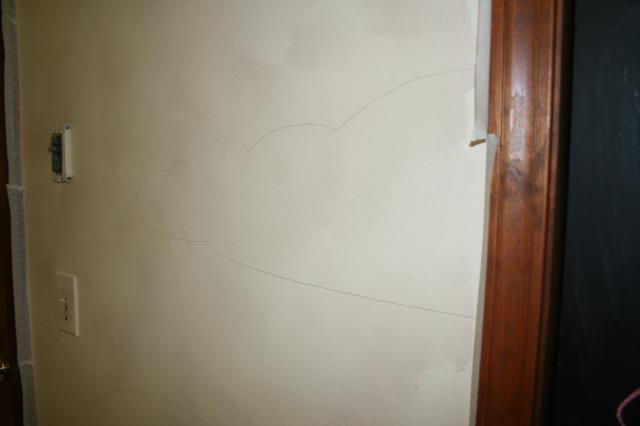
start painting.  There was some confusion – she thought it was Mural sky
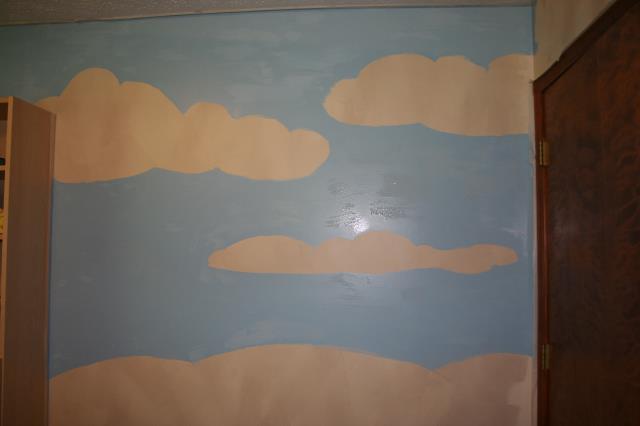
one wall, Stella had drawn 3 walls and then we decided to do all 4 walls!  With a pencil – the design was drawn, the room was taped and then the painting began.  It was a fun all day project with us both painting away. The mural turned out more amazing than I thought it would – we did a great job!  Thank you to my cousin who brought the vision to life – WOW!

Mural done

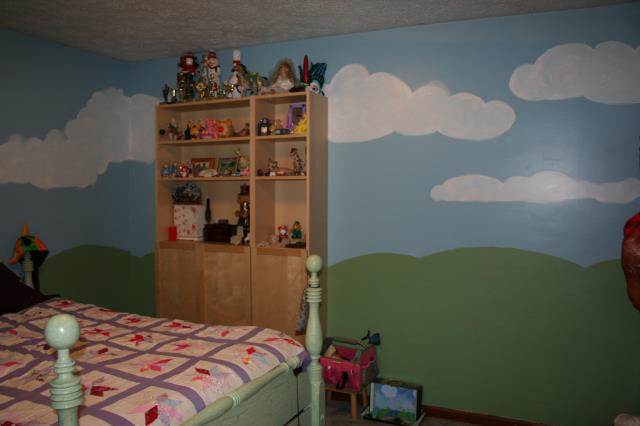
I have spent the rest of this week putting Stella’s room together – she had many things still in boxes and piles.  It has not been an easy feat – my daughter is quite the collector of SO much stuff!!!  But so glad that her room will be HER room when she returns.

Mural done 1

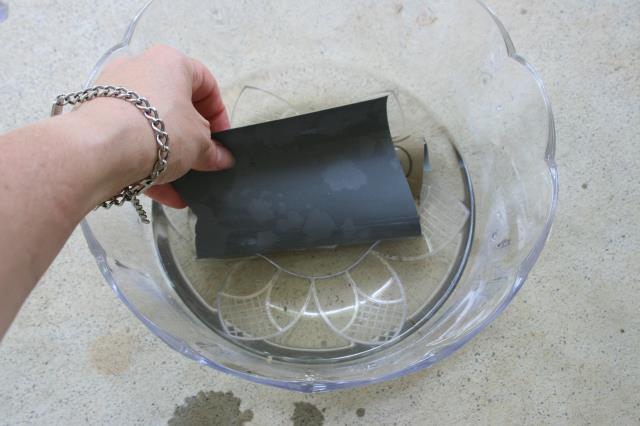
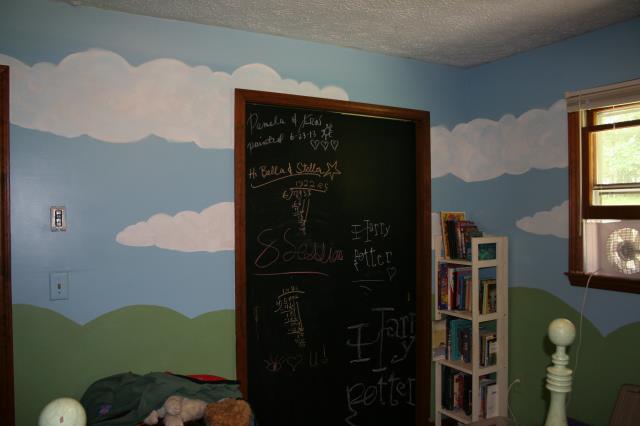
The other fun thing that we did, before she left, was to paint her closet doors with chalk board paint.  This was one of the best ideas I had for the house – Stella spends a lot of time working out math problems, drawing and playing school.

Mural done 2

I can’t wait for Stella to see her room when she gets back from New York – she is just going to love it!

Mural done 3

Digiprove sealCopyright secured by Digiprove © 2013
Posted in Crafts | Tagged , | 6 Comments

Garlic Scape Pesto – Wonderful

I recently received in my weekly CSA (community supported agriculture) a bunch of garlic scapes.  I love garlic scapes, but am a fairly newbie to them.  I came across them about 2 years ago and my local farmer’s market and it was love at first cooking with them! I used a couple of the scapes in a vegetable ensemble I was making for a veggie and bean burrito.  As the veggies were cooking – I wondered if there were other ways to cook with scapes that I had not tried, so off to the internet I went.  So glad that I did – because I came across a garlic scape pesto recipe that I just had to try!  I love pesto!

Galic scapesIf you are not familiar with garlic scapes, let me give you some information.  The garlic scape is the shoot that grows from the hard necked garlic variety.  As the garlic bulb grows underground, a green shoot grows from the ground and curls before straightening. If the scape is not cut off then it grows into the a hard garlic stalk.  When using the scape in cooking, cut off the end that was originally cut, cut the remaining scape into 1/4 inch lengths up to the bulb or flower of the scape – discard this. Saute up with your favorite veggies and enjoy.

Garlic Scape Pesto (recipe originally found on www.sustainabletable.org)

Garlic scapes served

Ingredients

1 cup garlic scapes, cut into 1/4 inch pieces
1/3 cup walnuts
3/4 cup olive oil
1/4 – 1/2 cup freshly grated Parmigiano-Reggiano cheese
Salt and pepper to taste

1. Cut up your garlic scapes and place them in the bowl of your food processor.

Garlic scapes cut

2. Toast your walnuts in a dry pan.  You do not have to do this step, but I like the flavor of toasted nuts.

Garlic scapes walnut toasting

3. Add the nuts to the scapes and process.

Garlic scapes in processorGarlic scapes processed

4. Slowly add the olive oil to the scape and nut mix, stopping to scrape sides as you go.

Garlic scapes adding oil

5. If you are going to use right away – pour the mixture into a bowl and add the cheese and season with salt and pepper.  Any leftover will keep in the fridge for up to 1 week.

Garlic scapes without cheeseGarlic scapes cheeseGarlic scapes pesto

6. If not going to use right away – place the mixture in a bowl that can be stored in the freezer – DO NOT add the cheese.  When ready to use take out of freezer, allow to defrost and then add the cheese and use.

We had some fresh peas from the garden, which I lightly sauteed with olive oil, added them to the past along with the pesto.  Of course, with Stella a little extra cheese was added on top.  This was wonderful pesto, but it does have a bite.  Stella loved it and gobbled her bowl right up!


Digiprove sealCopyright secured by Digiprove © 2013
Posted in Dinner, Recipes, Sauces | Tagged , , , | 3 Comments

What Kind Of Bite Is That?

Stella texted me yesterday morning saying she must have slept funny because she had a red mark on her neck and it hurt.  She also sent along a  photo.  I texted back and told her that it was not from her sleeping funny, but looked like a bite of some kind.  Then the next text was I am not feeling very well.  I packed up my work items and headed home.  By the time that I arrived home she was now saying that her chest hurt.  We took her temperature and it was 99, not that big of a deal.

Stella read for a little bit and then took a nap.  When she woke from her nap she said it was hard to breath and felt like her ribs were going to break – her temperature was 101.  For the next hour I called doctor after doctor’s office trying to get in, with no luck.  I finally called a doctor’s office in town which does not take our insurance and they could fit us in.  Her temperature now was 102!

Spider bite
As we were sitting in the waiting room, I checked my email and in one of the newsletters I get there was a recipe for a natural spider repellant – this might come in handy.  In and out of the doctor’s office in less than 10 minutes – spider bite.  They called in a prescription and told me to get her some antihistamines to help with the swelling and itching, if that started.  I would have watched it one more day, but Stella leaves this afternoon for a week and a half to New York – going to go visit all of her friends.


Natural Spider Repellent (this is where I got the recipe/idea)

Spider repellent

Ingredients

5 drops Essential oil (citrus, lavender, peppermint, citronella, cinnamon, tea tree, cloves)
5 drops liquid dish soap
1 quart of water

1. Mix all the ingredients in a spray bottle – I decided to use orange oil. Shake well.

Spider ingredients

2. Spay doors, windows, cracks, around the yard, garden etc – weekly.  do a spot check on carpets/furniture since you are using essential oils and they can stain.

I sprayed all the windows and door frames on the inside of the house and all around Stella’s room outside and the outside door frames. The house smells really good and hopefully no more spider bites!

Digiprove sealCopyright secured by Digiprove © 2013
Posted in Life | Tagged , | 3 Comments

Make Your Own Dishwasher Detergent

I was at my aunt’s home and she showed me her sparkling glasses and they were sparkly!  Then she shared with me that she had started making her own dishwasher detergent – I had to have the recipe and give it a try.

This recipe is so easy and you may already have the ingredients in your home, if not you can find them at your closest grocery store!

Dishwasher Detergent

Dishwasher done

Ingredients

Baking soda
Washing soda

1. Using a glass jar – I used a wide mouth canning jar.  Mix the baking soda and washing soda.

Dishwasher ingredients

2. The ration is one part baking soda to 3 parts washing soda.

3. Shake well and use as you would your regular dishwasher detergent.

Dishwasher mixed

To help your dishes and glasses shine – you can add some Lemi Shine rinse. This is non-chemical and safe for septic systems.

BeforeDishwasher top shelf

I hope your dishes turn out as shiny and sparkly as mine!

Digiprove sealCopyright secured by Digiprove © 2013
Posted in Cleaning | Tagged , , | 2 Comments

Cherry Cobbler Crisp – Divine!

A friend of mine emailed and said he had gone cherry picking – well my interest was peaked!  Being new to the area – I am having to learn all the places to pick fruits.  I was given the name of the farm and immediately went to the internet and did a search.  It is a third generation farm, Levering Orchard. I mentioned to one of my aunts that we were going to go cherry picking and she of course knew of the orchard and had gone picking there.  One of the best parts of going cherry picking was that we were able to take the Blue Ridge Parkway almost the whole way!  There are some beautiful and wonderful highways that I have traveled, Hwy 1 in California, Route 69, the Taconic Parkway in New York and the Blue Ridge Parkway.

Cherry picking

Once we turned off the Parkway, we headed down a very windy and steep road – then the turn off to the orchard – wow.  The orchard is up or down, depending on how you see a hillside.  We were given our buckets, parked and headed to the trees.  Most of the trees had been well picked on the bottom and ladders were place at each tree.  I am afraid of heights and for the most part you had to go all the way to the top of the ladders – so grateful that Stella is not afraid of heights, since she did most of the climbing and picking!  This was a definite change from last years picking – where I did most of the picking.  When were done we had picked a little over 7 pounds.

Cherry pittingWhen we got home Stella washed and de-stoned all the cherries!! Lucky me.  Once Stella got the hang of the de-stoner, she had a lot Cherry bowlof fun.  We froze some, left some for eating and then made a wonderful cherry cobbler crisp.  I have never made a cherry cobble and all the recipes started with cherry pie filling – so the first thing I did was make cherry pie filling from our freshly picked cherries.

Cherry freezing

Cherry Cobbler Crisp

Cherry served

Ingredients

2 1/2 cups cherries
2 Tbl lemon juice (I was out,but had lemon aide in the fridge – so that was used)
1/3 cup arrowroot or corn starch
1/2 cup sugar
1/2 cup brown sugar (not packed)
3/4 cups oats
1/2 cup flour
1/4 cup almond meal
1/2 cup cold unsalted butter
1/4 tsp nutmeg
1/2 tsp cinnamon

1. Lightly grease a 8×8 inch baking dish.

2. In a medium sauce pan add 2 cups of cherries, lemon juice, arrowroot an sugar. Heat on medium, stirring occasionally in the beginning – as it thickens stir constantly.

Cherry 2 cupsCherry filling startCherry fillin mixed

3. When it thickens to cherry pie filling thickness pour into the greased baking dish.

Cherry filling thickCherry filling in dish4. I add some fresh cut cherries on top.

Cherry added

5. Preheat the oven to 375 degrees.

6. In a medium sized glass bowl add the brown sugar, flour, oats, cinnamon, nutmeg and almond meal – stir to mix.

Cherry dry

7.  Cut the butter into pats and add to the dry mixture.  Either using a pastry blender or your hands (my preference) blend the butter in until the mixture resembles course crumbs.

Cherry crumbs

8. Sprinkle the topping over the cherry mixture in the baking dish.

Cherry ready for oven

9. Bake for about 30 minutes, the top will brown and look crispy.

Cherry out of oven

Serve warm with ice cream, whipped cream or plain.  This was so delicious and will be a staple during cherry season!!!

Digiprove sealCopyright secured by Digiprove © 2013
Posted in Dessert, Freezing, Preserving, Recipes | Tagged , , | 2 Comments

Useless Headlights?!

Recently I had a friend drive my car and she asked if one of my headlights was out?  I said no,but they are really filmed over.  She told me her headlights had been that way, but her dad had given her a cleaner and it had worked great.  I went to the local Napa store and explained what the problem was to the sales person – he told me that I could buy the cleaners, which are very expensive and will need to be re-done in a couple of months or I could try something else.  Of course, I had to ask what the something else was. He told me to use very fine sandpaper, wet, and then a rubbing compound.  He said this would last a couple of months and it was less than 1/4 the cost of the cleaners.  I bought it all and finally did it – what a difference!

Cleaning Your Headlights

Headlights after

Items Needed

Masking tape
Fine sandpaper
Rubbing compound
Water
Cotton clothes
Shammy cloth

Make sure that your car is not in the sun or the headlights hot.

Before

Before

1.Wash your headlights.

2. Tape around the headlights.

Headlights taped

3. Wet the sandpaper and sand your headlights in a circular motion.  You may have to rinse and repeat this step a couple of times.

Headlights sandpaper

4. Wash the headlights and allow to dry.

5. When headlights are completely dry – using the rubbing compound.  Follow the directions, doing a small section at a time and rubbing either up and down or across.

6. Buff the headlights.  If you have the buffing attachment for your drill – this would be best.  I do not have – so had to use old fashion elbow grease.

7. Admire a job well done!

Digiprove sealCopyright secured by Digiprove © 2013
Posted in Cleaning | Tagged , | 3 Comments

It’s Official!

Homesteading peach

We have moved into our new home, yeah!  Most of the unpacking has been done, with a few boxes still waiting for Stella to go through.  For the most part the pictures have been hung, items in their place, the kitchen organized. Several rooms have been painted and the others will be soon.  There are several projects that will have to wait until winter since now with the weather the focus is outside.

The yard is quite large and I have a rider mower, but still need to figure all of it out and feel comfortable using it.  With a couple of steep hills – I have found that I am still not capable of mowing and am thinking I will get a self-propelled walk behind mower for the part of the lawn I can’t master with the rider!

Homesteading clothes lineThe project list for the yard and outside of the house is long and as I have found out from the start – each project seems to take way longer than thought.  One of the first projects was fixing the clothesline.  This I thought would take less than an hour, but like I mentioned before – it took longer and is still not done.  One post was leaning and being propped by another piece of wood – I dug around the post, but not even with all my Popeye strength could I pull the post out.  I am not sure how long the stake is – but I think that one post will have to be a two person project for a future date.  I was able to take off the old cord and re-do one section of the clothesline, which fits almost 2 loads of laundry at one time – so that is great!  I so love having my clothes dry in the wind and sun – and there is plenty of wind here.

Before

Before

I was also able to start the orchard.  A couple of the trees do not seem to be doing well and I will give them some TLC with an organic fertilizer this coming week.  The orchard was also my first big mowing of this yard and it was difficult since the grass Homesteading orchardwas very long!  In our orchard we have almond trees, apricot, cherry, blueberry, raspberry, peach and apple.  The deer like eating the leaves off the apple trees, but they do not touch the peach tree. There was also a couple of opening from our yard to the field behind our house.  I was given some black cherry seedlings – so I planted several of those.

homesteading openingHomesteading black cherry

I was given some tomato plants so those are planted out behind the house.  This is a first for me.  I am not a huge tomato fan, but I do like fresh pico de gallo and tomato sauce. I usually just buy a flat at the farmer’s market of tomatoes and then go home and make a batch of sauce.  I was given some pointers by one of my co-workers for the second planting – so it will be interesting to see the difference in the plants and the yield. Ran out of mulch, but will line with paper around the plants and finish mulching this week.

homesteading tomatoes

Garden spot

Garden spot

The other big project for the summer is getting the one area of the front field ready for gardening next year.  I started laying cardboard down to kill the grass..  I have plenty of cardboard from the moving boxes, but I do not have an abundance of rocks to hold the cardboard down, not so I have wood chips, mulch or compost.  I have done a very small section and now have another idea to try out.  We now have 2 rabbits and I am moving their hutch around by the house – since they eat all the grass under the hutch and leave many dropping.  I am working on a set up to put them in the garden area with the hope that they will eat all the grass, dig and leave some great compost!   I am hoping to have that set up in the next week or two, but it might be longer since we will be gone the next two weekends.

Hometeading cardboard

I love our piece of heaven and the fact that we are homesteading our own land – but it is a lot of work and effort – but so rewarding in so many ways!  One of them is teaching skills to Stella and seeing her love of the land grow!

Digiprove sealCopyright secured by Digiprove © 2013
Posted in Garden | 9 Comments

Macaroni and Cheese, Need I Say More?!

Stella was recently invited over to a her first sleep-over in or new home town!  She was very excited to say the least.  We were asked to bring a dish for the pot luck and one that the kids would like.  What kid does not like mac and cheese?  I decided to try a new recipe.  I had made homemade mac and cheese before, when Stella was very young – and she did NOT like it – so I was keeping my fingers crossed on this one.

Mac & Cheese (I found this recipe here)

I forgot to take a photo out of oven, this is before

I forgot to take a photo out of oven, this is before

Ingredients

1 (8 ounce) package macaroni or small pasta (I used elbow rice pasta)
4 Tbl butter
4 Tbl flour
1 cup whole milk ( I used raw )
1 cup whole milk cream
1/2 tsp salt
fresh ground black pepper, to taste
2 cups cheddar cheese, shredded good quality ( I used raw milk cheddar )
1/2 cup organic breadcrumbs, buttered

1. Cook and drain the pasta according to package directions.

2. Grate the cheese, set aside.

mac cheese

3. Preheat oven to 400 degrees.

4. In a large saucepan, melt the butter.

mac butter

5. Using a whisk add the flour, salt and pepper.  Whisk until well blended.

mac flour

6. Add the milk and cream into the flour mixture – whisking constantly.

mac milk

7. Bring to a boil, boil for 2 minutes – whisking constantly – you do not want it to scald or cook to the bottom of the saucepan.

8. Reduce the heat and cook, whisking constantly for another 10 minutes.

mac thickened

9. Add the shredded cheese, a little bit at a time, allowing it to blend and melt in-between additions.  When all the cheese has been added, simmer for a couple more minutes, making sure the cheese is completely melted.

mac adding cheese

10. Take the saucepan off the heat and add the pasta – stirring to make sure that all the pasta is well coated with the cheese mixture.

mac pasta addedmac pasta mixed

11. In a shallow, buttered baking dish – spread the pasta and cheese sauce.  Make sure that it is evenly spread.

mac almost ready for oven

12. Sprinkle with bread crumbs ( I used about 1/4 cup of crumbs).

13. Bake for 20 minutes until the top is golden, if needed put under the broiler – watching closing at the end of the cooking time.

I brought the dish to the party and was told the next day that all the kids loved it and it was eaten quickly.  In the car ride home with Stella I asked her how she had liked it and she said she never got to try it!  Luckily she had a bite after I had spread it in the pan and she loved that bite!  Guess I will be making this again!

The original recipe posting had this to say about freezing it (I have not tried):
You can also freeze this recipe in zip-lock bags for later use – once you have mixed the macaroni along with the cheese sauce allow to cool to room temperature before adding to your freezer – I generally pull it out the night before and allow macaroni and cheese to reach room temperature; I then add the macaroni and cheese to a buttered baking dish, sprinkle with bread crumbs and then bake for 20 to 30 minutes, until golden brown on top and bubbling.

Digiprove sealCopyright secured by Digiprove © 2013
Posted in Dinner, Pasta, Recipes | Tagged , | 3 Comments

Make Your Own Sunscreen

This post was originally posted last summer. This past weekend I forgot to put my sunscreen on and got a little crisp on the shoulders – made me remember it was time to make a batch of sunscreen.

Next week I am hoping to get back to a more normal blog posting schedule – fingers crossed!!!  Have very good intentions!

Since I had never thought about making my own sunscreen, but then there was a comment made on my mosquito repellant post asking if I knew how.  I figured it would be really difficult, the ingredients would be ones that I could not get my hands on and I thought it would be expensive, considering I pay $10 – $15 for the “good” sunscreen.  The research began and what I found was that it was not that hard and the ingredients could be found easily, there was only a couple that I did not already have in the house!

Homemade Sunscreen

Ingredients

1/4 cup coconut oil
1/4 cup olive oil
1/4 cup almond oil (if you do not have you could substitute with olive oil)
1/4 cup beeswax
2 Tbl zinc oxide
1 1/2 – 2 Tbl shea butter
1 tsp vitamin E oil (optional – I had so I used)
Essential Oil (I used lavender)


A couple of remarks before I get to the “how-to”.  Both coconut oil and shea butter have a natural SPF of about 4 – so just by using the two of them you are at SPF 8.  The zinc oxide used is a non-nano version that won’t be absorbed into the skin. (Here is a great link explaining non-nano)  The amount of zinc oxide used is about a SPF of 20, you can add more if you want a higher SPF.  This recipe has about a 28 – 30 SPF. When I was doing the research I remember reading that citrus essential oil should be avoided – when I went back to try and find the source I could not find the article again – I decided to stay away from them.  I have found that the best place to get coconut oil is Trader’s Joes (not all carry – I asked my store every time I went in for 2 years, probably others did too and they finally started carrying it!), organic and a great price!

1. Combine all the ingredients except the zinc oxide and essential oil in a glass bowl, recycled jar or wide mouthed canning jar.  This is a lot of oil and you don’t want to use something that you use in your everyday kitchen activity.

Don’t add the essential oil until the end.

Beeswax

Shea butter


2. Place the glass container in a saucepan that has several inches of water. Turn on medium heat and as the water heats the ingredients will melt – occasionally stir or swirl the jar to mix it.

3. Once it is all melted take out of the water and place on a trivet or pot holder.  Add the essential oil, about 10 drops – mix.

4. Add the zinc oxide.  You do not want to inhale this and probably do not want children around when you are making – mix well using and old spoon or metal utensil.


5. Pour into container.  I used a pint size canning jar and re-used my Burt’s Bees face lotion container.  Stir a couple of times while it is cooling to make sure the zinc oxide gets mixed throughout and does not clump together.

You will want to store this in a cool, dry place or the refrigerator.  If you want it thicker add more beeswax, thinner less.  This is not water proof – so reapply after swimming.  It will make your skin feel so good.  This has a shelf life of about 6 months.

Clean the jar before the ingredients start to harden – so much easier.  Then just put the jar and stirring utensil you used in a special place and use it again when you are making sunscreen.  This feel so good on your skin and makes your skin so soft – you will make it again – use it as your lotion or make without the zinc and use as your everyday lotion.

Digiprove sealCopyright secured by Digiprove © 2012-2013
Posted in Beauty | Tagged , | 6 Comments

Are The Mosquitoes Getting To You?

As Stella had her first mosquito bite of the year – thought it might be a good time to re-post this blog.  This is our go-to repellant and it is so easy to make!  Happy Memorial Day to you all!!!

They say the best oil is eucalyptus, but I did not have any in my essential oil drawer and they were sold out at Whole Foods, so I used other oils that have repellant attributes.

Mosquito Repellant Spray

Items needed


Spray bottle
Witch hazel or grain alcohol
Essential oil (Eucalyptus, lavender, tea tree, rosemary)


1. Pour the witch hazel or grain alcohol into a spray bottle.  I used witch hazel.  Fill to a little more than 3/4 way full – about 6 – 7 ounces.

2. Add the essential oils.  I used 15 drops of lavender, 10 drops rosemary and 10 drops tea tree.

3. Put the top on and shake.

You can now spray this on your skin and/or clothes.  Spray on skin and then rub.  You will have to reapply more often than the deet repellant, about every 1 1/2 – 2 hours.  This cost me less than $5 to make myself. It works great!

Digiprove sealCopyright secured by Digiprove © 2012-2013
Posted in Recipes | Tagged , | 5 Comments