Egg And Cheese Breakfast Casserole

This week Stella had the first round of her State Testing (SOL) and she was very nervous about the tests to say the least.  An email went out the parents asking if they would bring in items so that all the kids would have a “good” breakfast before a day of testing.  I was not going to participate until I saw what the menu was – lots of fruit and then bagels, muffins, biscuits.  Where was the protein and items that would really sustain them thought he rigors of testing all day?  That decided it for me.  I would make an egg casserole, but it needed to be fast, easy and kid friendly (75 kid friendly)!

Egg and Cheese Breakfast Casserole (easy double, triple or quadrupled)

Egg cheese casserole done

Ingredients

8 eggs
1/2 cup mozzarella cheese
1 cup cheddar cheese
1/2 cup cream
1 – 1/2 cups extras (veggies, sausage) – optional

1.Preheat the oven to 350 degrees.

2. Beat eggs and cream in a bowl.

Egg cheese casserole eggsEgg cheese casserole cream

3. Add the mozzarella cheese and mix well.

Egg cheese casserole cheese added

4. Pour the egg mixture into a 9×13 baking dish. Use a bigger baking dish if doubling, tripling, etc.

Egg cheese casserole in pan

5.  If adding the extras, pour them over the mixture and mix in with a fork.  I chose not to add any extras because I wanted as many kids as possible to eat it and was not sure who would eat if meat or veggies were a part of the casserole.

6. Sprinkle the cheddar cheese over the top.

Egg cheese casserole cheese on top

7. Bake for 30 – 40 minutes or until the center does not jiggle.  The thicker the egg mixture the longer it will need to bake.

Serve hot!  I was told that the kids gave this casserole two thumbs up!


Digiprove sealCopyright secured by Digiprove © 2014
Posted in Breakfast, Recipes | Tagged , , | 3 Comments

Toilet Paper Seed Pots

This past weekend was glorious and truly gave me the itch to get my hands dirty and thoughts of gardening filled my head.  So glad I spent all day Saturday out in the sun, since Sunday the weather turned and we had snow and ice that continued into Monday.  My seeds have been sitting on my kitchen counter reminding me daily as I walked by them.  Each weekend I had good intentions to get some seeds started, but the weekend would fly by and that item seemed to never get crossed off my “to-do” list.

After cleaning out the carport and moving items from the area in the basement where a bathroom will soon be started – the sun was shining and my seeds were calling.  Out came the organic soil, the cow pots, Popsicle sticks (markers) and the seeds.  Sorting through the seeds – I set aside all the seeds that needed to get started – I filled the cow pots, place my seeds, covered and marked. I used up all my cow pots, but still had seeds to plants!  Most years I make pots out of newspaper, but I was out of newspaper (since I use that daily to start our fires) – so what was I to do?  I save all my toilet paper rolls and thought there has to be a way to use these.  After some trial and error – I had figured out how to make seed starter pots out of toilet paper rolls!

Toilet Paper Roll Seed Started Pots

TP pot filled

Items Needed

Toilet paper rolls
scissors

1. Cut 4 slits on one end of the toilet paper roll.  Make slits opposite one another and of equal distance.

TP pots rollTP pot cut

2. Fold the cuts like you were closing a box, each cut piece over one cut and over the other.

TP pot foldTP pot bottom

3. Fill 1/2 – 3/4 with dirt, press down to compact but not to tightly. Place your seed, cover, mark and water.

TP pot standingTP pot dirt

NOTE:  After water a few of the toilet paper rolls start to un-do (where the seem is) – I ust used a stapler and stapled closed.

Digiprove sealCopyright secured by Digiprove © 2014
Posted in Crafts, Garden, Homesteading, Recycled, Repurposed | Tagged , , , | 3 Comments

Kale And Chickpea Soup

Another storm is hitting us and the weather reports are conflicting, but I am wagering that there will not be school again tomorrow.  With the cold weather is was an excuse, not a big one, to make a pot of soup and a warm, comforting dinner.  Looking in the refrigerator I decided another kale soup.

Kale and Chickpea Soup

kale chick served

Ingredients

2 carrots, chopped
1 cup portabella mushrooms, chopped
1/2 – 3/4 cup shitake mushrooms, chopped
3 – 6 cloves garlic, chopped
Lard, butter, olive oil or coconut oil
Course sea salt – to taste
Ground pepper to tast
1/4 tsp ginger powder
1/2 tsp coriander
1/2 tsp cumin
1/2 tsp oregano
1 tsp thyme
1 bay leaf
8 cups water
1 can chick peas, drained
3/4 bunch curly kale, chopped

1. Heat either lard, butter, olive oil or coconut oil in a large soup pot. While that is heating chop your carrots, mushrooms and garlic.

Kale chick mushrooms

2. Add the carrots and saute for about 3 – 5 minutes.

3. Add the mushrooms and saute for another 10 minutes.

4. Add the garlic and saute for another 5 minutes.

5. Add all the seasonings and mix well.

kale chick saute

6. Add the water and simmer for 1 – 2 hours, you want the stock to be flavorful.

kale chick begin broth

7.  Add the chickpeas and simmer for another 20 – 30 minutes.

Kale chick added

8. Add the kale and cook for about 10 – 15 minutes.

Kale chick kale cut

Serve.

Digiprove sealCopyright secured by Digiprove © 2014
Posted in Recipes, Soup | Tagged , , , , | 1 Comment

Sweet Potatoes, Delicious!

Since many of us are starting our seeds and getting the gardening itch – I figured I would re-post this.  I get asked a lot about how to start sweet potatoes, so here it is.

Originally posted on July 20, 2011.

Last year was the first time that I had ever planted sweet potatoes in my garden.  I came across the plants in one of the local garden stores in the area – so I decided why not.  My daughter loves sweet potatoes and would eat them a every meal if she could!

I did some reading up on the plant, finding out sun exposure, watering, etc and then in the ground they went.  I was not sure when to harvest, one book said before the first frost, another I read said when the leaves start to turn.  So what did I do?  I winged it.   I figured they had been in the ground producing for about 4 months – so I dug them up.  They were beautiful, a wonderful orange color and ranging in size and shape from small finger like to very large oblong ones.

Next was the curing process, hmm – all that I had read was to let them cure on the ground for several hours after harvesting.  I did not know how I was supposed to know if they had cured enough, would be good to eat and would last thru the winter.  Again, I winged it.  I let them cure in the sun for about 3 days, taking them in at night.  Whether or not I followed the proper protocol didn’t matter because these were the most delicious sweet potatoes I had ever tasted and the deep orange color was simply amazing.  I must have done something right because for 3 years my neighbor has continuously told me that everything I have planted in my post card sized yard would not work.  When I harvested my sweet potatoes I called him over and he finally said that I was a gardener and he wanted to try one -he loved it and asked for more!

I planted about 12 plants and harvested an apple bushel sized bag, which by the way is a great storage bag for the potatoes.  We had potatoes throughout the winter, with some left over come spring.

With such success, I of course wanted to plant them again this year, but never could find any plants at any of the garden stores. Back to the books I went trying to figure out how to propagate the plant from the tuber and was not really “getting it”and then in the mail came my favorite magazine Mother Earth News and there was an article in there about growing sweet potatoes in the north.  Ask and you will receive.

Sprouting Sweet Potatoes

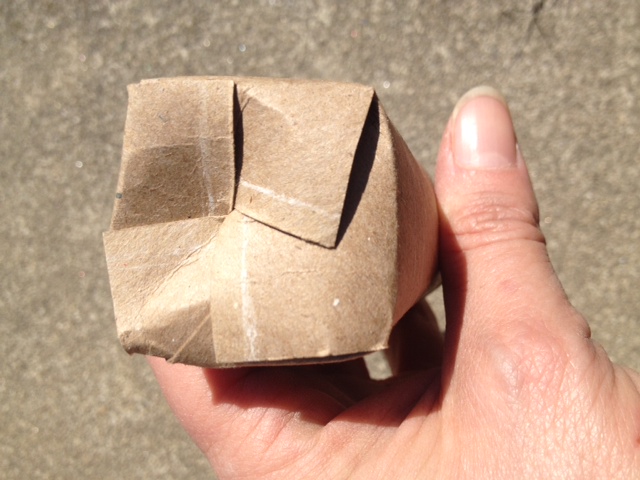
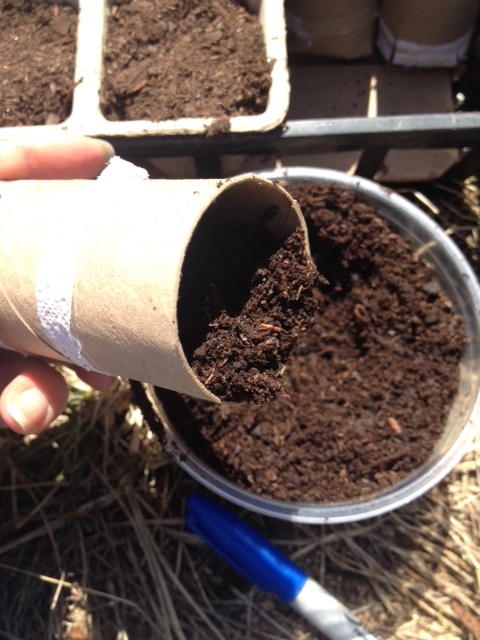
I pulled out the bag of potatoes and some had already started to vine.  I took the ones that had already started vining and added a few more to a shallow baking dish filled with water, sat them in the sun and about 2 weeks later I had enough vines to put in the garden!  After breaking the vines off the potatoes I thru the potatoes into the compost, not sure how they would taste after sitting in water for 2 weeks and vining.

Then into the garden they went.  I am fortunate to have a neighbor, same one as mentioned above, that has a much larger piece of land for his garden and he gave me space to grow the sweet potatoes.

Happy in the garden

Remember that I put the water-logged sweet potato into the compost?  I think you can guess what happened in there…several weeks later I had about 40 or so vines growing and no more room to plant them.  I needed to find a home for them and I am happy to report that yesterday I found a home for many of them.

Growing in the compost

Sweet potatoes are yummy all by themselves, but we also enjoy them as sweet potato fries, chips, in zucchini pancakes and the other day I found this recipe for sweet potato hummus – can’t wait to try it!http://www.organicauthority.com/mojo-foods/6-sensational-hummus-flavor-combinations-recipes.html

Digiprove sealCopyright secured by Digiprove © 2011-2014
Posted in Garden | Tagged , | 4 Comments

Try Your Luck of the Irish with Irish Soda Bread!

Originally Posted on March 12, 2012

When I took the loaf out of the oven and I sent a picture to my mom with a caption”look how beautiful”.  Both of us love this bread an wonder why is it then that we only make it around St. Patrick’s day!?  Would it be as delicious and anticipated if I made it more throughout the year – not sure – but this is the year I am going to find out!  We had the bread plain, toasted with butter and as part of breakfast, lunch and dinner.

Irish Soda Bread

Ingredients

1/2 pound raisin or about 2 cups
4 cups flour (I used whole wheat and white wheat flour)
1/2 cup sugar
1/2 tsp (omit if using salted butter)
4 tsp baking powder
1/4 pound butter (1 stick)
2 eggs
1 cup buttermilk (preferred) or milk

1. Place raisins in a glass bowl and add enough hot water to cover – let them sit 5 – 10 minutes to plump up.  Then drain.


2. Preheat oven to 375


3. In a large glass mixing bowl, combine the flour, sugar, salt, and raisins.


4. Cut cold butter into the flour mixture with a pastry cutter or fork until it resembles cornmeal.


5.  Beat eggs lightly, add buttermilk and then mix with the flour mixture.  If it is too dry add some more buttermilk, a little at a time.

6. Turn out on floured surface and knead.  Shape into a round loaf and cut a cross on the top with a knife.


7. Bake in a greased cast iron skillet or 9 inch round cake pan for 1 hour.  Done when a knife comes out clean.

8. Place on wire rack to cool completely.

We enjoyed this plain, toasted, with lots of butter and with almost all meals until it was gone!

Digiprove sealCopyright secured by Digiprove © 2012-2014
Posted in Bread, Recipes | Tagged , , | 6 Comments

Make Your Own Laundry Detergent!

I am very sensitive to many ingredients in “traditional” laundry detergent and so is my daughter.  I can go somewhere and if they use a detergent that I am sensitive to, usually by early in the day I have a rash where the sheets rubbed against my skin during the night.  The same thing will happen with towels and clothes washed in detergents that I am sensitive to. I have to say that the underwear is the worst!!!  Did that once and never again – I will hand wash them or use other measures.

Here is a great chart of the chemicals in laundry detergent and dryer sheets.  If you want to get away from dryer sheets try these.

Laundry Detergent

Laundry detergent in jars

Ingredients 

Laundry detergent ingredients
1 box Borax
1 box Baking Soda (large)
1 Box Washing Soda
1 Bar Naptha


1. In a large metal or glass bowl, pour the borax, baking soda and washing soda. You may want to wear a mask or a bandanna over your mouth and nose.

2. Grate the Fels Naptha.

Laundry detergent grating

3. Add the grated Fels Naptha to the bowl.  With your hands or a very large spoon mix all the ingredients.

Laundry detergent in bowl

4. With a funnel fill your jars with your laundry detergent. I used a half gallon mason jar and several glass milk jars.

The whole process takes less than 15 minutes and you have laundry detergent for a couple of months!

For each load use 1/4 – 1/2 cup.  For white you can add lemon juice in the bleach holder and to really get all the detergent out of to really freshen you clothes add some vinegar to the rinse cycle. This works well in both cold and warm water and your clothes, body and the environment will thank you.

Digiprove sealCopyright secured by Digiprove © 2014
Posted in Cleaning, Homesteading | Tagged , , | 2 Comments

Cinnamon Buns, Delicious!

Now that we are done with the Food Stamp Challenge I decided that we would have some indulgence for breakfast and we could also have them for dessert.  I wanted to find a new recipe that was pretty quick – that meant no rising – so no yeast.  I found a great recipe at Half Baked Harvest.  I made it a little more healthy than the original recipe, and they turned out fantastically!  Stella told me that I needed to make these more often!

Cinnamon Buns (Half Baked Harvest)

Cinnamon bun done

Ingredients

Dough
3/4 cup organic white flour
3/4 cup organic wheat flour
3 Tbl flax meal
1 tsp brown sugar
1 tsp baking powder
1/4 tsp sea salt
3/4 cup buttermilk

Filling
2 Tbl coconut oil, melted
1/4 cup brown sugar
2 tsp cinnamon
2 -3 Tbl hemp seed
1/2 cup crispy almond slivers

Icing
1/2 cup organic powdered sugar
1 Tbl organic whole milk
1 tsp vanilla

1.To make the dough place the flour, brown sugar, baking powder, flax meal and salt in a medium size mixing bowl.

Cinnamon bun dry

2. Stir in the buttermilk until a dough ball forms. If it seems to dry add a teaspoon of buttermilk at a time.

Cinnamon bun dough

3. Turn out onto a heavily floured surface (if there is not enough flour the dough will stick to the counter when you are trying to roll the dough into a log). Roll the dough into an a rectangle about 1/4th inch thick. If the dough sticks to the rolling pin add more a sprinkle more of flour, but try and add as little flour as you can.

Cinnamon bun rolled

4. Place the coconut oil in a saucepan and melt.

Cinnamon bun coconut oil

5. Preheat the oven to 375 degrees.

6. Using a pastry brush, spread the melted coconut oil all over the dough.

Cinnamon bun brushing

7. Sprinkle with the brown sugar, cinnamon, hemp seeds and the almonds.

Cinnamon bun insideCinnamon bun inside close

8. Grease a muffin tin, I used butter.

9. Roll into a log and cut into 12 equal buns.  Place the buns into the prepared muffin tins.

Cinnamon bun cutingCinnamon bun in pan

10. Bake for 12-14 minutes or until the buns are lightly browned.

11. While the buns are baking, make the icing. In a glass bowl combine the powdered sugar, vanilla and milk until smooth.

Cinnamon bun icing ingredientsCinnamon bun icing

12. Allow to cool for about 5 minutes and spoon icing over top each bun.

Cinnamon bun drizzling

Take a bite and enjoy!!!!

Digiprove sealCopyright secured by Digiprove © 2014
Posted in Breakfast, Dessert, Recipes | Tagged , , , | 2 Comments

Food Stamp Challenge: Week 4, Notes From Stella

Painted FaceHooray today is the last day we are doing the food stamp challenge. This week I ate the school lunches again.  One day I had cheese sticks, they were fried and another day I had grilled cheese and then I was back to the chef salad. With a school lunch you have to get the items plus two more things on your tray so with the cheese sticks I got fresh fruit – it was sliced up pear, I think from a can, green beans they were not good.  With the grilled cheese I got mashed sweet potatoes which I really like because they are my favorite and pears.  When you get the chef salad you get dried fruit and nuts.

My mom asked me what my thoughts and observations were about being on the challenge, it makes you really hungry.

My mom also asked me what I was most looking forward to when we were done with the challenge. I really can’t wait to get back to our regular food and not be told that you can’t eat this because then we won’t have that for dinner or lunch.  I really did not like going to the grocery store and being told that I could not get something.

Digiprove sealCopyright secured by Digiprove © 2014
Posted in Homesteading, Life | Tagged , | 5 Comments

My Thoughts On Our Month Long Food Stamp Challenge

We are 2 days away from the end of our month long Food Stamp Challenge, and I can’t wait!  This has been both difficult and easy, educational, enlightening and I am glad that we did it.

The question I was asked the most was why are you doing this?  I am not sure that I can truly explain why I decided to do this – but I will try.  This biggest one was to see if you could eat nutritionally on the SNAP (food stamp program) and the other was see if the stereo type that is portrayed of people on food stamps was true. The second reason really is not coming across the way that I mean and I don’t know how to better articulate it.  So many people think that people of food stamps or other government assistance programs are milking the system and because they look capable of working that they should be.  Now there are always people who take advantage of systems and programs – but I truly feel that the SNAP program is not really one of them.  It is not easy being on food stamps, worrying about how you are going to feed your family, are you going to have enough money on your card for the items that are in your basket and wondering how you are going to pay for the essentials needed that are not covered within the program.  To talk about whether or not a person should or can work – well, I have been unemployed and yes I was capable and willing to work, but many jobs I was not qualified for, if I took them they would cost me more than I was making and then you have to be offered the job that you interviewed for – after many months of that I finally started working for myself and then after 2 years found a job.

I am not that different from many people that are on food stamps – I work a part time job, consult for 3 other people, write this blog, homestead, part of 2 boards, involved in my community and I am a single mom for pretty much 24/7, 365 days a year.  All that being said my time is very limited and I have to plan for everything.  I had to put aside time to prepare the foods – time that I would have liked to spend sleeping, spending time with my daughter, friends, family or just taking the time for myself.

This month was not that much different from my regular food life.  I soak my grains, oats, flour  – make almost everything from scratch, plan my meals.  What was different was that we do eat out on occasion and I buy the best products that I possibly can (which I am very much looking forward to getting back to).  We ate a very clean diet for the month, very little processed food, very little sugar.  I did eat out twice during the month (work and a get together) and I felt it – my body was not used to the heaviness of the food or the amount.

So my observations of how this effected me:  I pretty much felt hungry all the time even though we ate nutritionally, we ate less than we normally would; I lost weight; my digestive system was off, my energy was low; I slept poorly; my patience seemed short.

I am looking forward to March 1 and our celebration, along with buying things that we went without for a month and of course my red wine!

Digiprove sealCopyright secured by Digiprove © 2014
Posted in Homesteading, Life | Tagged , | 3 Comments

Food Stamp Challenge: Week 4, Quiche

I really did not have to make anything new for either breakfast or dinner, since we had enough in the freezer from earlier cooking – but I decided it would be nice to have something new.  Looking at what was in the refrigerator I decided on a quiche – using the veggies that were left, eggs, milk and 3 types of cheese.  When Stella saw me making it – a smile went across her face and I think I heard a “yum”.

Vegetable Quiche

Challenge week 4 quiche done

Ingredients

Sautéed veggies (carrots, onion, broccoli,  spinach)
2+ cups grated cheese (I used a combination of cheddar, Parmesan and mozzarella)
1/2  cup of milk
5 eggs
salt, pepper, dried or fresh herbs

1. Saute the vegetables in lard, coconut, butter or olive oil – you want them crisp, tender.  You also want enough to cover the bottom of the cake pan.

Challenge week 4 quiche veggies cutChallenge week 4 quiche vegggies

2. Preheat the oven to 350 degrees.

3. Lightly grease your 9″ cake pan.

4. Grate your cheese.

5. Add the cheese to the eggs, along with salt and pepper – mix well.

Challenge week 4 quiche eggs

6. Add the milk – if it seems too thick you can add a little more milk at a time.

Challenge week 4 quiche cheese

7. Place the vegetables on the bottom of the pan.

Challenge week 4 quiche vegs in pan

8. Pour the egg mixture over the vegetables and spread with a fork.

Challenge week 4 quiche ready for oven

9. Bake for about 40 minutes, checking after 30 minutes.  It is done when it slightly pulls away from the sides and the center is firm.

Serve for either dinner or breakfast. Great re-heated!

Digiprove sealCopyright secured by Digiprove © 2014
Posted in Breakfast, Dinner, Homesteading, Life, Recipes | Tagged , , | 2 Comments