The first part of winter is here, with cold nights and chillier days. We have already had several hard frosts and a dusting of snow. I held off as long as I could before building the first fire in the wood burning stove and I have yet to turn the heat on. The heat in the house is electric, which is expensive. The wood burning stove is in the basement with only one vent to the upstairs and that was blocked when they insulated the basement ceiling – not too smart. So with the wood stove I am heating two floors about 2200 square feet. We have placed extra blankets on the beds and are closing the blinds on the windows that have them.
With moving to rural America and homesteading as much as possible – I pay cash for everything and do not want to accumulate debt unless I absolutely have too – a mortgage is enough. Buying a home that is over 30 years old and someones second home, there are things that need to be done and I was aware that the windows were single pane and now I can see which ones need replacing sooner than later and can also feel the draft coming in. First on the list of improvements is adding vents from the basement to the first floor. Windows were further down on the list, but they may be moving up that list – we will see. The living room windows are the worst of the lot, with one of them not having any screen or storm and it it facing the windy side of the house. The front door you can see through the cracks around the door and the front window – it is big, but at least it faces south.
I went in search of quilted blankest or moving blankets at the local thrift store – but did not find any – so headed over to the fabric store. Wanted to get quilted fabric, after seeing that it was $9.99 a yard – I decided I would go with fleece and then for the front window because it is so big and the fleece was not wide enough went with a heavy felt.
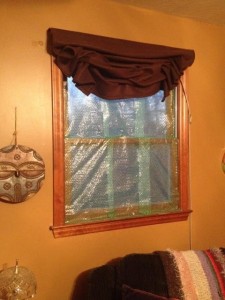
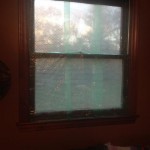 To take blocking the draft one step further – I decided I would line the one window with bubble wrap since I saved all of it from the move – the problem – the clear bubble wrap were all small pieces so I ended up using the green – it add a nice hue to the room. The front door was sealed with weather stripping and we could already feel the difference.
Next was making the curtains. I decided on making them as simply as possible and I wanted them to roll up like roman shades. After getting all the materials, I was ready to taking the sewing machine out and get started!
Roman Curtains (or Roman Shades)
Items Needed
A heavy material
Line material, if using (I did not)
Thread, color to match material
Rings (brass if you can find them – I could only find plastic ones)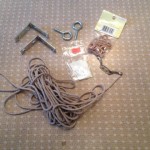
Nylon cord
Eyelet screws (quantity dependent on size of curtain)
1/2″ screws (quantity dependent on size of curtains and how many “L” brackets)
“L” brackets (I used 3 for the smaller window )
Weights (found in the curtain section of my local fabric store)
1/2″ thickness wood in the length of your window (measure from outside the frame)
1 Rope cleat
Screws to mount the curtain and the rope cleat
Screwdriver
Drill
Staple gun or small nail tacks
Needle
1. Measure your window. I wanted my curtains to cover the whole window. I measured from outside frame to outside frame to get both my width and length.
2. Get all your materials. I went to 2 fabric stores and two of our local hardware stores to get all my supplies.
3. Using your window measurements add a 1/2″ to the width (this is for your 1/4″seams) and make sure that you add enough to the length for your fabric to wrap partially around your wood piece and to hem the bottom,which will include the weights.
4. Sew your side seams.
5. Sew your weights into the bottom of the curtain, allowing enough material to fold over and sew a hem.
6. Sew your top 1/4″ hem.
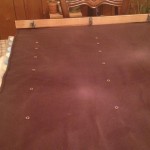
7. Laying your fabric out with wrong side facing up, it is now time to sew your rings on. The width of my smaller curtain was 37″ and from my research I figured it needed 3 rows of rings. I measure to get the center, 18.5″ and marked the fabric – I then measured the window frame width and added 2 inches onto that to get my other 2 marks for the rings – this was 5″ from the outside width edge.
8. Now to mark where the rings would be sewn on. The first ring started at 5″ from the bottom of the curtain, the next ring was 8″ up from that, then 7″ and so forth with the last ring having a 3″ distance. Now sew your rings on, going through the fabric, but only tacking on the top of each ring.
9. Lay your piece of wood on your fabric, so that the edge of the wood lines up with the edge of your fabric.Using either a staple gun or nail tacks attached the curtain to the wood – lining edges up.
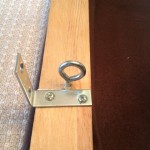
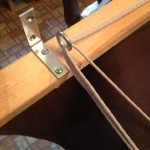
10. Mark your pieces of wood to attach the “L” brackets and the eye screws. I lined the eye screws with the rings, attaching the eye screws on the inside side of the “L” brackets. Before mounting your eye screws makes sure that the eye will hold all the cord that needs to go through it.
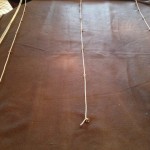
11. Insert the cord. I tied a knot at the bottom rings, burn the raw edge of the knot a little (only if it’s nylon cord, as it melts), then run it up through the rings and across through the eyelet screws. When running the cord down the curtain, leave enough of a tail for securing on the rope cleat. I also added a little bit of glue onto the knots.
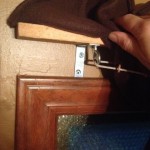
12. You are now ready to mount over the window. Hold the curtain up and mark where the screws will go. Screw the curtain to the wall.
13. Attach the rope cleat to the wall.
I was so happy that it worked. it would have pulled up in layers better if I had put a backing on, but I chose not to – mainly because of the thickness of the fleece.
 Copyright secured by Digiprove © 2013
 Follow


Wow. You are amazing, making that window draft-proofed! Had to smile when you said you used bubble wrap. : ) I’ll get to see it this weekend.
You continue to amaze me with your energy and creativity. Looks great.