From Guest Blogger – Gail Osterman
The snow storms that have “graced” the nation this winter recently brought to mind my family’s favorite comfort food from my childhood…homemade custard. My sister and I would make snowmen, my father tackled the snow shoveling, and my mother would do her part in making the snow adventure memorable by baking custards.
 The recent nor’easter that dumped more than two feet of snow on parts of New England was the perfect occasion for a custard re-appearance. Custard, for those who did not grow up with this
  home baked treat, is basically an egg, milk, and sugar concoction that when cooked assumes a pudding-like consistency. It, along with other puddings, made a frequent, and well-received, appearance in my mother’s childhood (she is now in her mid-eighties) because her parents raised chickens …and, needless to say, eggs were plentiful!
Today, not motivated by a need to use up an abundant supply of eggs, custard falls into the category of a special dessert. There are many recipes for custard ingredients, just as there are many ways to cook it. The recipe below is my grandmother’s recipe. Fortunately for us, it is both simple and truly gives our taste buds a culinary treat.
Custard
Ingredients
6 eggs
6 cups of milk (I use skim, but my grandmother used raw milk from their farm)
1 cup of sugar
1 ½ tablespoons of vanilla
½ teaspoon salt
¾ teaspoon nutmeg
Step 1: Preheat the oven to 350 degrees and place the rack in the middle of the oven. It is important that the oven temperature is hot when you put the custards into the oven.
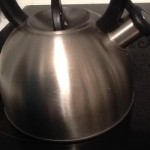
Step 2: Boil a kettle of water. (More about this later.)
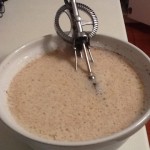
Step 3: Mix the eggs and milk together in a large bowl. (I like using the old-style egg beater, because it is simple and doesn’t require assembling the mixer.)
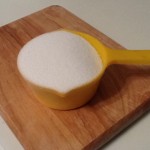
Step 4: Add the sugar to the egg mixture and mix until the sugar dissolves. (Okay, I normally do not use white sugar in my cooking, but we like this recipe so much that I haven’t played with the recipe to find a more healthy sweetener.)
Step 5: Mix in the salt, vanilla and nutmeg. I like to use freshly grated nutmeg, but ground nutmeg is fine.
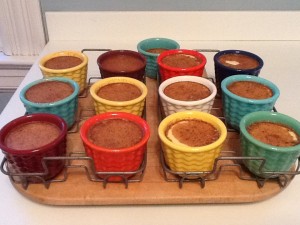
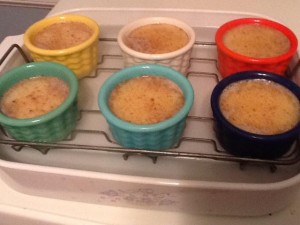
Step 6: Transfer the custard mixture into individual cups (such as ramekins, but I have also used oven-proof coffee cups and when necessary small baking bowls), and place the cups into a larger baking dish like a casserole or roasting pan.
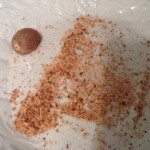
Optional step: My family likes nutmeg so much that I often grate a little more fresh nutmeg on the top of each custard cup.
Step 7: Now for the most IMPORTANT step of the entire process…it can determine the success or failure of your custards! Carefully fill the large baking dish (the one that houses the individual custard cups) with the hot water you boiled in Step 1 to about one-half to two-thirds up the side of the custard cups. This water bath slows the heat transfer to the custard. If you use cold water from the tap, it will alter the cooking time.
Step 8: After ascertaining that the oven is at the proper temperature, carefully place the baking pan of custards in the oven. This can be tricky, since the pan will be heavy and filled with hot water.
Step 9: Bake approximately 35 minutes. You will need to test the custard for doneness by inserting a knife into the mixture. It should come out clean, but the mixture should still be soft. If it is too done, the custard will be grainy on the bottom; if the custard is undercooked it will be thick liquid. Unfortunately, it is difficult to give an exact time for cooking, as it is dependent upon your oven, the size of your cups, and the temperature of your water bath. But, once you try the recipe and determine the above mentioned parameters, you will come up with your personal exact cooking time.
Step 10: Be careful taking the custards out of the oven (that water bath is hot!). Remove the individual cups immediately from the water bath to prevent further cooking. Let them cool…and then enjoy!
 Copyright secured by Digiprove © 2013
 Follow



Love your ramikins and the custard looks so yummy!!