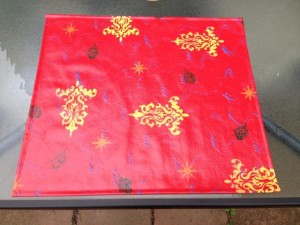
When we go to New Orleans we use the coolest place mats. My friend Lorrie made then awhile back, several sets, and this time I asked her how she did it. Well she went on to tell me, you have to get artist canvas, then you paint the base coat, usually 2 coats, then you paint designs, use stencils, write quotes, sew the edges and finally seal with with water based acrylic. OK – it did not sound too hard – I was going to give it a go.
First I needed to get the artist canvas, one call made to Lorrie. Then I had to get the water based acrylic, another call to Lorrie. The artist canvas arrived – I cut my piece, but what side do I paint on, another call to Lorrie. Meanwhile I am following her blog post on it. Do a paint wash on the back? – yes another call to Lorrie. Then I was almost done – but do I sew the sides first or do the acrylic? you guessed it – another call. I think I may have used up my quota of calls for the year on just this one project!
And then there was the rain, and more rain and even more rain. Being able to get outside to paint and allow to try was not easy. The day I did the paint wash on the back – the weather report said no rain during the day, developing in the late evening. So I got up, set everything up painted the back and went back in the house. I was in the kitchen and is that rain I hear? I stepped outside and it was a light drizzle. I got the canvas and hung over the shower rod – but because it was so humid and moist – it did stop raining and the sun came out – it took almost all day to dry!
Artist Canvas Placemats
Items Needed
Artist canvas (can buy the roll on Amazon)
Paint (I get the small sample paints at Home Depot)
Stencils, sponges, etc.
Paint brushes
Water based poly-acrylic
Sewing machine
Matching thread
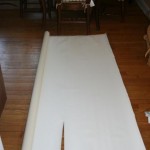
1. Cut a strip of canvas 72″ x 20″ – I did this by measuring one end to the other, but when I was cutting the individual placemats realized I probably should have drawn the line by measuring from the edge of the canvas – they were a little uneven.
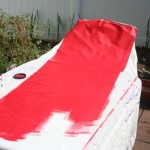
2. Decide what color you want your base to be and paint at least 2 coats – allowing plenty of time to dry in between coats. You can paint on either side and make that your top, but the “real” top is the whiter side.
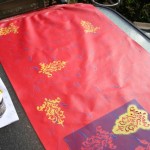
3. Now use your imagination and go for it – design away!!
4. Place some of the base paint in a cup, add water and paint the back of the canvas.
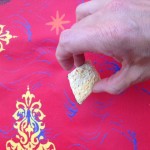
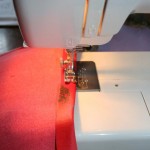
5. Cut your 4 place mats, they should measure approximately 19″ x 15″. Turn over each edge about 1/2″ and sew on the sewing machine. Not all of my turned edges were the same width, but they were close.
6. Using the poly-acrylic, paint 2 coats on the top and 1 on the back. These are especially great to use at the outside table. All you need to do is sponge them off and that’s that – no laundry and they last a long time!
 Copyright secured by Digiprove © 2012
 Follow




I love these. I would buy a set!! : )
I love them too! What color scheme?
🙂 I’m taking an art class – we made printed/painted paper last week, including marbelized. Used the technique where you build a shaving cream base. Then drip and dabble and feather liquid watercolor over, using a wood skewer to move the paint. Drop a sheet of paper on top, tickle to pick up the color, and remove from shave cream. Scrape shave cream off paper and voila! Beautiful marbelized paper:)
jxo