I couldn’t pass up the opportunity to give a go at making reusable snack bags and sandwich wrappers. I repurposed an old pair of Stella’s jeans, the quilt that Bernie, the dog, ripped and then some fabric leftover from a quilt I made awhile back. I based the sandwich wrapper on one that we use and really like, the snack bags – I made one like the old fashioned sandwich bags, before zip lock and then some pocket ones.
Jean Sandwich Bag
Materials Needed
Old pair of jeans
A piece of scrap fabric
Thread to match
Sewing machine
 1. Taking a pair of old children’s jean, cut the leg below the knee. I kept the top part to make a purse later. I then
 cut the piece – cutting the hem off and then cutting the leg into 2 pieces. Cut one piece 5″ (height) x 5 1/2″ (wide) and the other piece 7 1/2″ (height) x 5 1/2″ (wide)
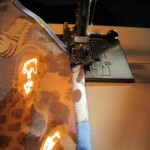
2. Taking the smaller piece, turn the top over, once, press and then turn again, press and sew. Making a nice finished edge.
 3. Taking the piece of some leftover fabric, I cut 2 pieces, the same width as the jean piece and 2 1/4″ in height. Pinning right sides together, sew the length of the top and bottom, trim the seam, turn right side out and press.
4. Attach the fabric strip to the top of the shorter jean piece, just sewing across the top.
5. Using the same leftover fabric cut a piece 7 1/2″ x 5 1/2″. Pin right side of leftover fabric to right side of larger jean piece. Sew together, trim seam, turn right side out and press.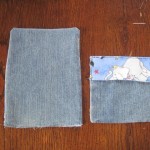
6. Taking the smaller piece with fabric strip, place right side on top of the larger piece of jean, on jean only side. Sew sides and bottom together, trim seams, turn out.
7. You will need to decrease the top of the larger piece so that it fits nicely into the baggy part. I just turned the jean over the fabric and sewed a seam on both sides.
8. Taking the top part of the bag, place inside the baggy part and then flip the fabric strip over – this closes the bag just like the sandwich baggies before ziplocs.
Quilt Snack Pouches
Materials Needed
Old quilt
Velcro
Matching thread
Sewing Machine
1. These are simple and fast. I made an assortment of sizes and the size depends on what you are going to put inside. The quilt I used had a border, which I incorporated into my pouches and the “trim” looking top. I cut 6 pieces – 2 pieces 5 3/4″ x 5″, 2 pieces 5 3/4″ x 5 3/4″ and 2 pieces – 7 3/4″ x 5 3/4″
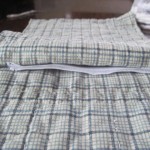 2. I then cut 2 pieces of velcro (hook & loop) for each piece. Making each piece of velcro almost as long as the width of the bag would be after sewing together. I then pinned them on, with the top of the velcro about a 1/2″ from the top of the bag. After pinning both sides on I then put them together to make sure that they would line up once the bag was sewn
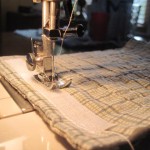 together.
3. Sew the velcro on each piece.
4. Pin the right sides together and sew. Trim seams and turn right side out.
5. Your bags are done – simple and useful!
Reusable Sandwich Wrappers
Materials Needed
Fabric
Plastic liner
Velcro
Matching thread
Sewing machine
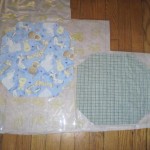
 I made 2 of these and will give the directions for both. I based the pattern off a sandwich wrapper that we have and use frequently. It is and octagon shape. I am giving the measurement for the height and width and then you will have to go from there to make the octagon pattern. The wrapper is 12″ x 12″.
1. I cut the quilt material the same size as the pattern, but the fabric I cut adding 1″ all the way around.
2. Cut the plastic liner the same size as the pattern.
 3. Cut 2 pieces of velcro (hook and loop). I cut mine about 2 1/2″
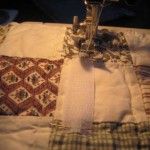 long. Taking the rough part of the velcro place it vertically on the right side of the bottom of the sandwich wrapper. Place it in the center of the wrapper with the bottom of the velcro about 1 1/4″ from the bottom. Sew on.
Now I am going to split a little bit since the quilt sandwich wrapper was finished differently than the animal wrapper.
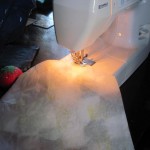 4 Quilt. Placing the plastic lining on the wrong side of the quilt,
  along with paper on the plastic, sew around the edges of the wrapper leaving an opening at the top of the wrapper to turn it right side out. Once you are done sewing, pull the paper off, trim seams and then turn right side out, this will take some patience – since the plastic sticks to itself.
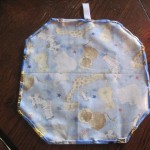
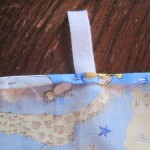
4 Animal. Place the plastic lining on the wrong side of the fabric. With the fabric, turn twice to make a nice finish and pin. When you get to the center of the top, cut a small incision in the fabric to place the soft piece of velcro. Sew all the way around the wrapper.
5 Quilt. Sew the opening of the top, securing the velcro. Your quilt sandwich wrapper is done.
5 Animal. Your sandwich wrapper is done. What I like about these wrappers is that it also serves as a place mat.
 Copyright secured by Digiprove © 2011
 Follow




Amazing what you can do!!