
 Follow
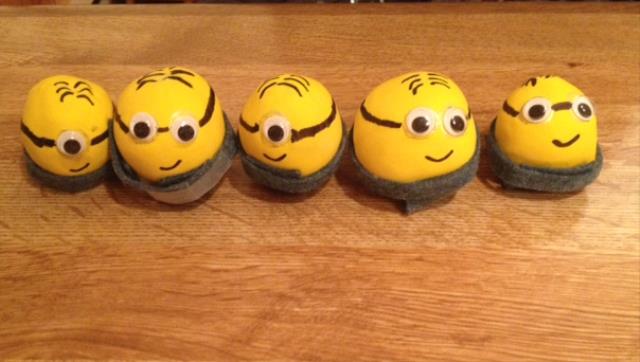
Stella was given an assignment at school, put together a project that could be presented to the class. I am sure the directions were a little more detailed than that, but that is pretty much the gist of it. A couple of months ago, Stella came home with a stress ball that she had made – so her project would be a take on the same concept – but she would be making minions. If you are not familiar with minions, they were little yellow characters from the movie Despicable Me. They were so cute. I was given a list of supplies to get and was shocked that I was able to find everything needed in town and did not have to drive to the “big” city 45 minutes away! The supplies in hand – she went to work. I was amazed at what she created.
She practiced her presentation, with me as the audience, several times – and I was impressed. She had to create and present her creation in 5 minutes or less. She was quite nervous when the day came for her to present to her class. This was a 4H project and the next day she received a letter home stating that she had been chosen to take her creation/presentation to Nationals! Let me explain Nationals… in our school district there are 4 elementary schools – so Nationals is a competition between the 4 elementary school. She is looking forward to Nationals which are being held on April 17.
Creating Your Own Minions
Items Needed
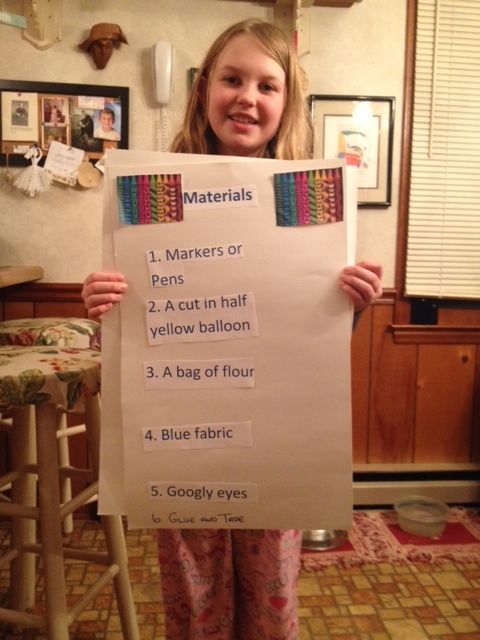
Flour
Sandwich bags (the ones that have the fold over tops)
Flour
Yellow balloons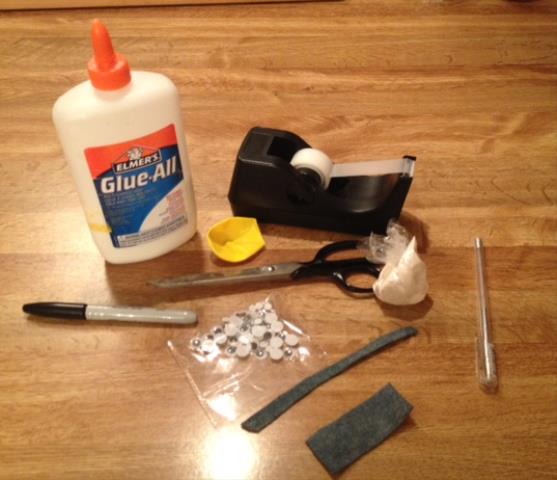
Scissors
Rubber band
Elmers glue
Tape
Googlie eyes
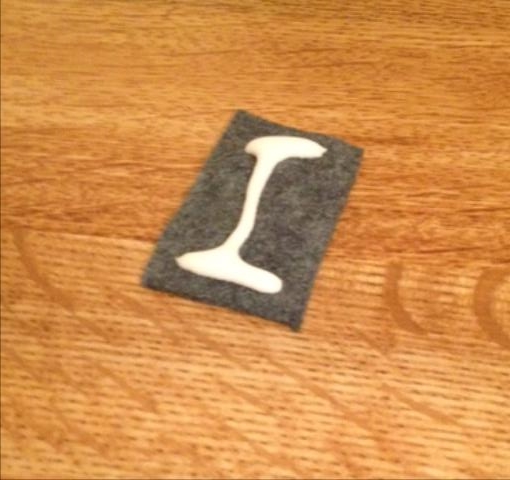
Blue felt
Black sharpie marker
Silver marker
1. Cut the top off your sandwich bag. Fill with about 1/3 cup of flour. Seal shut with a rubber band.
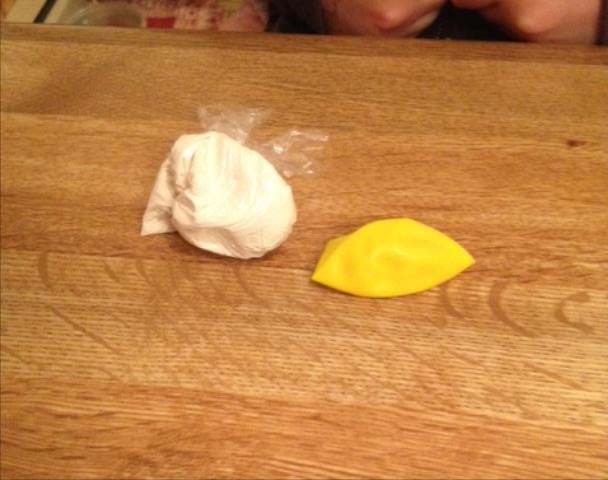
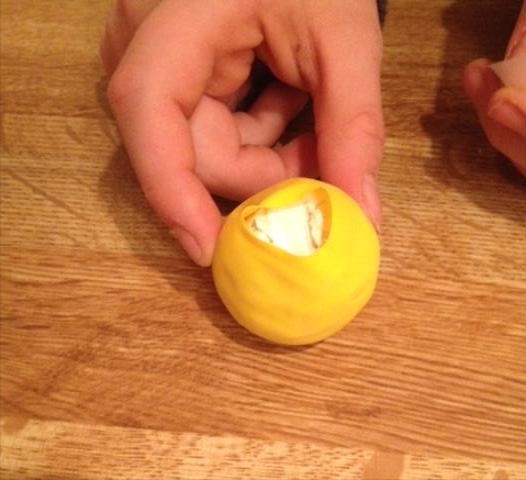
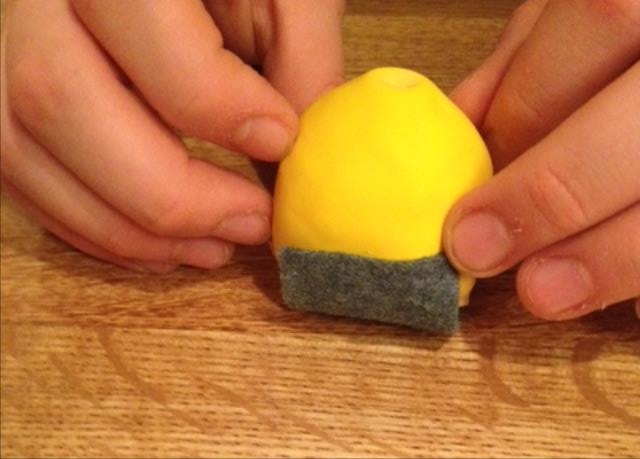
2. Cut the “stem” of your balloon off. Wrap the balloon around your bag of flour. Tape the balloon opening shut.


3. Cut two strips of felt, one thicker and shorter and the other narrower and longer. Secure one strip from front to back on bottom of shape with glue and then secure the other strip around the middle of the shape again with glue.


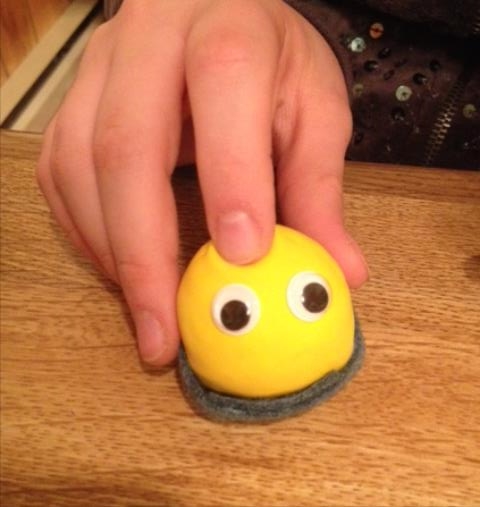
4. Attach your googlie eyes with glue. There are minions that only have one eye and some that have two eyes – so your choice.
5. Using your silver marker, draw a circle around the eye(s).
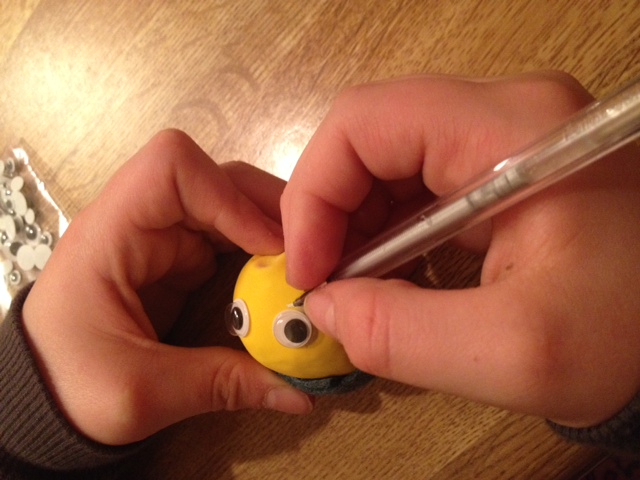
6. If you have two eyes, draw a nose piece with your black marker connecting the two circles and then draw a line connecting to the two circles around the back of the “head”. These lines represent goggles.
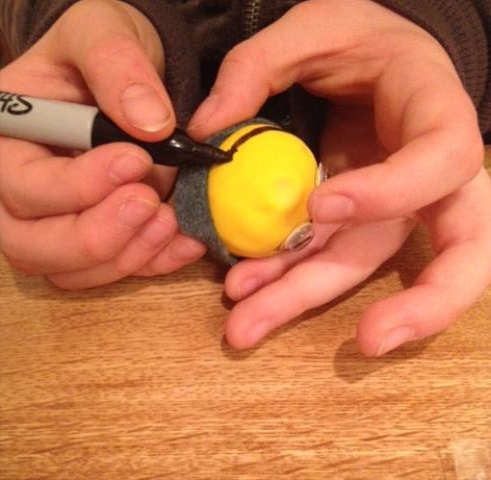
6. Using your black sharpie marker, draw hair, a nose and a mouth – make them expressive.
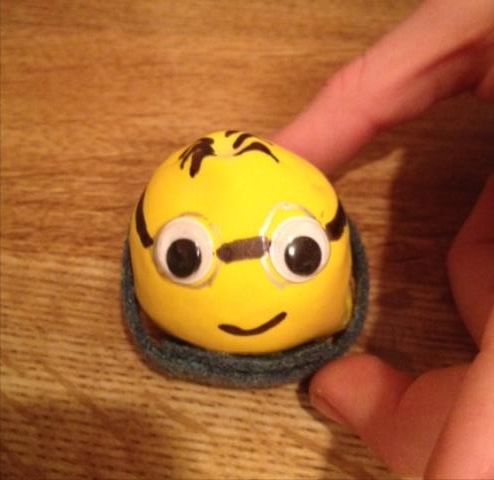
And there you have your very own minion. This have been a hit and everyone that has seen them has wanted one. Mine is sitting on the window sill above the kitchen sink, but I think I might had velcro to the bottom and attach my minion to the dash of the car. So cute!!
Her posters used in her presentation.


 Copyright secured by Digiprove © 2014


Kudos to Stella!! She is becoming quite the “performer”…how exciting that she will be presenting with all 4 elementary schools. I wouldn’t be surprised if she was the big winner!! The minions are adorable!! : )
I want one ! I love that you could find all supplies in town. I think some folks jump right in the car for C’Burg not realizing what is available in Floyd.