Fall to me means cool days and even cooler evenings and spending more time in the kitchen preparing hearty, comfort meals. I love squash, pretty much any kind and so does Stella, but I think her favorite is pumpkin, so I was excited this year that I found a farm 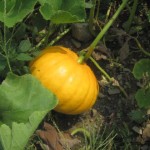 that grew sugar pumpkins. Sugar pumpkins are different from the pumpkins that you carve for your jack-o-lantern – they are smaller, a richer orange color and is what is used for pumpkin pies. The girls picked 11 pumpkins and I ended up with 10, gave 1 away – I was very excited to preserve for use later in the season. There is one market here that carries them, but for a very short time and they go FAST!
First I had to cook the pumpkins for anything else that I was going to do – so to the kitchen I went. You can get a good upper arm work out preparing pumpkins. First thing, wash the 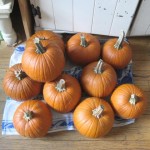 pumpkins – if you picked from a farm – usually the store bought have been washed of dirt for you. Then you will need to take the stems off, I wrapped a towel around the stem and pull in the opposite direction of how it grows. Not all are that easy to pull off and some I had to cut around the stem and then break off.
I decided to take 6 of the pumpkins and preserve by freezing for later in the fall and winter.
Preserving Pumpkin Puree
1. Wash the pumpkins and break the stems.
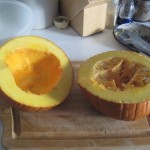 2. Cut the pumpkin in half and scrape out the stringy inside – saving the seeds – you want to use the seeds for roasting.
3. Line a cookie sheet with tin foil, shiny side up and spray with oil – I use a misto filled with olive oil.
4. With the pumpkins facing down bake in the oven for 30 minutes at 350 – 375 degrees. After 30 minutes flipped over and continue to cook for another 30 minutes or until a fork goes into the “meat” easily. You want the “meat” to be very soft.
5. Once the pumpkin is cooked, take out of the oven and let cool enough so that you can handle.
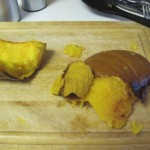
6. Peel the skin off. If the pumpkin is cooked enough, the skin should easily peel right off.
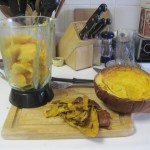 7. You now need to puree the pumpkin – you can do this with a handheld mixer, food processor or blender. I find I like to put the pumpkin, usually 1 full pumpkin (2 halves) into a bowl and use a potato masher and then put into a blender to puree further. This is probably an extra step, but that is how I like to do it and I told you you would get a good upper arm work out – so combining this with cutting the pumpkins – your arms will feel it.
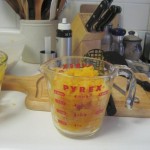 8. Fill a measuring cup with 2 cups of the puree and then transfer
 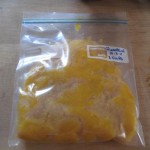 to a freezer bag. Flatten the puree out, squeeze out as much air as possible and seal the bag. Place in the freezer. I usually use about 2 cups at a time, but you can freeze different amounts according to how you are going to use.
When you defrost, place puree in a measuring cup or bowl, once defrosted pour off any water and you are good to go with your recipe or as a side with dinner.
I cooked 6 pumpkins and was able to preserve 20 cups of pumpkin and then we had some with our dinner – Stella inhaled it! I just added a little butter and brown sugar (very little) – it made a nice addition to the fish we had and it added color to the plate.
Tomorrow – pumpkin butter and Friday – roasting pumpkin seeds (so keep those seeds!).
 Copyright secured by Digiprove © 2011
 Follow
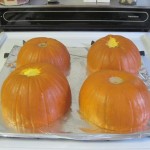
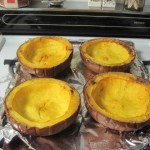


yum!!!!!!!!!!!!!!!!!!!!!!!!!! I am also making pumpkin pies for the family with a little maple syrup in the batter.
Your pies sound yummy!!!