
 Follow
This past weekend my cousin came to help me with some projects – I was so excited! I had three projects that I wanted help with and was not sure we would get them all done but we did! We were able to finish up the garden fencing and hang the gates – I just need to put the fencing over the gate openings, we re-did the grape arbor (future post) and were able to get 2 cold frames built. Another project that was not on the list, but was a much needed one – was figuring out why the wood burning stove was not pulling as it should… the reason? One of the pipes was pretty much gone – so a new pipe was put on and it is drawing much better – yeah!!!
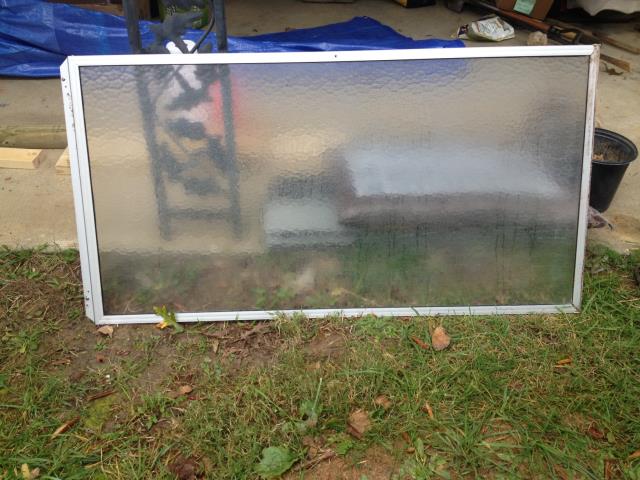
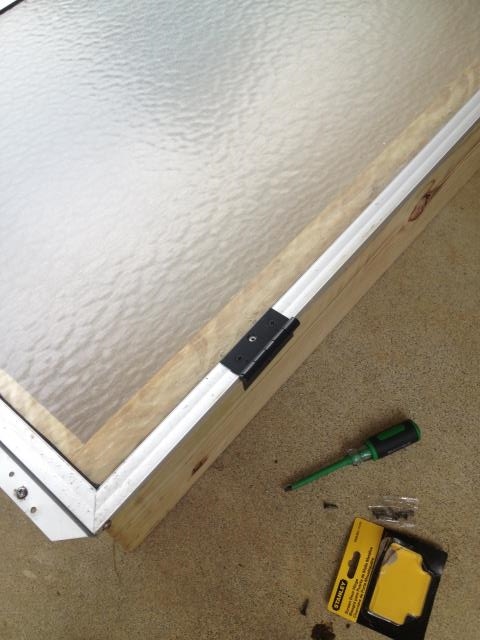
I am one that always looks at something that is no longer of use in its original purpose as to what it can now be used for. When I first moved into this house – the tub had glass shower doors – those came off immediately and they were stored in the basement for the future. The first future I saw for them were as the tops of cold frames and that became reality.
I went to the hardware store with my diagram and measurements to get all the supplies. I was hoping for non-treated wood but was not able to get that – so treated wood it was.
Cold Frames

Items Needed
2 glass shower doors (or recycled windows)2 – 2x4x8 pieces of wood
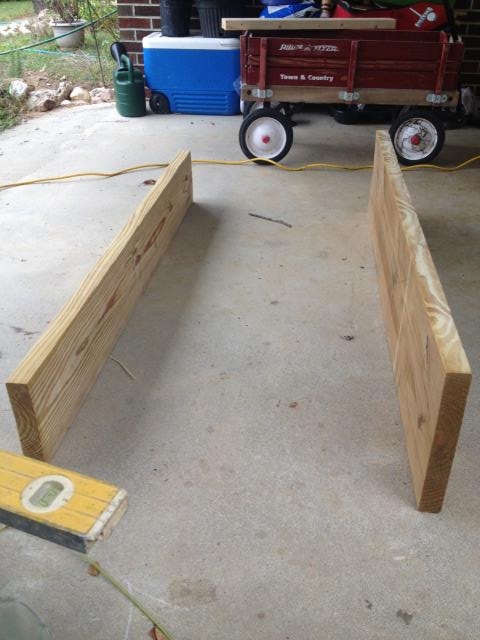
3 – 2 x4x12 pieces of wood
1 box 3″ exterior screws
4 hinges (not nickel plated)
Saw
Drill
Drill bits
Carboard
1. Measure your shower door.
2. Cut the front pieces for your cold frame using the 2x4x8 pieces of wood.
3. Cut the back and side pieces for your cold frame using the 2x4x12 pieces of wood.
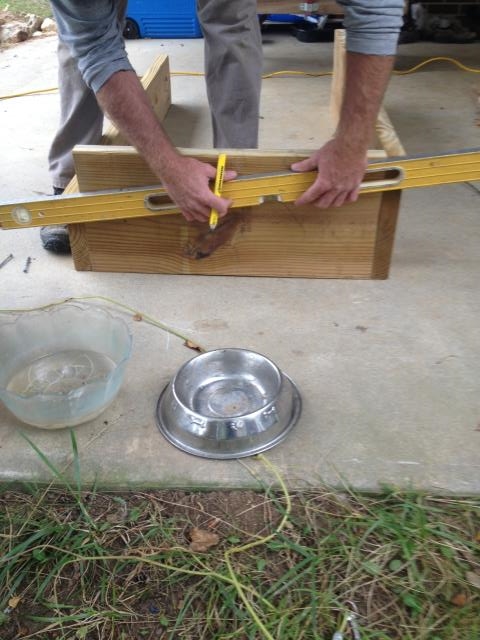
4. Measure and mark your angle for the side pieces. Cut using your marking as a guide.
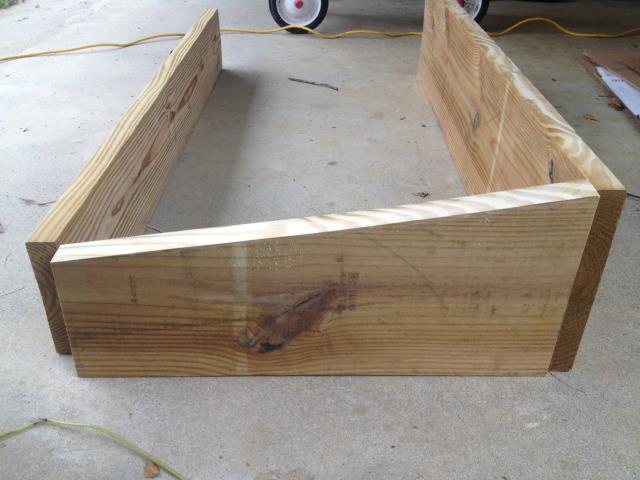
5. Screw your front, back and sides together.
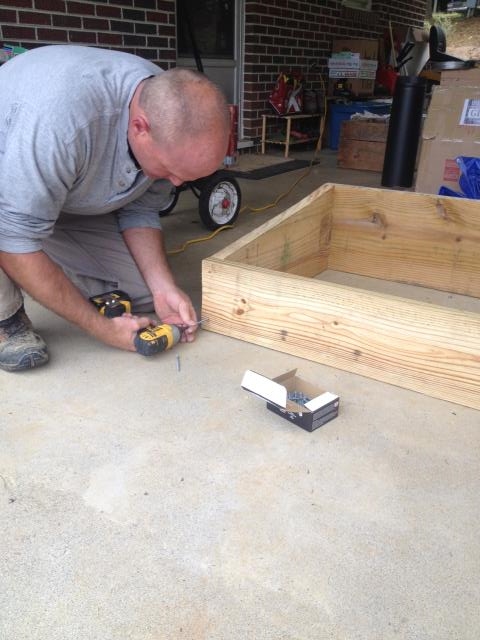
6. Measure where you want your hinges on the door and drill your holes.
7. Attach your hinges to the doors and the cold frame.
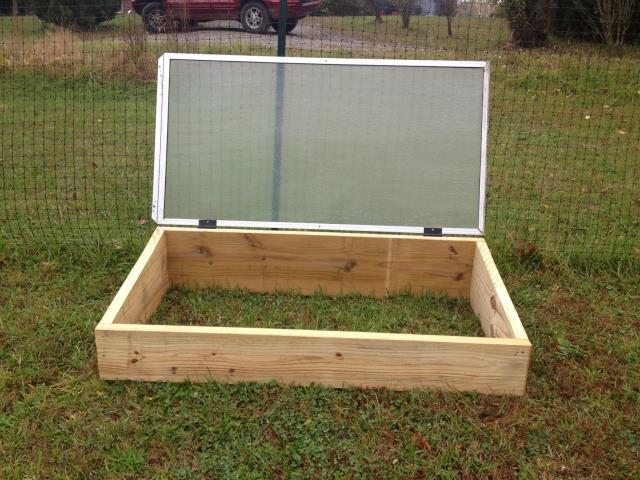
8. Move your cold frames to the garden. We placed the cold frames in front of the metal fence post – this is to hold the doors open when needed. I think I will put some chains on the doors to make propping them open a little easier.
9. Line the inside of the cold frames with cardboard to kill the grass, etc. so they are all ready when you want to plant inside come spring (I might try a fall planting of spinach and kale – if there is time). Your cold frames are done!!!
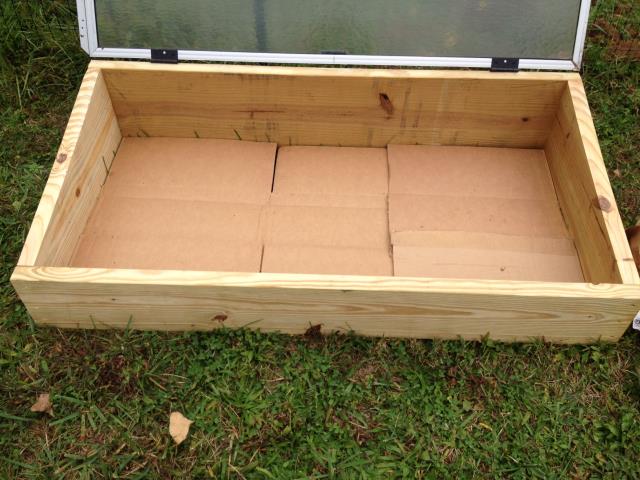
I was so excited to see these come together and can’t not wait to use them!!
 Copyright secured by Digiprove © 2013


Great cold frame!! You could probably grow some kale and spinach, etc., but the cold frame is really good for starts – you might want seed trays so you can transplant to your big garden. : ) Creative use for those shower doors!!