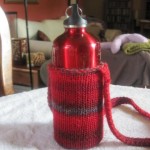
I have finished another project that had been started during our power outage due to Irene. The was the first time I had felted a project and it was fun and easy. I will definitely be making more of these! I am not really a fan of knitting on double pointed needles and prefer to knit with a loop, but I did not have the correct size loop, but had the double pointed needles – once I get going I can get into the rhythm, but it does take me awhile.
There are so many great knitting sites on the web and I found this pattern on a free knitting pattern site: http://knitjenious.blogspot.com/search/label/Free%20Pattern The directions were great and I have added some additional photos, since I am a more visual learner.
Hands Free Water Bottle Holder
Items Needed
1 skein on felting wool yarn, about 93 yards, pick one with a pattern or different colors throughout
Size 8 double pointed needles
Water bottle
Dish soap
water
Instructions
1. Cast on 36 stitches, leaving about an 8 inch tail which will be used when you begin the strap. Divide evenly on 3 double pointed needles. Join to work in the round, making sure not to twist yarn. The cast on edge is the top of the carrier.
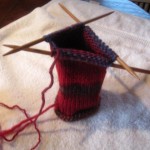 2. Knit in stockinette stitch ( knit all stitches ) until you have a tube about 6 inches in length.
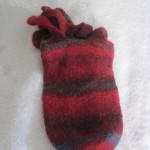
3. Once you have about a 6 inch tube you will start the decreasing part of the project:
1st round: Knit 7, knit 2 together (K2tog) – 4 times (32 stitches remain)
2nd round: Knit 6, K2tog – 4 times (28 stitches remain)
3rd round: K5, K2tog – 4 times (24 stitches remain)
4th round: K4, K2tog – 4 times (20 stitches remain)
5th round: K3, K2tog – 4 times (16 stitches remain) NOTE: you will probably be on 2
needles now
6th round: K2, K2tog – 4 times (12 stitches remain)
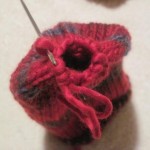
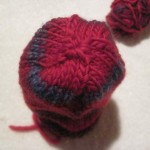
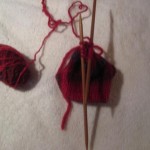 Cut yarn, leaving about an 8 inch tail. Thread the end of the yarn onto a needle (I use a steel yarn needle), draw through the remaining stitches, starting with the stitch that you would knit next, pull through – I usually go through twice, but that is up to you – pull tight. Poke the needle through to the inside of the carrier and weave in the end.
Starting the strap –
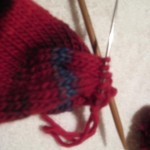
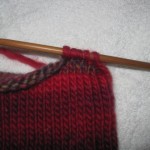 1. Using one double pointed needle pick up the first 5 stitches on the cast on edge, those directly to the left of your “tail”. Using the tail as the yarn, knit the 5 picked up stitches. This is the set up row for joining the strap later. Leave these stitches on the needle and move to the other side to begin the strap.
2. Moving clockwise around the cast on edge pick up stitches 19 – 23, start counting from the stitch closest the tail.
Row 1: Knit
Row 2: Purl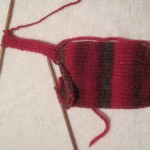
Row 3: (right side) K1, P1, K1, P1, K1
Row 4: (wrong side) P1, K1, P1, K1, P1
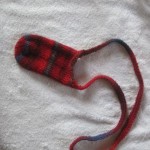
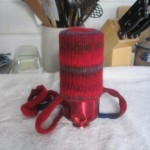
Continue the K1, P1 rib (repeating rows 3 & 4) until the strap measures about 40 inches in length, ending on a right side row. Strap length can be adjusted – this is the length that will allow you to go across the body.
3. Join the strap edge to the other side (remember those 5 stitches on the other needle), using Kitchener Stitch – this is NOT a complicated stitch, but it is easier to watch then for me to explain: http://www.youtube.com/watch?v=KhQYq-6UCKI , this shows you how to do the stitch and end it – I found it to be the best one to watch.
4. You now have completed the knitting process and now comes the felting process.
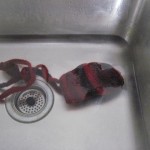
1. Fill the sink with water as hot as you can stand – I filled my tea kettle and added it to the water. Add a few drops of dish soap to the water. I found that I was able to felt faster if I just put the dish soap on the wet project and then rubbed in – but either way works.
2. Place the project in the water and swish around and then rub the project in between your palms – remember to give just as much attention the to strap. Check along the way – I kept a towel on the counter with the water bottle and would take the project out and place on the water bottle until it was the size and the amount of felting that I wanted.
3. When it is felted to your liking, rinse the project thoroughly under cold water and place the project on a towel and roll up to remove the excess water. Place the project over a water bottle, to mold, and allow to dry for a couple of day. I found that this fits both an 18 oz and 24 oz. water bottle nicely.
This is a great project – I find when I am out on a short hike or taking a walk, I want my hands free and so many times I do not bring my water with me and then I am sorry – now I have no excuse.
 Copyright secured by Digiprove © 2011
 Follow
