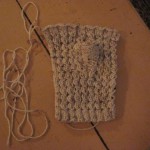
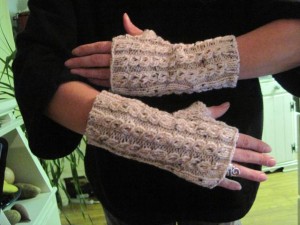
I wanted to try another pair of fingerless gloves, ones that had a thumb gusset. I found this pattern on ravelry.com, but it linked back to Crystal Palace Yarns. This was another one that the directions were not well written and I had to rip out the knitting for the thumb gusset twice, before deciding to do it my own way. I finished the right one and started the left one and then realized that I was knitting another right one – so two pairs will be made, but that is ok because I had wanted to knit another pair of different fingerless gloves for a gift, but they will get the other pair of these. Now, to explain why I ended up knitting 2 right handed ones – you start the left one the same as the right one and I just kept on going and did not go back to the left hand directions, duh!
Eyelet Ribbed Fingerless Gloves
Items Needed
Size 7 or 8 straight needles – the directions say 7 for teen gloves and 8 for adult gloves
Yarn – I used medium weight and knitted on 7 needles for an adult
Gauge: 30 stitches = 6 eyelet ribs = 4″ on larger needles, unstretched
Abbreviations:
K – knit
P – purl
K2tog – knit two stitches together
Kfb – knit in front and back loop – this increases by one stitch
Ws – wrong side
Rs – right side
Yo – yarn over
Sl – slip as if to purl
Psso – pass the slipped stitch over
Right Glove
1. Cast on 43 stitches
Row 1 (WS): P3, *K2, P3* to end of row
Row 2 (RS): K3, *P2, K3* to end of row
Rows 3 – 5: Repeat rows 1 and 2, then Row 1 again
Pattern:
Row 6 (RS): K3, *P2, sl 1, K2, psso* repeat to end of row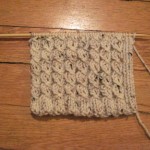
Row 7: *P1, yo, P1, K2* repeat to last 3 stitches, P3
Row 8: K3, *P2, K3* to end of row
Row 9: P3, *K2, P3* to end of row
Repeat rows 6 – 9 until piece measures 4″ from cast on edge. End by working Row 7
Right Thumb Gusset
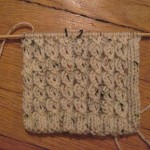 Row 1: (RS): Continue pattern as established for 23 stitches, place marker (this is where I am changing the pattern and I hope you understand how to do it) for the next stitch work as you would when knitting on – increasing by one stitch – P that stitch and the next 2, for the next stitch, again, work as knitting on, increasing another stitch, purl that stitch, place marker, continue working the pattern until the end of the row. (you may find another way to do it, but this is the one that worked best for me – the directions called for yo and then the next row knit in the back to close hole, but no matter how I did it I could not close the hole on the next row )
Row 2: Work in pattern to first marker, sl marker, knit all stitches to next marker, sl marker, continue working the pattern until the end of the row
Repeat rows 1 & 2 until there are 16 stitches between the markers, end by working a WS 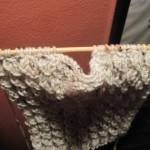 row (row 2) and purling the stitches of the thumb gusset instead of knitting
Next row: Work in pattern to one stitch before bound off thumb gusset, KFB, sl one stitch just made back onto the left needle, K2tog, work in pattern to end of row.
Continue working the pattern for another 3/4″ (teen) or 1″ (adult)
Work 4 rows of ribbing without eyelet pattern.
Bind off loosely in pattern, leaving a long tail.
Left Glove
1. Cast on 43 stitches
Row 1 (WS): P3, *K2, P3* to end of row
Row 2 (RS): K3, *P2, K3* to end of row
Rows 3 – 5: Repeat rows 1 and 2, then Row 1 again
Pattern
Row 6: *Sl 1, K2, psso, P2* work until last 3 stitches, K3
Row 7: P3, *K2, P1, yo, p1* until end of row
Row 8: k3, *P2, K3* until end of row
Row 9: P3, *K2, P3* until end of row
Repeat rows 6 – 9 until piece measures 4″ form cast on edge. End by working Row 7
Left Thumb Gusset
Row 1: (RS): Continue pattern as established for 18 stitches, place marker (this is where I am changing the pattern and I hope you understand how to do it) for the next stitch work as you would when knitting on – increasing by one stitch – P that stitch and the next 2, for the next stitch, again, work as knitting on, increasing another stitch, purl that stitch, place marker, continue working the pattern until the end of the row.
Row 2: Work in pattern to first marker, sl marker, knit all stitches to next marker, sl marker, continue working the pattern until the end of the row
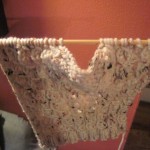 Repeat rows 1 & 2 until there are 16 stitches between the markers, end by working a WS row (row 2) and purling the stitched of the
 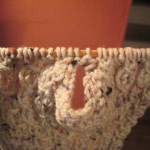 thumb gusset
Next row: Work in pattern to one stitch before bound off thumb gusset, KFB, sl one stitch just made back onto the left needle, K2tog, work in pattern to end of row.
Continue working the pattern for another 3/4″ (teen) or 1″ (adult)
Work 4 rows of ribbing without eyelet pattern.
Bind off loosely in pattern, leaving a long tail.
Finishing:
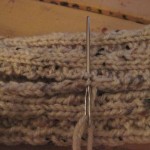
Fold each glove in half and sew the seam. Weave in all ends.
 Copyright secured by Digiprove © 2011
 Follow


That pattern is beautiful and would make a gorgeous scarf!! : )
Yes and a hat – may have to try one of those soon!