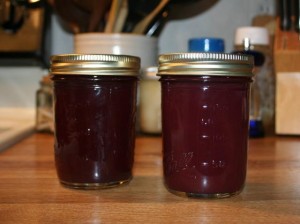
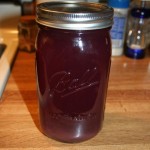
Now that you have made your fresh grape juice – you are ready to make some grape jelly! We were so in the groove as we were making the grape jelly that I forgot to take many pictures – but I will do my best to describe it all in words. My jelly does not come out as set or thick as store bought or for that matter as other canned jellies, the reason – I cut the sugar, usually by half. So if you want a firmer jelly, add more sugar than what I do. I really like using our own jellies because I know exactly what is in there and how the fruit was grown.
Grape Jelly
Items Needed
1 box of Pectin
5 cups Grape juice
2 – 3 cups sugar (original recipe calls for 7 cups)
Lemon juice
Canning pot
1/2 pint canning jars
Jar grabber
Large Soup pot
1. You want to start with fresh grape juice. You can use store bought in jar or frozen (exclude the sugar), but the results will not be the same as using fresh grape juice. Check out this post on how to make your own grape juice.
2. Place a spoon in the freezer.
3. Fill you canning pot with water and place it on the stove on high. You want this boiling by the time you are ready to place your jars in.
4. Sterilize you canning jars. You can do this is a pot with hot water or you can use your dishwasher.
5. In your large soup pot, pour in 5 cups of grape juice and start heating it, don’t bring it to a boil.
6. In a bowl combine the box of pectin with 1/4 cup sugar.
7. When the juice is almost boiling pour in the pectin with the 1/4 cup sugar – stir to dissolve and bring back to a rolling boil.
8. Place the lids into a small pot of water and heat, but do not bring to a boil. You want to sterilize the lids and get the rubber “sticky”.
9. When the juice is boiling add the rest of the sugar and about 1 tbl of lemon juice. Bring the pot back to a full boil. Stir, making sure that the jelly does not burn on the bottom of the pot. Once back to a boil let it boil for 1 minute.
10. Now take the spoon out of the freezer and put some of the jelly onto the spoon – let it cool some and see if firm enough for you, if not let the jelly cook a little while longer. The cold spoon will allow the jelly to set faster and for you to be able to determine whether or not the jelly is “done” for you.
11. Using a jar funnel, fill each jar until 1/4″ from the top of the jar. Wipe the mouth of each jar clean.
12. Place a lid on each jar and closed with a ring.
13. Place the jar into the water bath and once the water is back to boiling, process for 10 minutes.
14. Take the jars out of the water bath with a jar grabber and place on counter or towel covered counter. Listen for the popping of the jars – this is them sealing. If they do not seal turn the jars over and allow to sit for 15 or so minutes – turn over and they should be sealed, if not that is the jar to use first.
Enjoy on your next peanut butter and jelly sandwich, on a cracker, over ice cream or give as a gift with some homemade bread!
 Copyright secured by Digiprove © 2013
 Follow


Can you believe Grandma used to make jelly when I was a little girl!! Beautiful color on your jelly.
Love your new photo! Is that a view from your homestead?